Rayfin IP Network Troubleshooting
The PC hosting the software application and your Rayfin cameras must be on the same network. There are several reasons why an Ethernet device may not show up on a network. To diagnose the issue, follow these steps:
Verify that your PC is connected to the same network as the camera. A router is required for the initial setup between the camera and your PC. A switch does not serve IP addresses with DHCP as a router does. SubC now supplies a micro router with our cameras to troubleshoot networking issues.
For more about switches and routers: What is a Switch vs a Router
Access your router or switch, and check if the link LED and activity LED is blinking on the port that the camera is connected to.
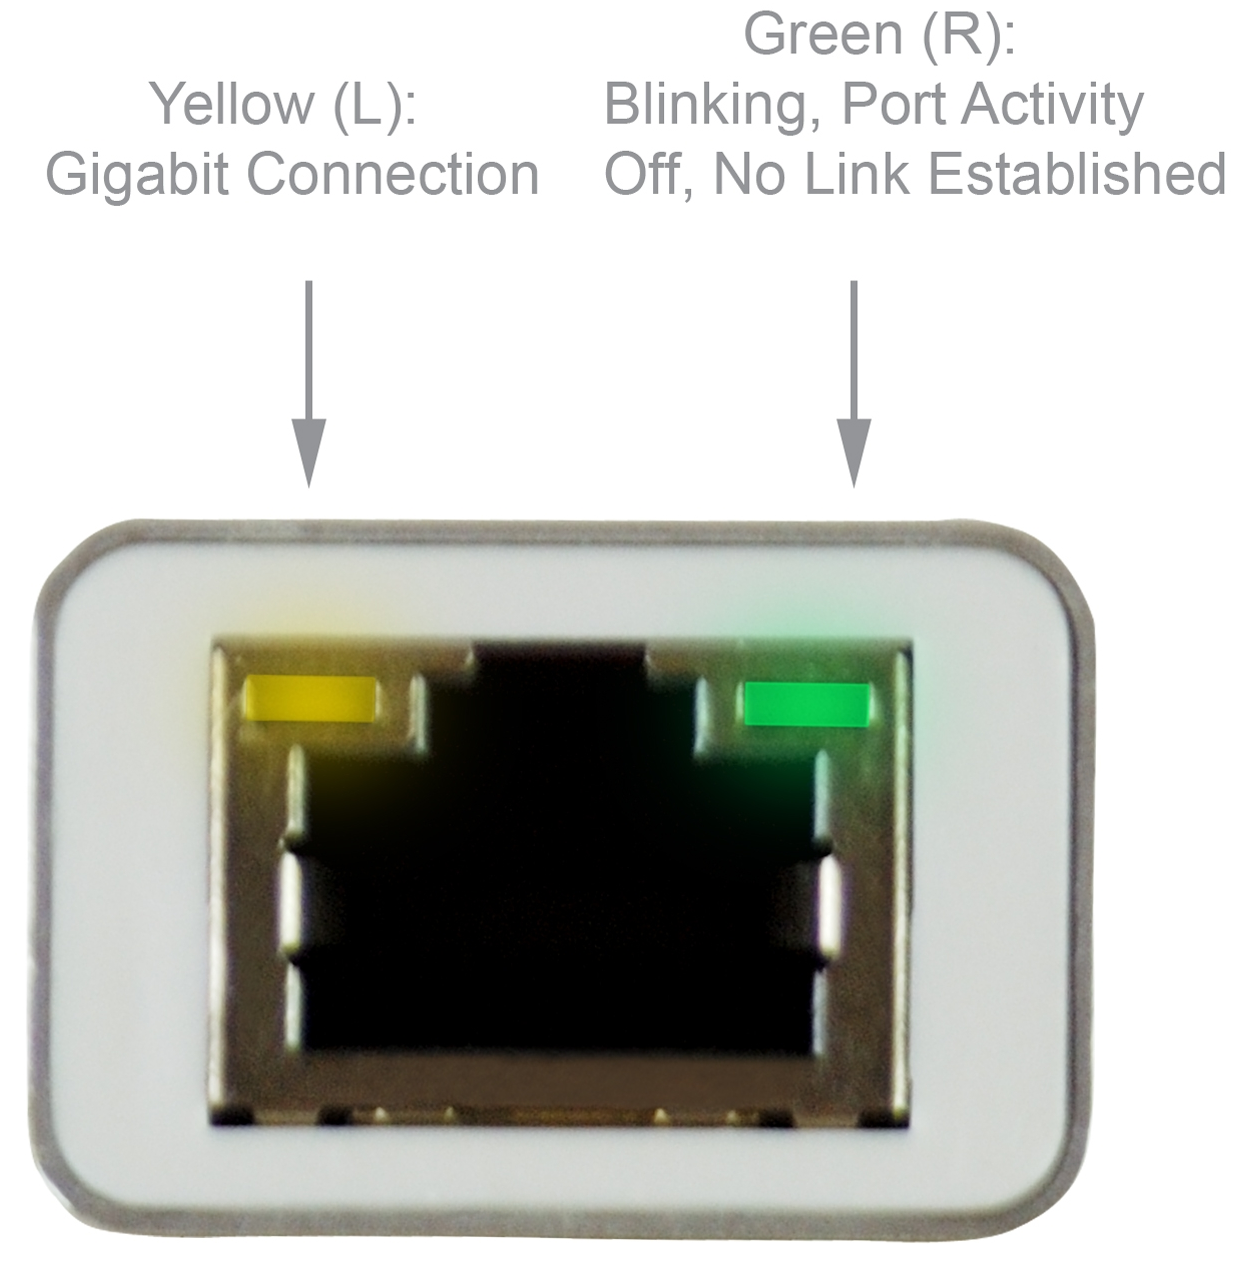
If the Link LEDs are not active, cycle power to the camera
Make sure your Laptop/PC is plugged directly into the router, on a LAN port (not the WAN port).
There could be a cabling or networking issue:
Refer to your camera datasheet for the correct Ethernet wiring: Rayfin SCI Datasheets
Follow the steps in the relevant Quick Start Guide for your camera model to ensure everything is connected correctly: Quick Start Guide - Rayfin Micro, Single Channel Inspection
Try another router / switch
Try a spare cat5e Ethernet cable
Check with your IT person or team. Your network’s firewall may be blocking certain IP ports. See the table on this page: Rayfin Static IP
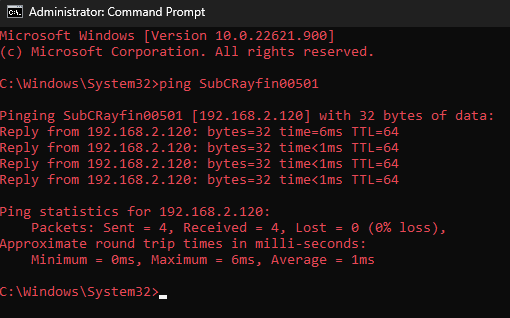
Ping the camera from the command prompt to verify that it is connected to the network
ping SubCRayfin##### or ping {IP address} -t (Note: the -t continuously pings, which can be useful for troubleshooting wiring and other intermittent issues)If the camera does reply after pinging it, it may be set to Static IP. See the steps in Ethernet Connection | Disabling Static IP to switch to DHCP mode.
Ethernet Ports
Some firewalls may need certain ports unblocked to enable all functions
Function | Ethernet Port |
RTSP video | 5540 |
SAMBA server | 139 (NetBIOS), 445 |
UDP data logging output | 8886 |
TCP/UDP data logging input | 8889 |
TCP camera control | 8888 |
UDP camera control | 8887 |
Incoming NTP port | 123 UDP |
REST | 8080 |