Connecting Inspector to DVR+O / SCI
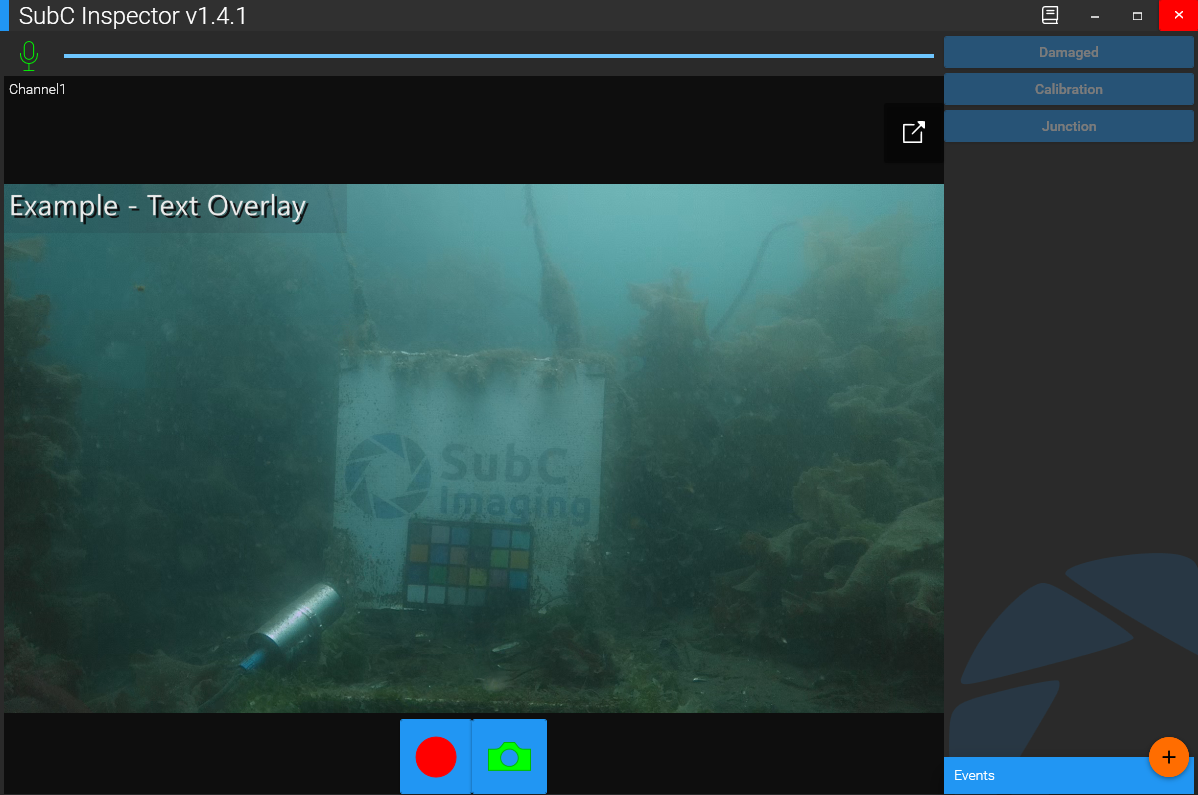
SubC Inspector Overview
Click the desktop icon to run SubC DVR+O and configure your video Input Channel(s).

Click the desktop icon to run SubC DVR+O SCI and configure your video Input Channel.


Click on the desktop icon to run SubC Inspector and enter the IP Address of the DVR+O / SCI system to which you wish to connect.
Both DVR+O / SCI and Inspector systems must reside on same LAN.
Only one instance of Inspector should be connected to a DVR+O application. If your inspection project requires the use of several workstations using Inspector, ensure that you have a 1:1 ratio (1 DVR+O application to 1 Inspector application).
The typical use is to have DVR+O running on one system and Inspector running on another system. However, if you wish, you can run Inspector on the same system as DVR+O. To do so, we’ve added a convenient checkbox button “Connect to DVR+O running on this system” or you can enter the loopback IP 127.0.0.1 on the IP Address field to connect Inspector to DVR+O on the same system.
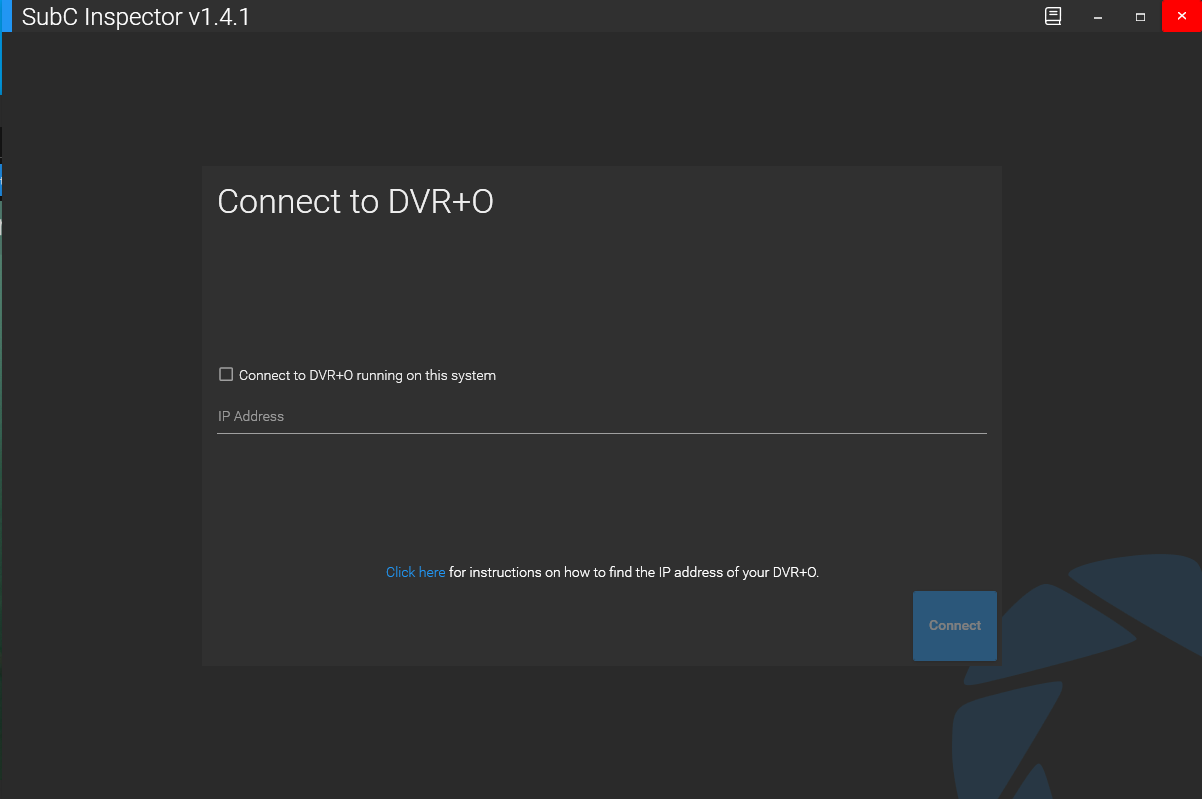
Enter the IP Address or hostname of the computer running the DVR+O software to which you wish to connect.
To find the IP Address in Windows system, open a cmd window on the DVR+O System and enter the command: ipconfig | findstr "IPv4" or type hostname to get the system hostname.
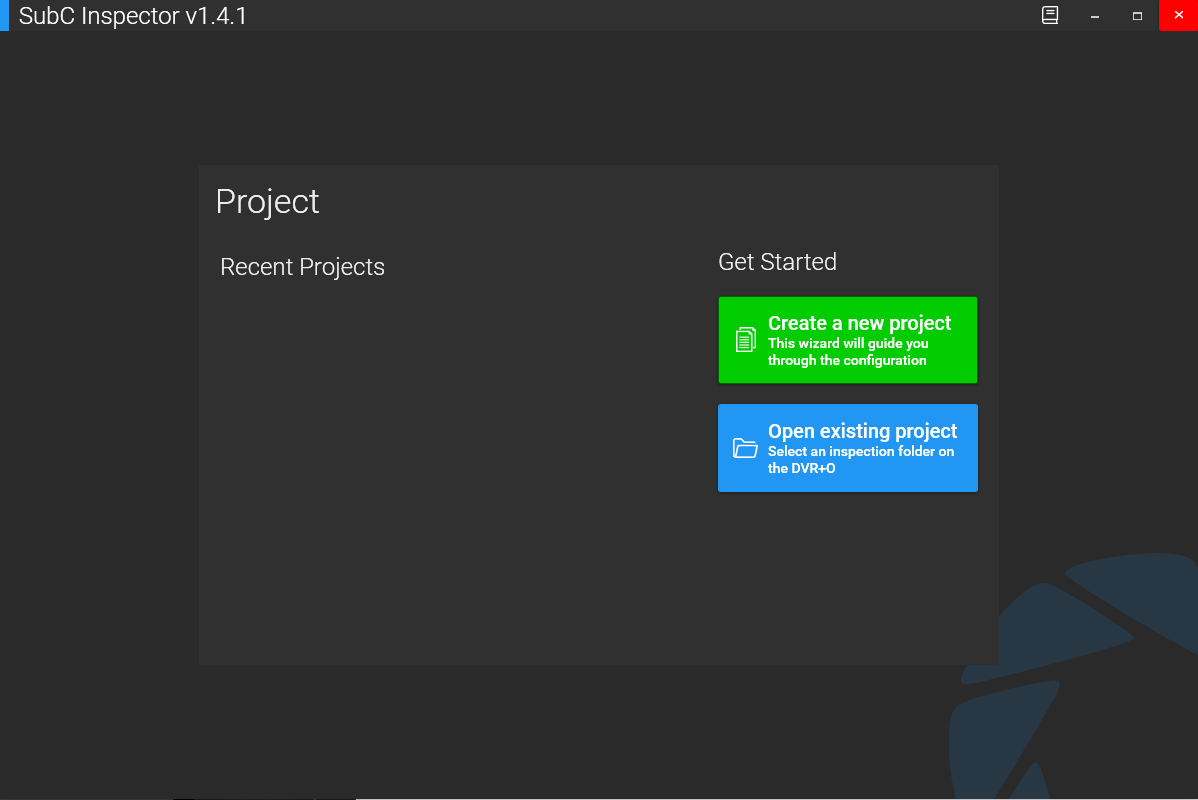
Click the “Connect” button to connect Inspector to the DVR+O server. Once SubC Inspector connects to the DVR+O system, the following Project slide will appear.
Recent Projects When you first install and open Inspector, you will see this screen “There are no recent projects”, therefore you will be directed to “Create one or open an existing project”
Getting Started
Click “Create a new project - this wizard will guide you through the configuration”
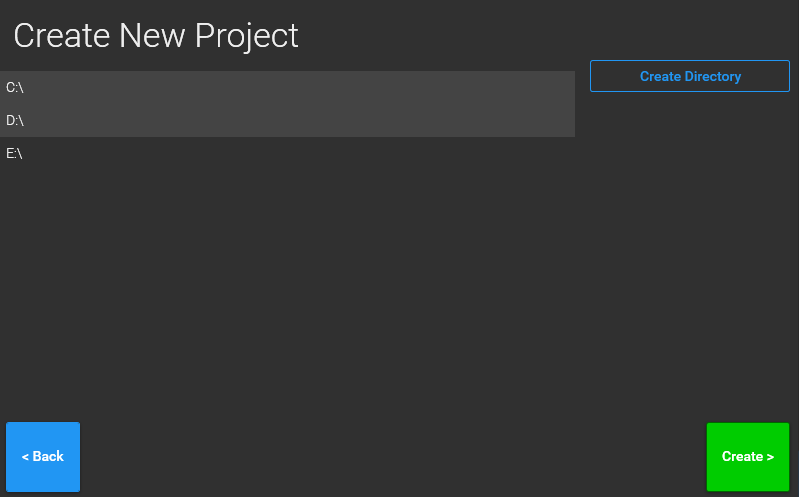
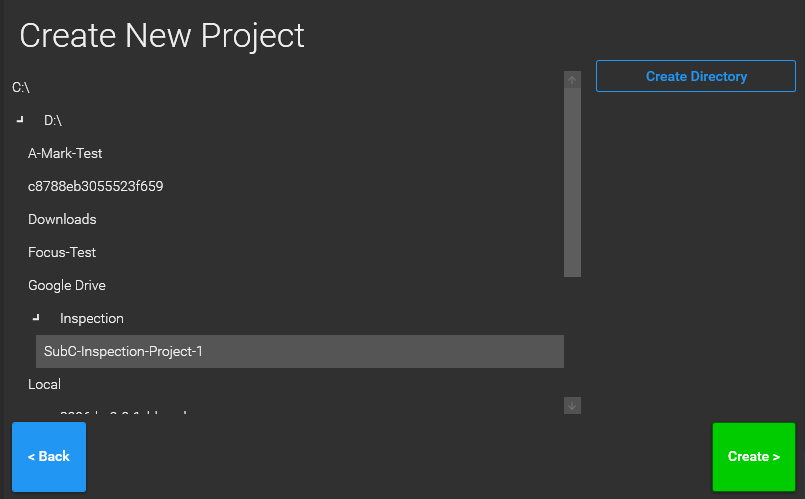
Select a storage drive letter then click “Create Directory” button
The “Create a new directory” window will appear.
Enter a name for your inspection project directory and click ACCEPT to proceed. (If you click CANCEL, the “Create a new directory” window will disappear, and you can alternatively select an existing drive/folder)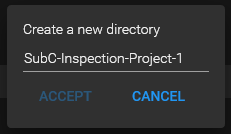
With your new Project directory selected, click Create button
The Configuration Inspection window will appear.
Optionally, you can select “Use Path Template” checkbox - this will activate the Directory Template, Filename Template, and Tags fields.
The Split Time (Minutes), Re-evaluate tags on split and Show Video Previews fields are selectable whether you select “Use Path Template” or not.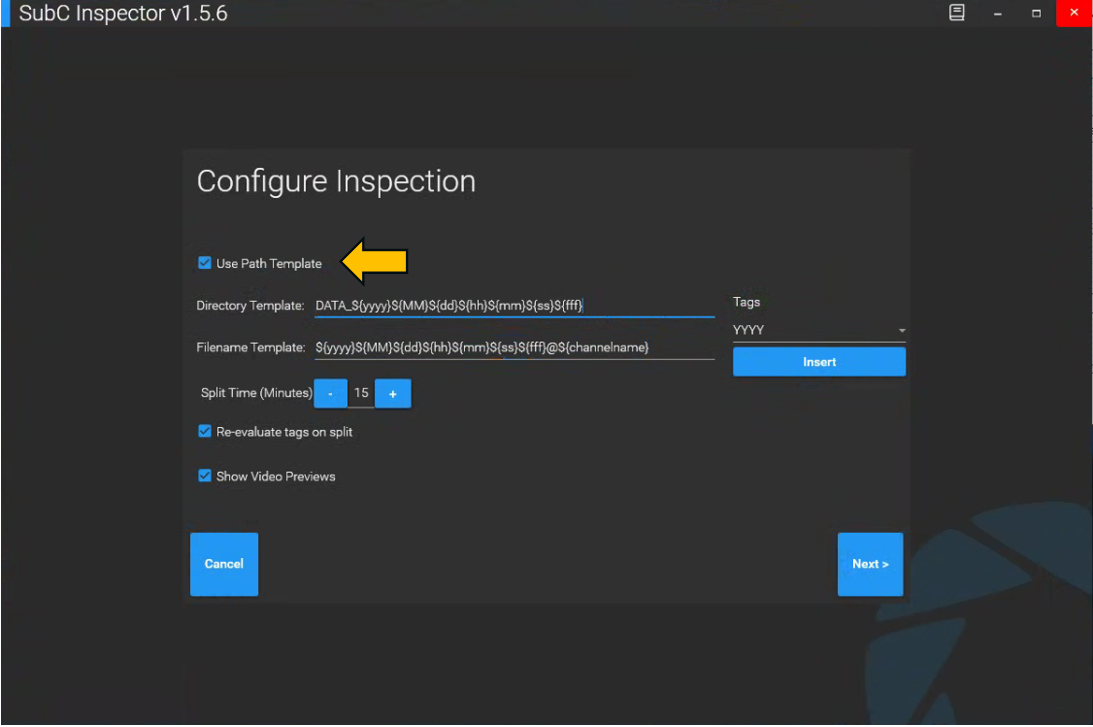
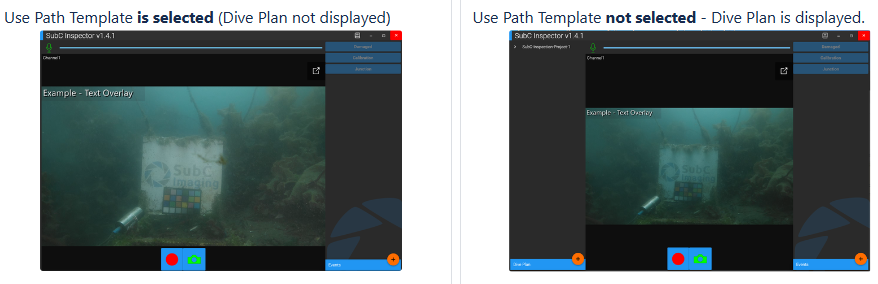
Also note, if you select Use Path Template, the Dive Plan panel (which otherwise would appear on the left of the Inspector UI), will not appear.
Split Time (Minutes): Set the amount of time before a recorded video file splits.
Reevaluate tags on split: When selected, will modify the filename of recorded video files each time they split according to the tags in the Filename Template.
“Tags”: Parameters for Filename settings
${yyyy}${MM}${dd}-${hh}${mm}${ss}-${fff}@${channel}
({fff} is milliseconds).When “Reevaluate tags on split” is set to Off, you’ll get files named with _0001.mp4 _0002.mp4 _0003.mp4 at the end of the filename.
Example
When “Reevaluate tags on split” is set to On, you’ll get files names that include the Split time stamp.
Example:
(Recording files with .hdr extension are temporary files that will be saved as .mp4 when the recording duration (split time) is complete)
Show Video Previews, when selected, will display the active DVR+O / SCI Channel(s) in Inspector.
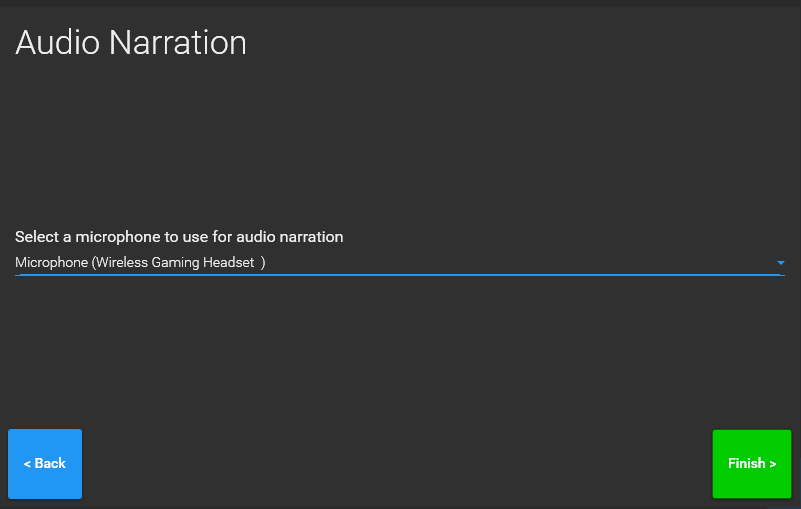
Click Next and the Audio Narration window will appear. If you have a microphone connected to the system, it will appear in the dropdown field. Select a microphone if you wish to use audio narration.
Click Finish.
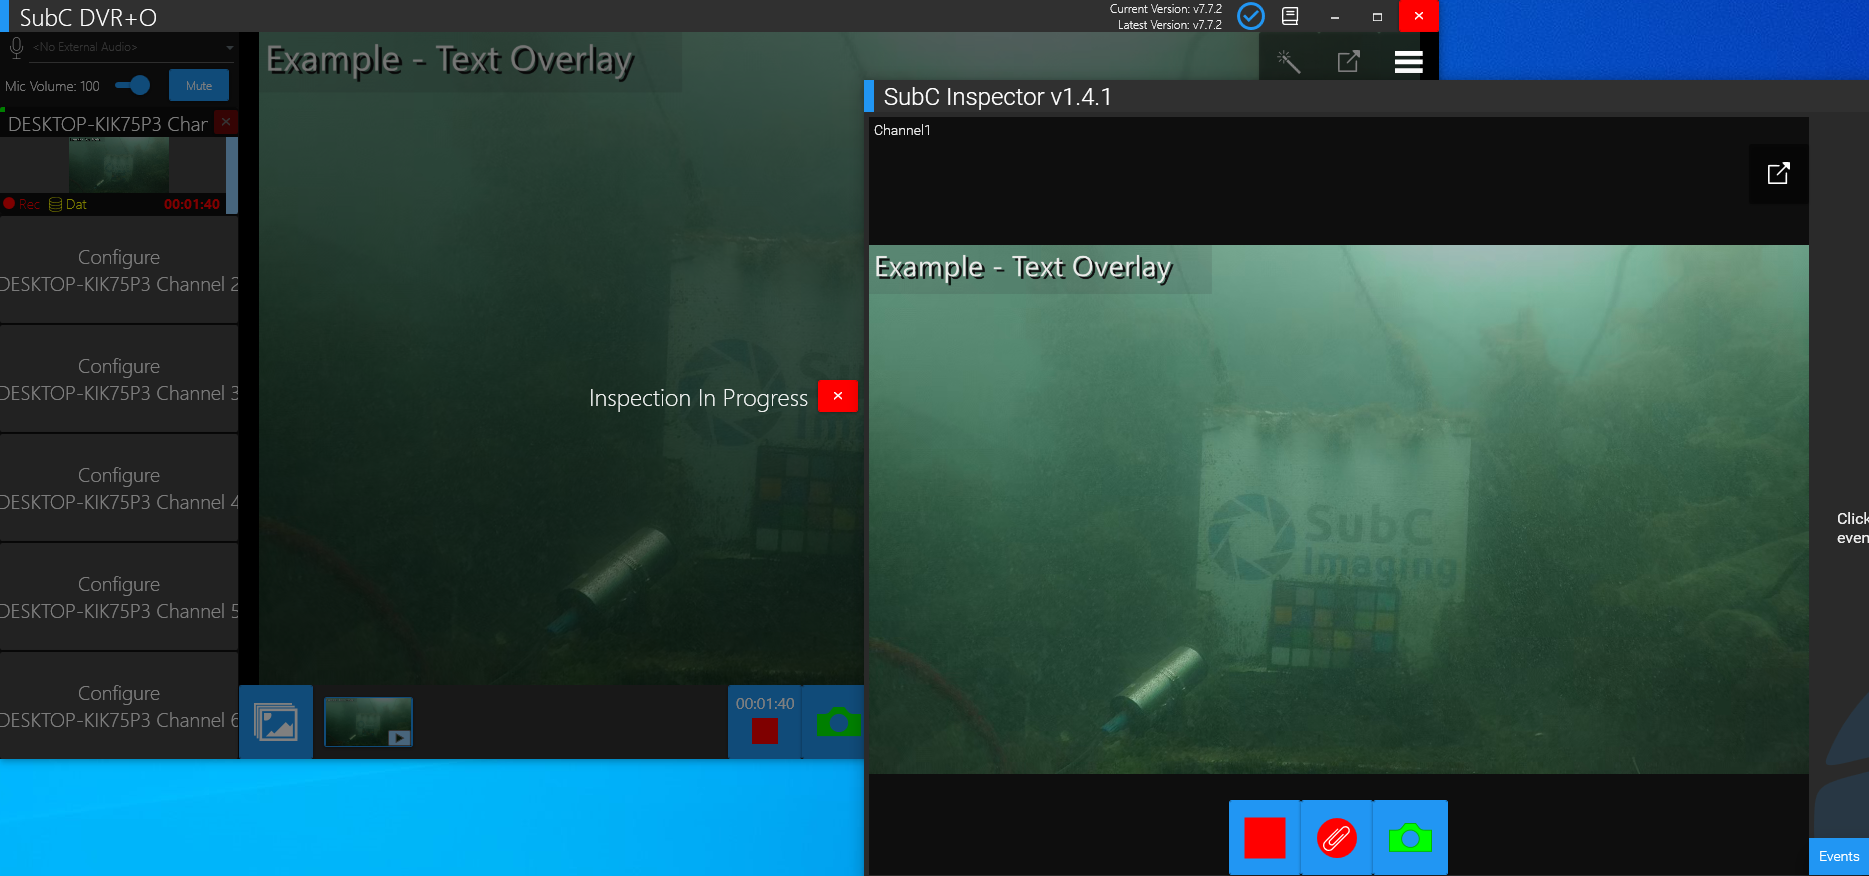
The Inspection project will open displaying the active DVR+O / SCI Channel(s).

Click the Record button to start all current active Channel(s) recording.
A “Recording Started” message will briefly appear at the top of the Inspector window.
Also, “Recording” will appear on each active Channel in the Inspector window.
If you wish to record Channels individually, one at a time, use the DVR+O UI – Select a Channel and click the Record button.
On the DVR+O, a “Inspection in Progress” message will appear.
On the DVR+O SCI a “Inspection in Progress” message will appear.
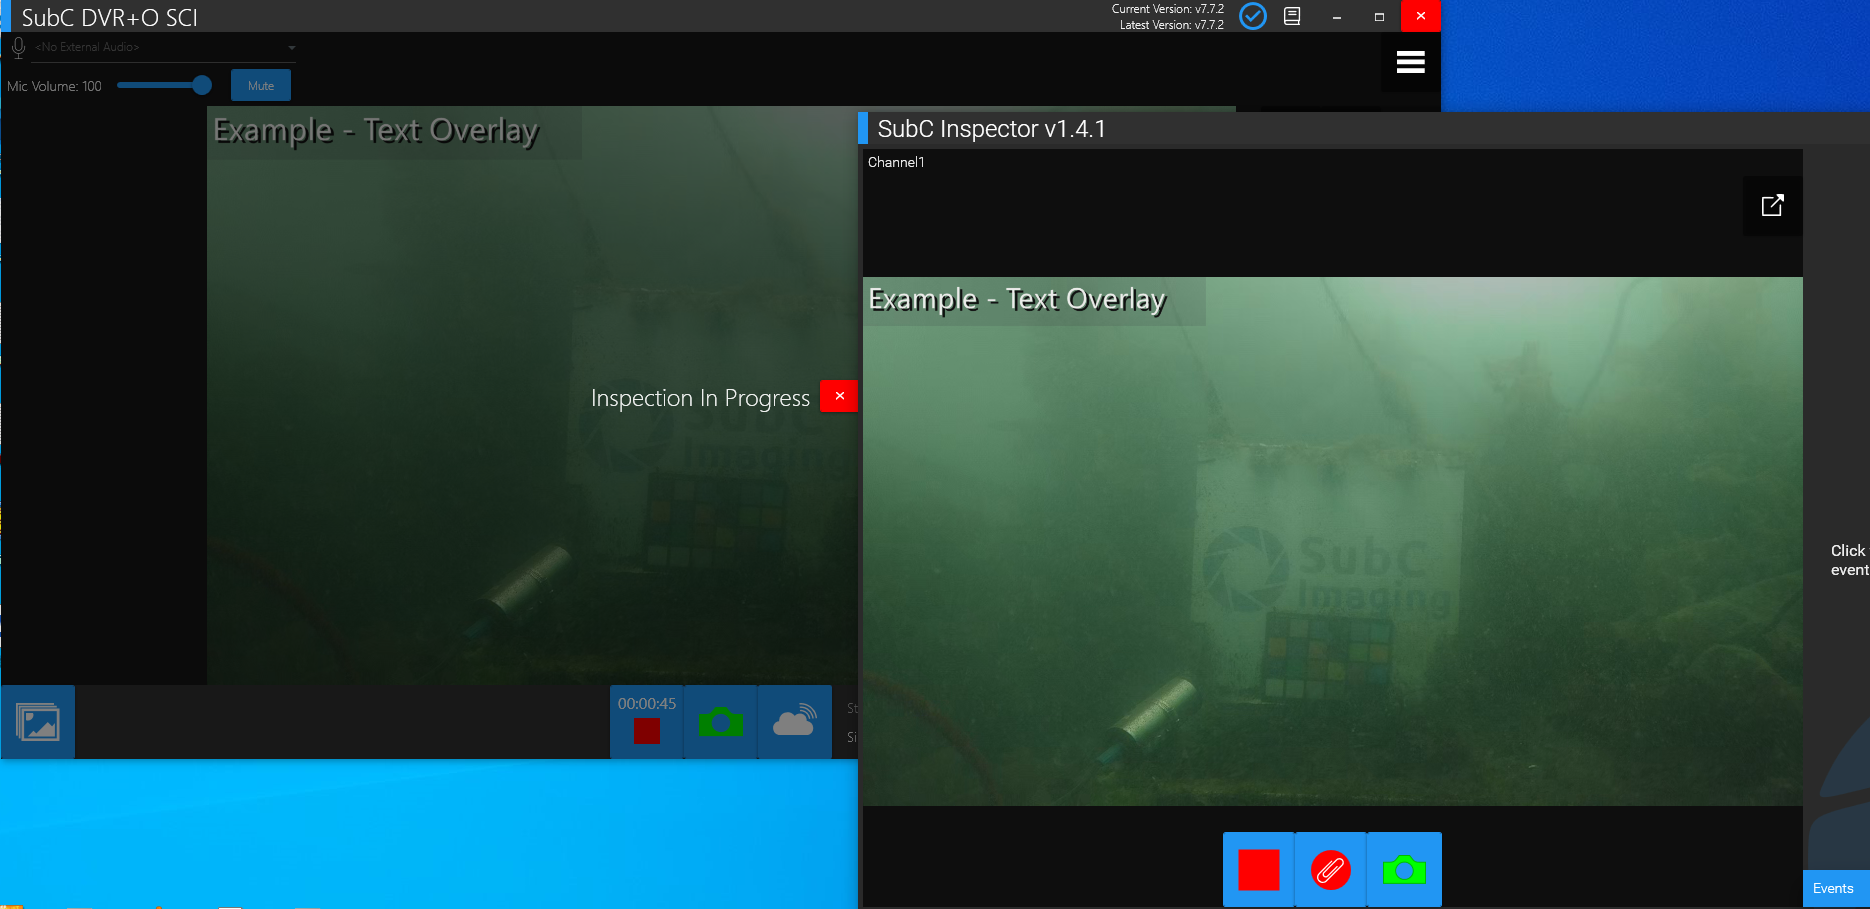
If you click the X the “Inspection in Progress” message will disappear and allow user interaction with the DVR+O / SCI UI once again.
Hold the cursor over the X and the following caution message appears. “Clicking this button will allow you to interrupt the inspection but could cause unexpected behavior”
This message is just to remind the user on the DVR+O system that it is ill-advised to make any changes to the DVR+O configuration while an Inspection is in progress.
However, we have made this available as an override option, for example, if you need to unlock the DVR+O UI controls.
If you wish reconfigure Channel(s) or make changes to Overlays on the DVR+O / SCI application side:
Stop Recording in the Inspector project
Close Inspector
Make any desired configuration changes on the DVR+O / SCI
Open Inspector to your Inspection Project to reload the DVR+O / SCI configuration changes.
When Recording is activated,

the Recording button changes from a circle to a square icon - indicating that recording is active.
Click this button to stop recording.
the Clip button appears.
This allows you to take a separate, typically brief, video recording clips of an “anomaly” when it appears in the video view.
Like the main Recording button, the Clip button also changes from a clip inside a circle to a clip inside a square indicating that the clip is recording

Click this button again to stop the clip recording.
Example:
Clip recording files include “anomaly.mp4” in the filename. Again, files with “hdr” in the filename are temporary - present only while the clip is recording. When the clip recording is stopped, these hdr files will disappear and the completed clip will be saved as “anomaly.mp4”.
the Camera button can be used to take a still image - when recording is active or inactive.
All of the Inspector Project files (recordings, stills, etc.) are save on the system that is hosting the DVR+O / SCI application. If you are running Inspector on a separate system (not on the same system hosting DVR+O / SCI) you’ll find your Inspector Project folder on the system that is hosting the DVR+O / SCI application.