Quick Start: Benthic HDC - HD over Coax
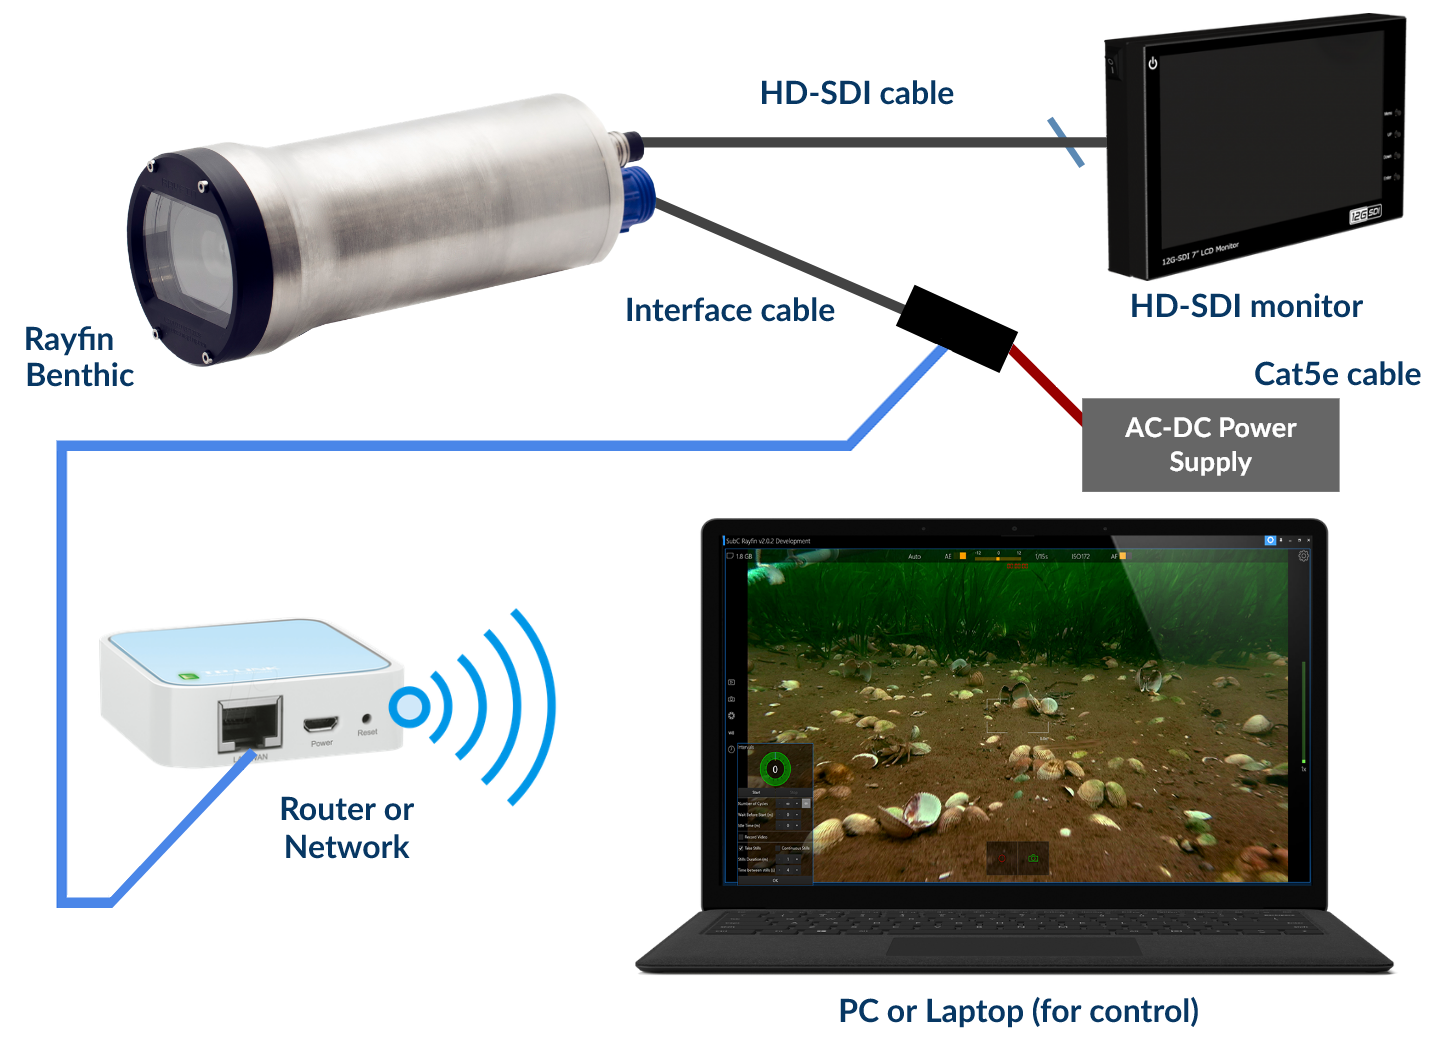
Required Components | |
Rayfin | Interface cable |
Windows PC or laptop | AC-DC power supply (24VDC) |
Cat5e Ethernet cable | AC cable |
HD-SDI cable | Router or Ethernet network |
Ensure the software is installed by following this section: Software Install - ROM and Firmware update process | SW Install
Plug the 13-pin interface cable into the camera.
Connect Interface Cable with Cat5e to the network or a router with DHCP. The Windows PC or tablet has to be on the same network as the Rayfin.
Connect the AC power supply cable to the Interface Cable.
Immediately after powering on the Rayfin camera, the bootup screen should be visible on the HD-SDI monitor. It will say “RAYFIN”. A few seconds later it will show the SubC logo followed by live video.
If you cannot see video on the monitor: In software, ensure the camera video is being transmitted at a framerate and resolution the ROV system mux can handle. Ex. 1080/30p is HD-SDI (1.5Gbps) and 1080/60p is 3G-SDI (3Gbps). For more info see this section Hardware Video Output
Follow this section Ethernet Connection to connect to the camera from the Rayfin Control Software.