Audio Rooms - SSW
SubC Audio Rooms is accessible through the SubC Streaming Service web Menu → Audio Rooms as well as the SubC Audio Rooms web application.
The same Audio Rooms that you create under your Streaming Service Group in SubC Streaming Service Web are also accessible through the SubC Audio Rooms Web and vice versa.
Open SubC Streaming Service web application

Click Menu → Audio Rooms and select your Group
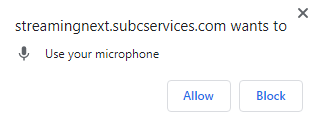
If you get this message, click Allow.
Example: In the SubC Streaming Service Web, “SUBC DEVELOPMENT” Group is selected and Audio Rooms that have been created for this Group are listed below.
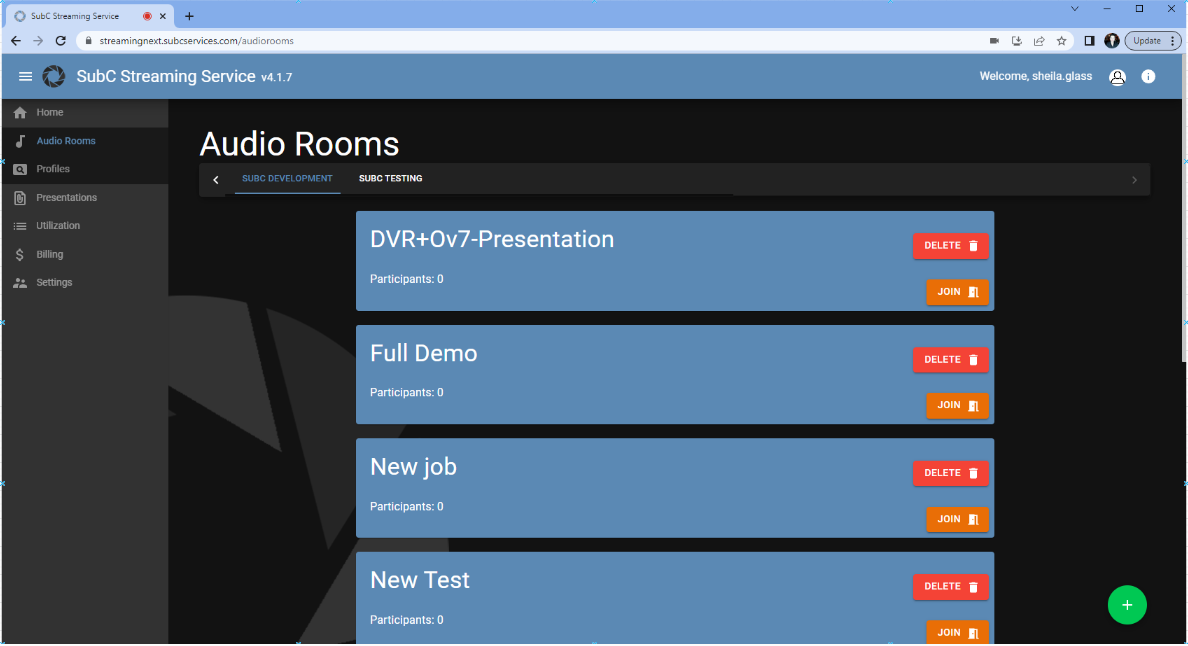

Click the green “+” button to create a new Audio Room
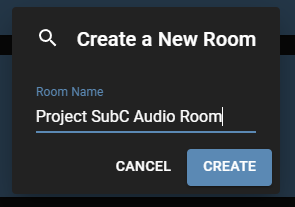
Enter a Name for the new Audio Room and click Create.
The new Audio Room will appear in the list (Refresh the UI browser if you don’t see it right away)

Click Join to enter the Audio Room
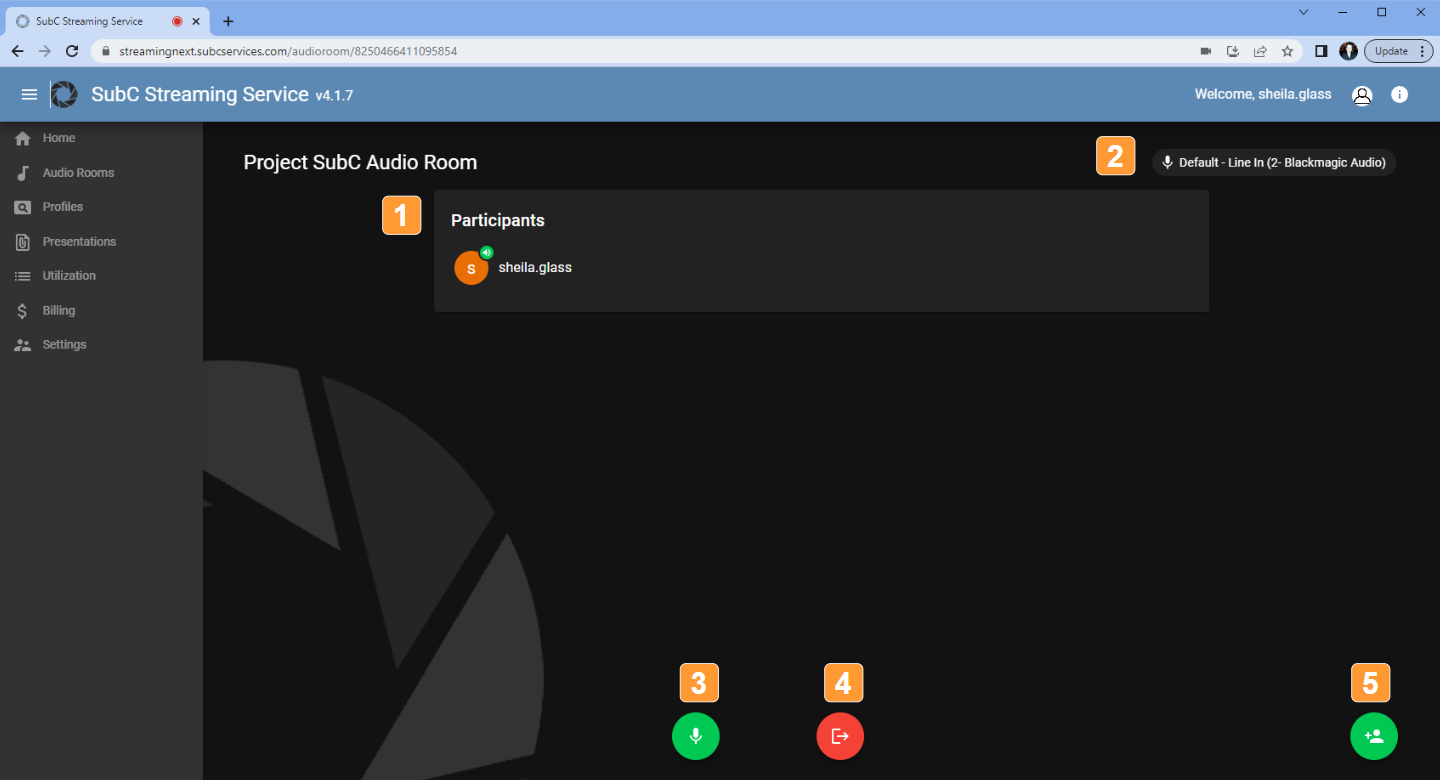
Participants shows who has joined this Audio Room
To the right, the connected microphone is displayed. This is a dropdown list, so if other microphones are available to the system, you can select.
Click the Microphone toggle button mute / unmute
Click the Exit button to leave the Audio Room
Click the “+” Person icon to Invite someone to the Audio Room
The Invite Participant window will appear. Enter the email address of the person you wish to invite to the Audio Room. They will receive an email containing a URL link to the specific Audio Room
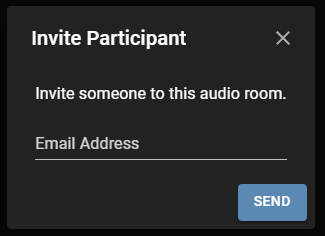
An “Email sent” confirmation will briefly appear.

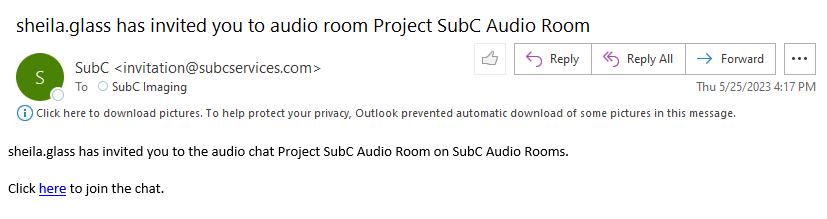
Example of an Audio Rooms Email Invitation that the invited Participant receives.
Also refer to the Audio Room User Manual (standalone application UI version)