Home Groups - SSW
When your company subscribes to SubC Streaming Services, Stream Service Groups(s) are created for your company and Members of the Group are created using each User's email address (i.e., name@yourcompany.com). See User Accounts - SubC Streaming Services
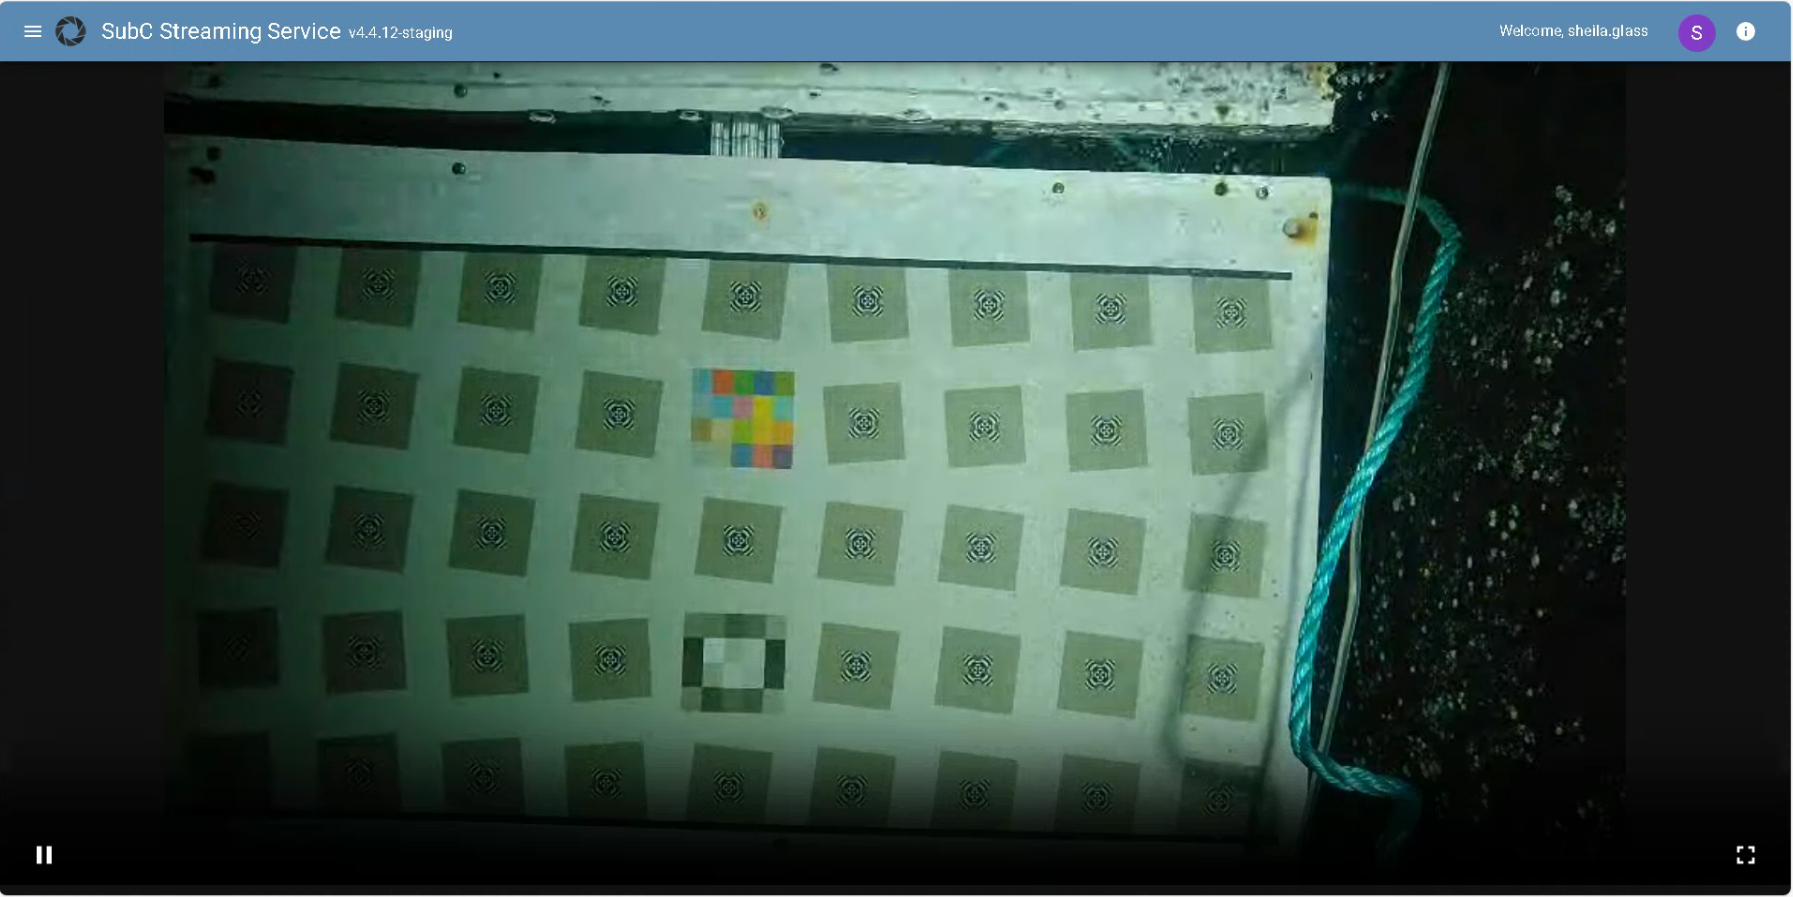
Open SubC Streaming Service Web and login with your Streaming Service Account.
A numeric code with be sent to the email address you are using to login. Enter that code in the login window as prompted.
For accounts created prior to 2025: If you need to reset you Stream Service Account Password, See Reset a forgotten Microsoft account password

Click Menu → Home in the Streaming Service Web.

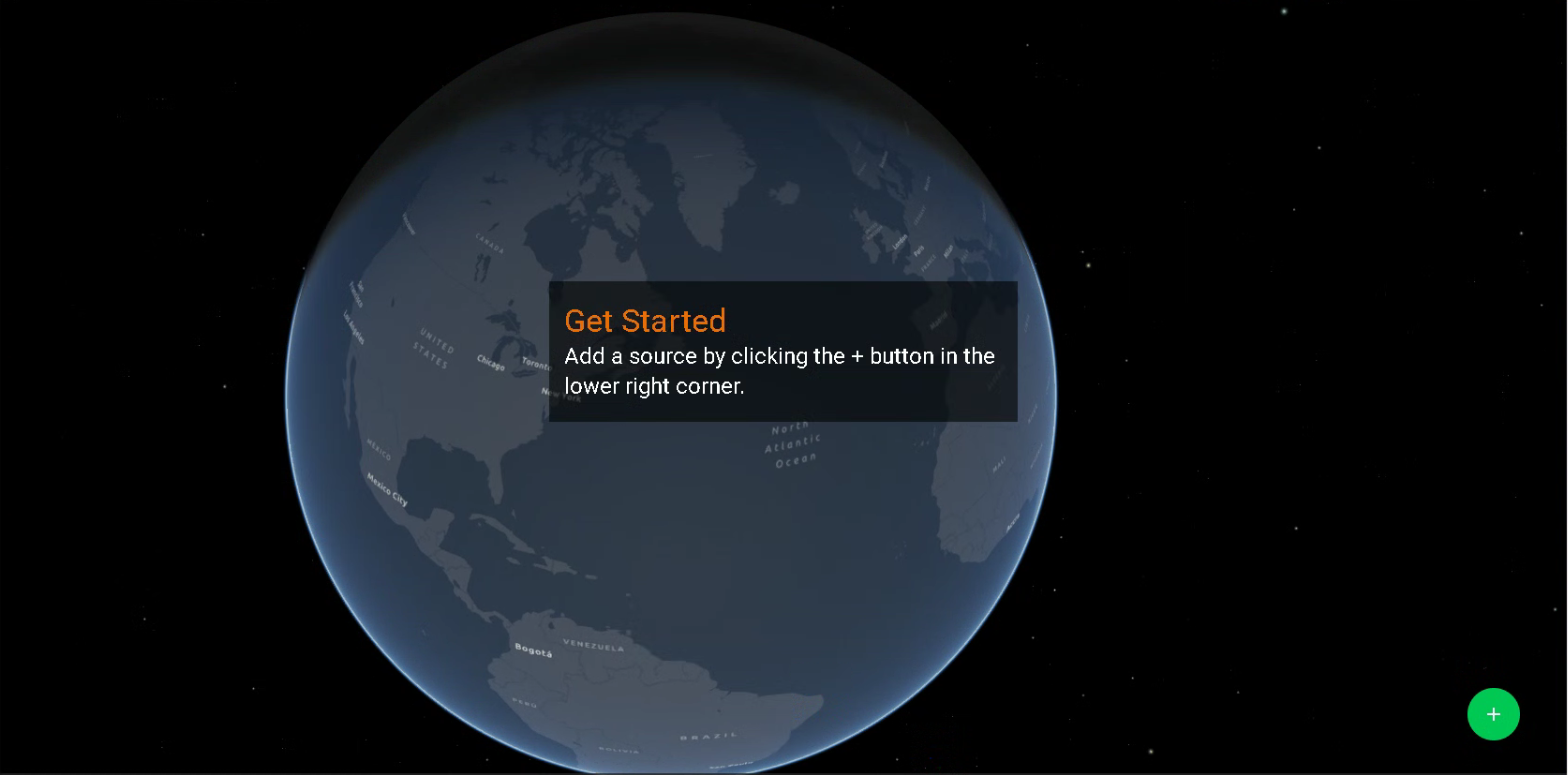
Your organization's Group(s) will be displayed on the top.
Select a Group
If Sources have not yet been added to your Group, you will also see the Getting Started message.
Click the “+” green circle to add a new Source system to the Group. See “Adding a Source to Streaming Service” instructions below.
Adding a Source to Streaming Service
Sources are PCs on your network that have a SubC Stream enabled desktop application installed, such as SubC DVR+O / SCI / RCS, SubC Stream, and SubC Blackbox desktop applications.

In the SubC Streaming Service web application, click the green “+” button to generate an Activation code.
This code is used to add a system running a stream enabled SubC desktop application to the current SubC Streaming Service Group.
The following “Link to Group” window will appear displaying the current Group (i.e., “SubC Development”)
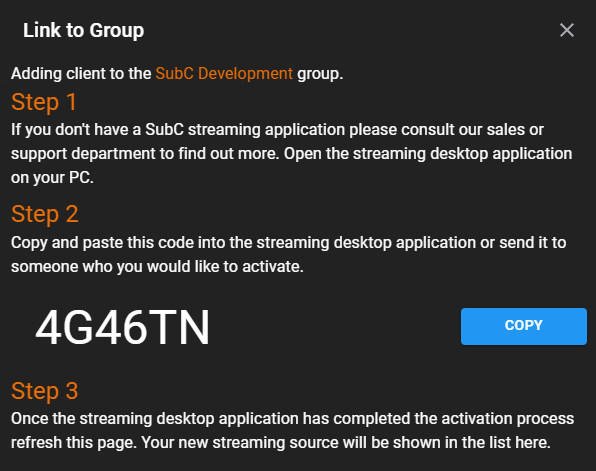
Copy the Activation Code
Open your Stream enabled desktop application on your PC.
Paste the code in to the Activate prompt window.
Once the Activation code is applied to Stream enabled desktop application, refresh the Streaming Service Web application page, you will then see are able to remotely interact with the PC running the Stream enabled desktop application.
See FAQ: Activate a New PC in SubC Stream.
Remote Control Stream Enabled Desktop Systems
SubC Stream enabled desktop applications currently running on system(s) that are activated in your Group will be visible and configurable in the SubC Streaming Service web application through both the Classic UI and the new GPS MAP UI.
GPS Map UI
In the GPS Map UI view of the SubC Streaming Service Web application, you can see where your SubC Desktop Application System is located on the globe.
Position the mouse cursor on the globe, press and hold the right mouse button and slide to rotate the globe.
Active SubC Stream enabled desktop application host systems in your Streaming Service Group are listed on System Card(s) on the left.
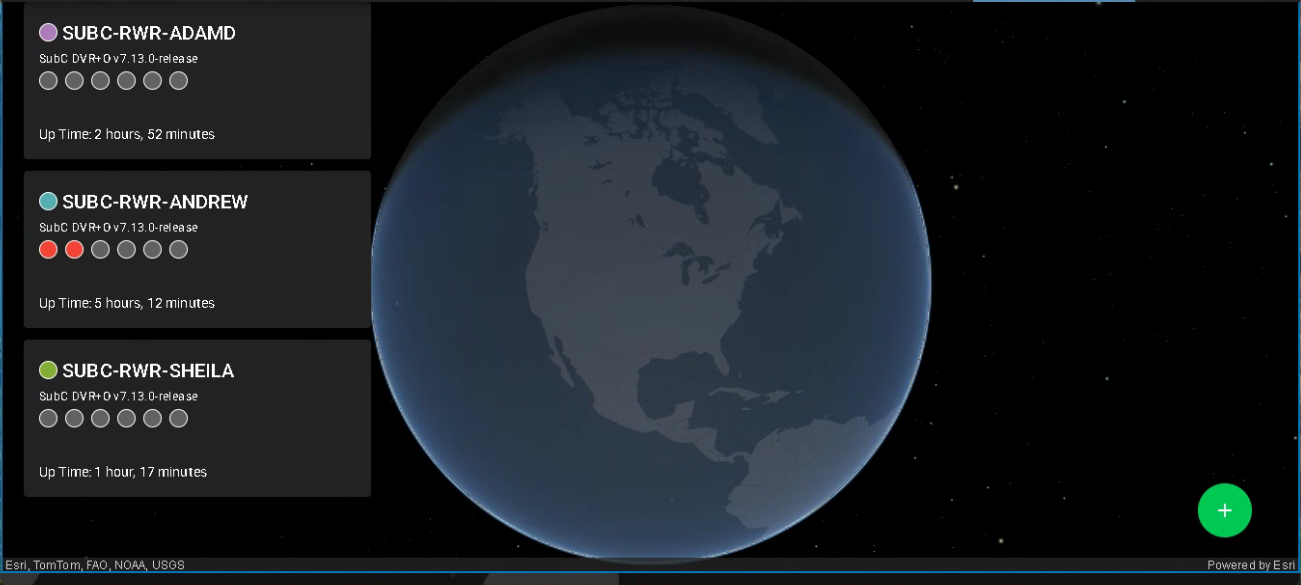

The Navigate to vessel pin appears on the System card only when you have included GPS Data. (See Menu → Data I/O on your SubC Desktop application UI)
Click on Navigate to vessel pin to zoom in on that system’s location.
The dots & lines shows movement of where your system is and has been
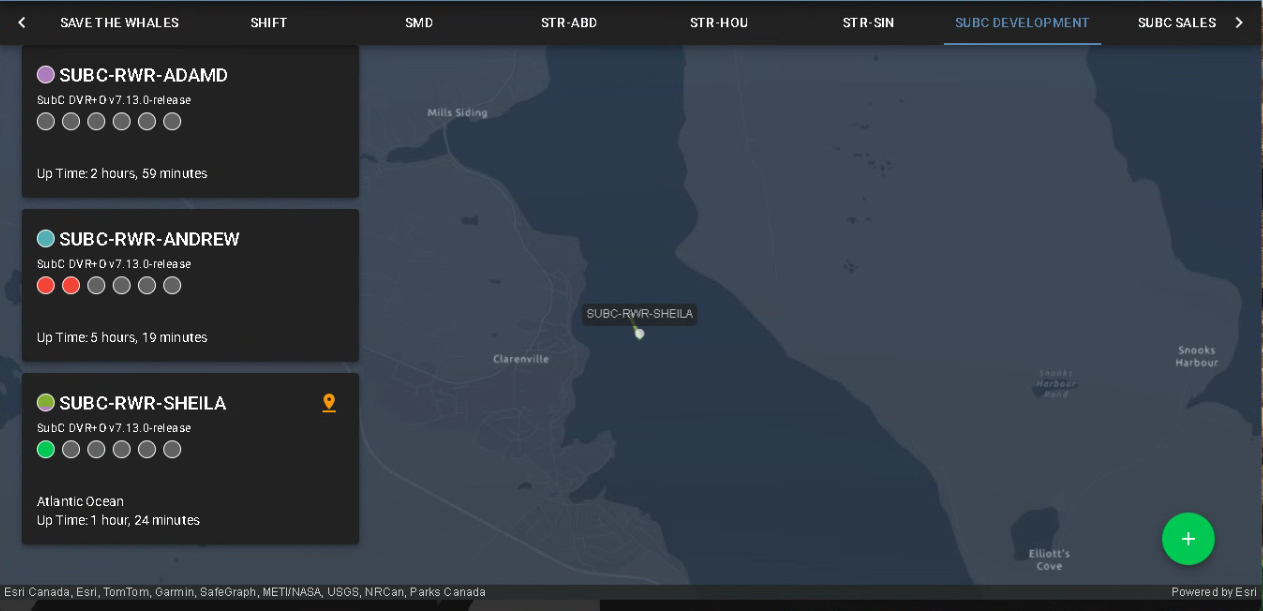
Status indicator “dots” in a row on the System Card correspond to each Channel. The color of those dots indicates the following:
Grey = Channel in not configured
Red = Channel is configured, but not streaming
Green = Channel is streaming
Click on the System card to open the Configuration UI for your SubC System Channels
This Configuration UI in the GPS Map Layout works the same as in the Classic Layout. The Configuration UI is described below.
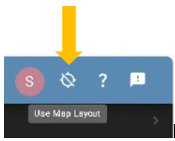
Click the Use Map Layout toggle button to switch back & forth between the GPS Map Layout and the Classic Layout
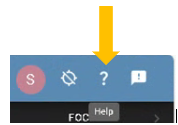
Click the “?” Help button to open this SubC Streaming Service Web User Manual published in the SubC Client Help Center.

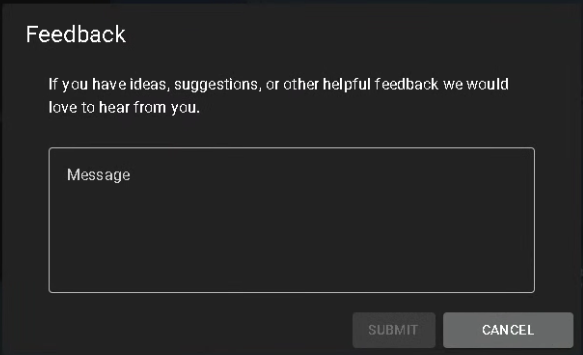
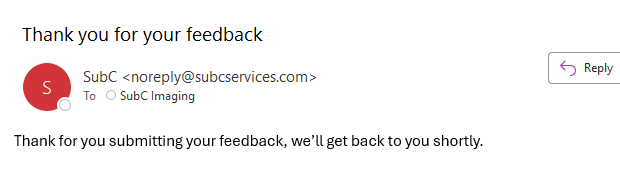
Click the “!” Send us feedback button (top, right of SubC Streaming Service Web app UI) to open the Feedback UI.
“If you have ideas, suggestions, or other helpful feedback, we would love to hear from you”
Type your feedback in the Message block and click SUBMIT button. Your Feedback will be received by SubC Support Team.
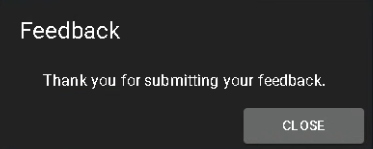
A confirming “Thank you for submitting your feedback.” message will appear. Click CLOSE.
You will also receive a confirmation email in the Inbox of the email address you used to login to the SubC Streaming Service Web app.
Configuration UI
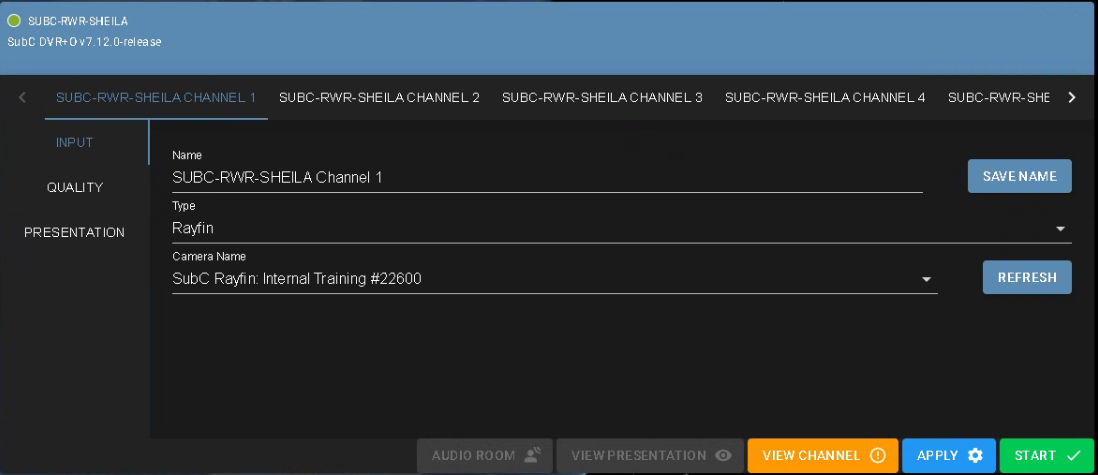
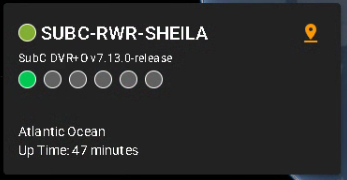
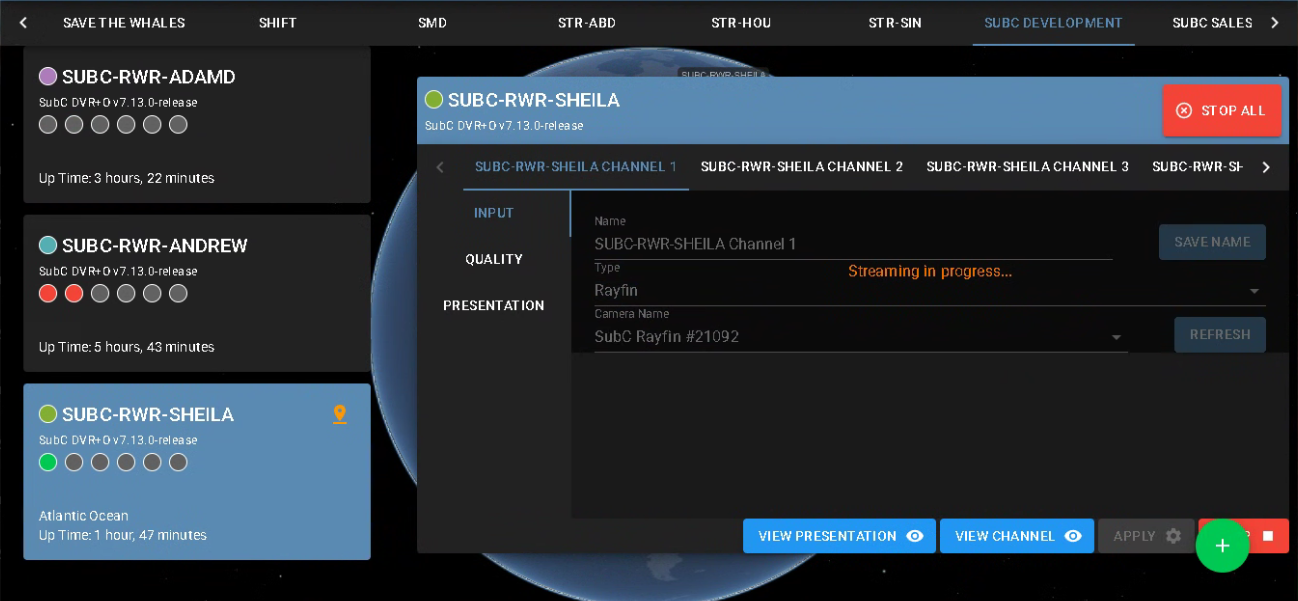
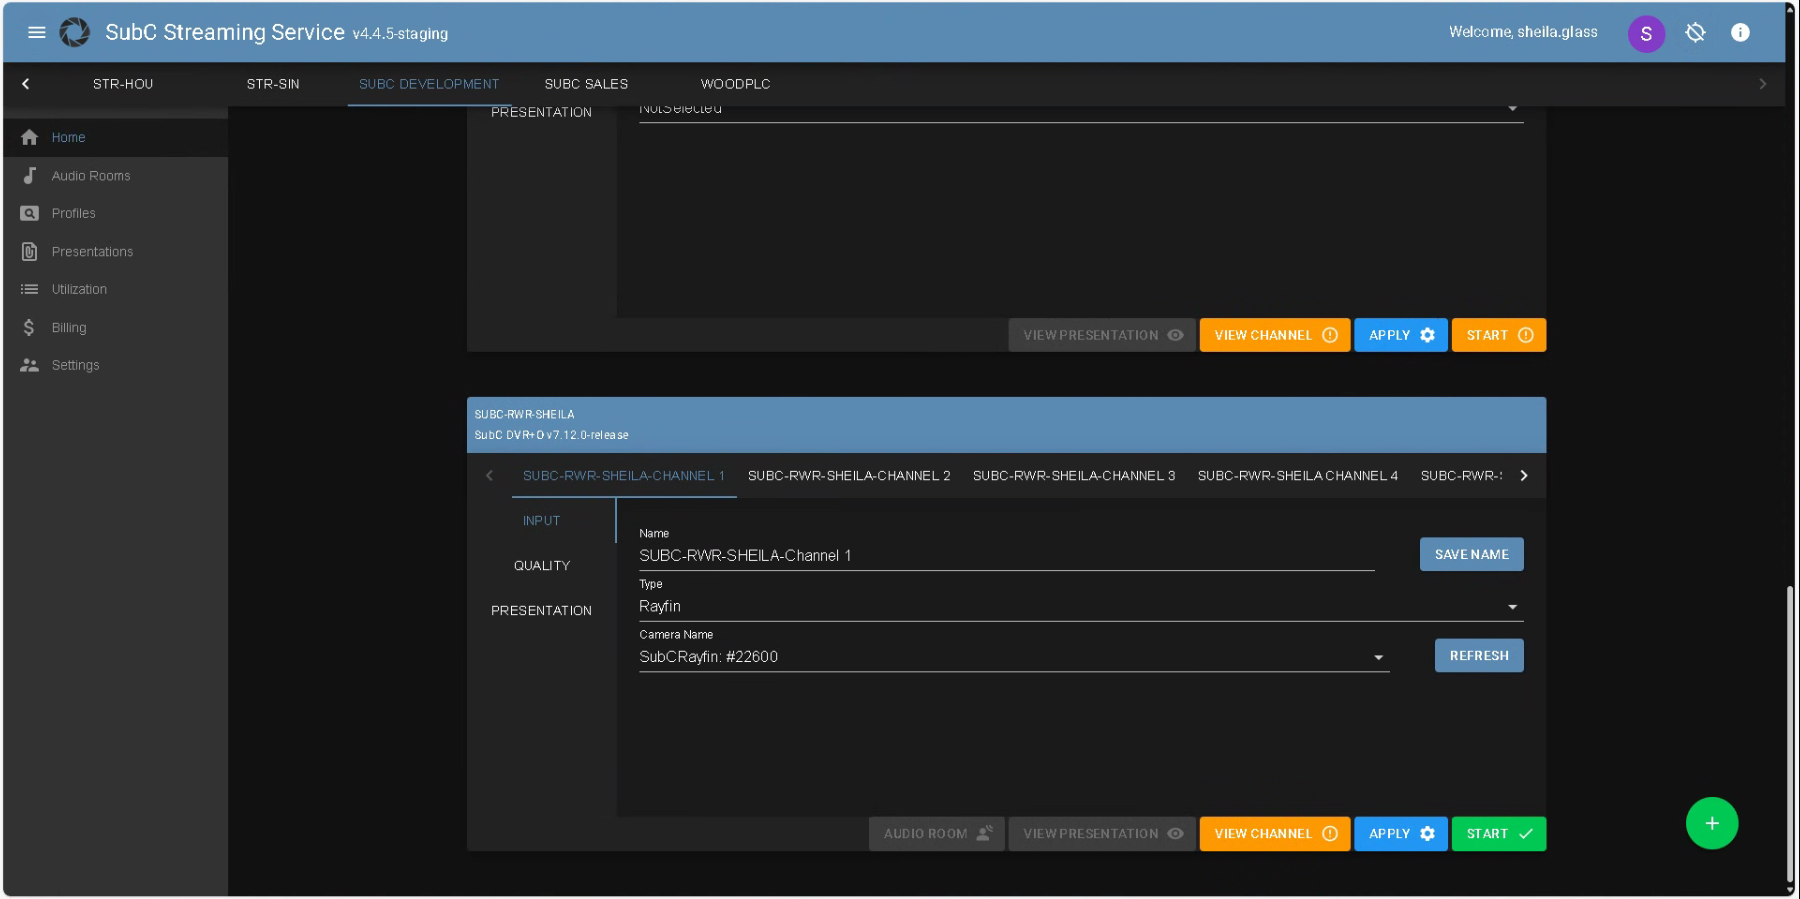
Example: In this image we see a system hostname “SUBC-RWR-SHEILA” is a member of “SUBC DEVELOPEMENT” Group.
We can see “SUBC-RWR-SHEILA”, is running the SubC DVR+O desktop application and its software version 7.12 and below, we see it has 6 Input Channels. “SUBC-RWR-SHEILA CHANNEL 1” is selected
Each Channel Menu has INPUT, QUALITY and PRESENTATION
The sections below describe how you can remotely configure SubC Stream enabled desktop application Channels with various Input, Quality and Presentation options through SubC Streaming Service web application.
Configuring a Channel
INPUT Menu
RCS
Name - Displays the PC’s hostname by default and Channel #
You can change the name of the Channels as you wish to a name that is meaningful, such as the name of the video input, camera or its location, and click the SAVE NAME button.
Type - Choose an Input Type from this dropdown field.
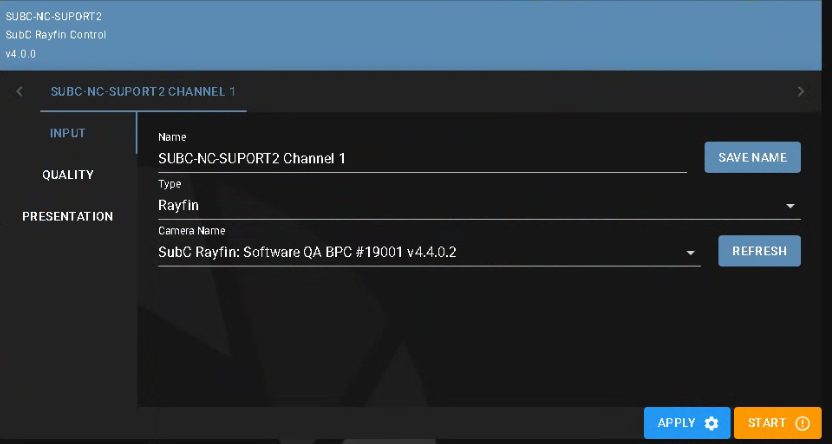
Rayfin
Rayfin
Type - Select Rayfin
Camera Name- Select from a list of Rayfin cameras detected on the LAN where the SubC Software desktop application host system resides.
Click the Refresh button if you don’t see the Rayfin camera listed that you are expecting to see. The Rayfin must be powered up and connected on the Network.
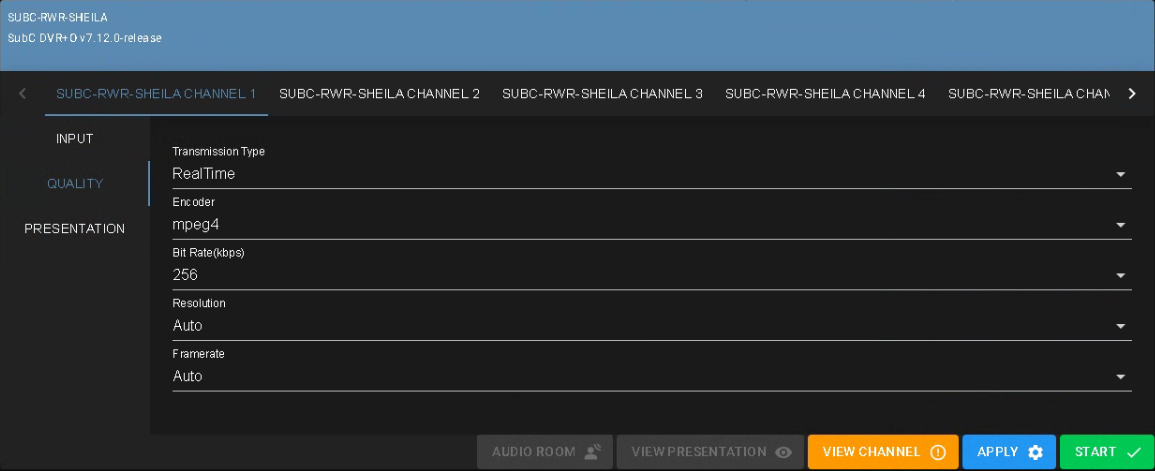
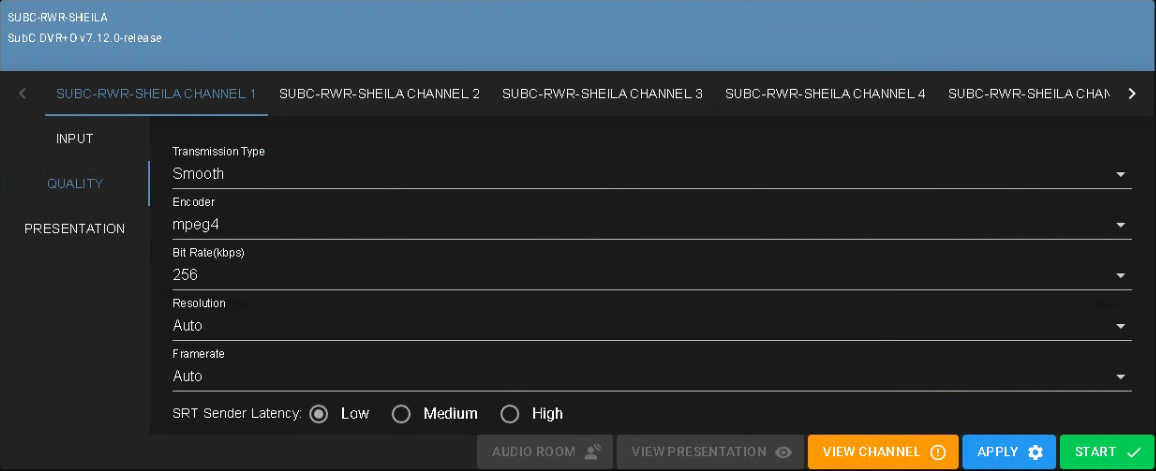
QUALITY Menu
DVR+O / SCI / RCS
Real Time
Smooth
Transmission Type: RealTime
RealTime streaming is useful when you need very low latency video (such as for piloting a craft).
Typically, this type of stream has sub-second latency but minimizing latency means no buffering.
Frames are delivered and displayed as soon as they become available. The lack of buffering may result in the video being jumpy on slower networks.
Encoder: vp9 | gpu_h264 | h264
vp9 - Default; vp9 is a higher compression codecs, allowing for better quality images at a lower bitrate/bandwidth requirement; Stream at 1bit/sec; requires higher CPU resources
gpu_h264 - Is a lower compression codecs; Streams at higher bitrate/bandwidth requirement; Stream at 4bit/sec; requires less CPU resources as the performance is video-card based.
h264 - Is similar to gpu_h264 in all aspects, except it utilizes the CPU resources; Select h264 if your system video card does not support gpu_h264 but you wish to use lower compression/stream at a high bitrate/bandwidth.
BitRate (Kbps) - Default = 256
Selection Range: 16-512.
Resolution - Default = Auto
Selection Range: 1920x1080, 1280x720, 720x480, 320x240.
Framerate (fps) - Default = Auto
Selection Range: 5, 15, 20, 29.97, 30.
Transmission Type: Smooth
SRT Sender Latency:
Low | Medium | High
These settings allow you to adapt to variations in your Network quality.
You can select Low = 1s, Medium = 3s, High = 5s whichever best suits your current Network conditions.
If you have optimal Network conditions, low dropouts, less buffering required, select Low for 1 second of buffering.
If you need more buffering, select Medium for 3 seconds or High for 5 seconds.
Encoder
Default is mpeg4 when Transmission type Smooth has been selected
Options vp9, gpu_h264 or h264 are available when Transmission type RealTime has been selected.
Bit Rate (kbps) - Options are 512, 256, 128, 64, 32, 16
Resolution - Options are Auto, 1920x1080, 1280x720, 720x480, 320x240
Framerate - Options are Auto, 30, 29.97, 20, 15, 5
SRT Sender Latency: Low | Medium | High selection only appears when Transmission Type Smooth is selected.
PRESENTATION Menu
DVR+O / SCI / RCS
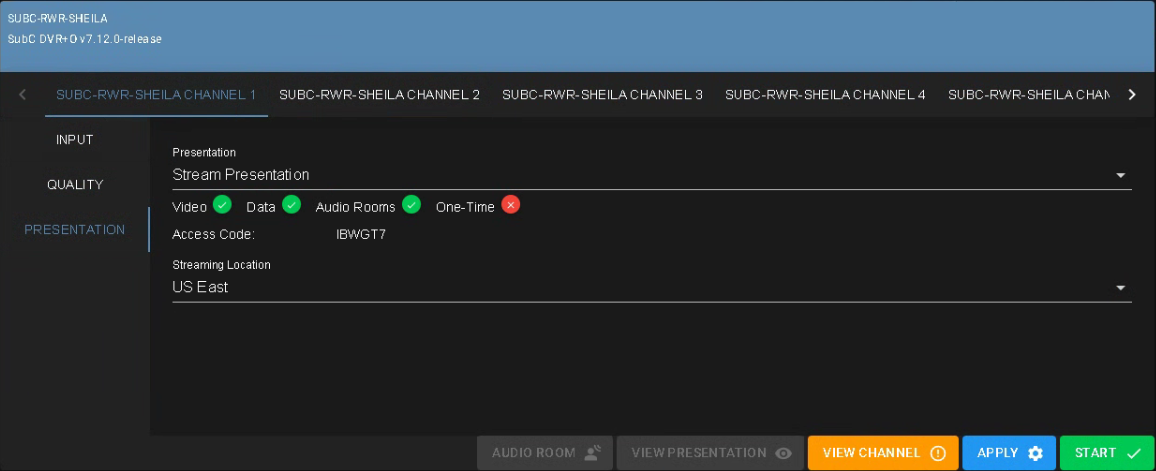
Presentation - Select a Presentation from this list.
The Presentation(s) that have been created for this Group will appear in the list.Depending on the features selected when the Presentation is created, a green checkmark or red x will appear to the right of each potential feature: Video | Data | Audio Rooms | One-Time
See Presentations section for how to create Presentations.
Streaming Location - Select a SubC Stream Server from the list.
You can select any of these SubC Stream Servers, however generally it is best to select a Stream Server nearest to your geographical location.
Ready to Stream
When you have completed configuring the Input, Quality and Presentation for a Channel:

Click the APPLY button to apply the current configuration to the Channel.
This action will communicate the selected settings to the SubC Software desktop application Channel.
Click the START button to begin Streaming
“Streaming in progress” message will appear on the Channel.
The access & control buttons will become activated
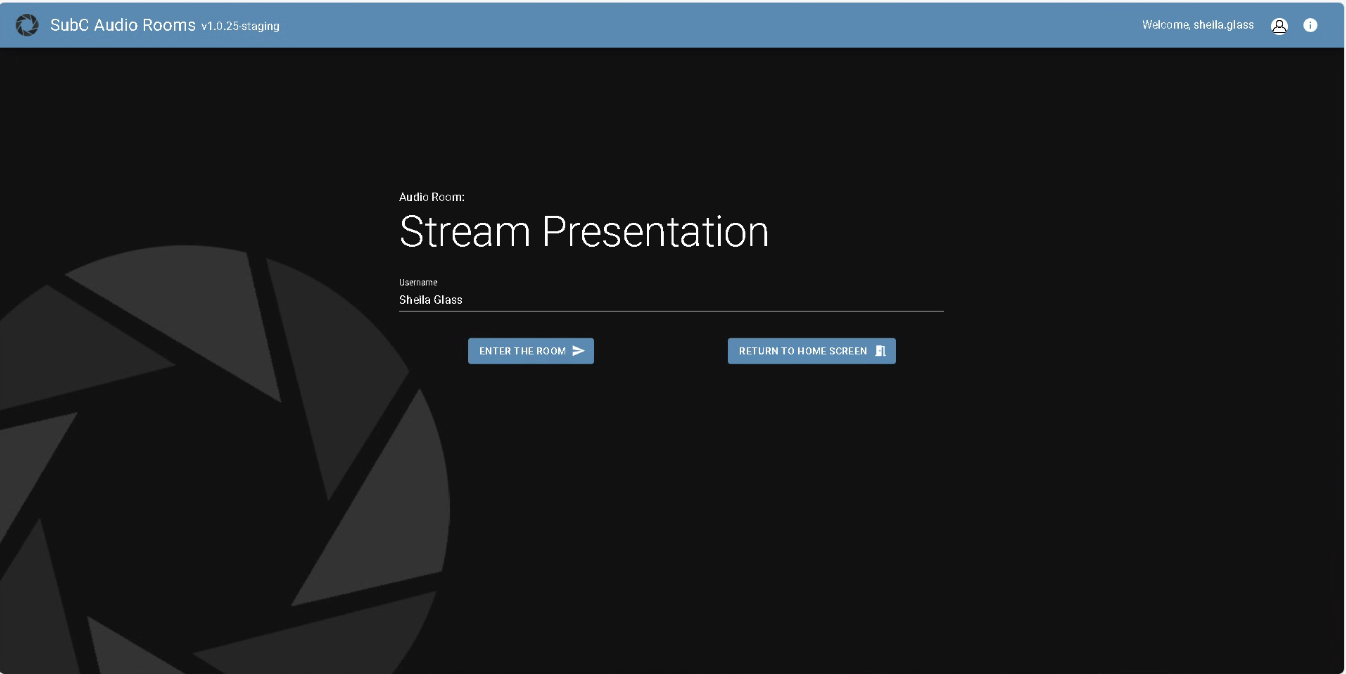
AUDIO ROOM access button will only appear if it has been included as a feature when the Presentation was created.
AUDIO ROOM opens the SubC Audio Rooms web application in a new browser tab
VIEW PRESENTATION opens the SubC Presentation viewer web app in a new browser tab
If you have multiple Channels streaming to the same Presentation, those will appear in the Presentation viewer
A maximum of 6 Channels will display in the Presentation viewer
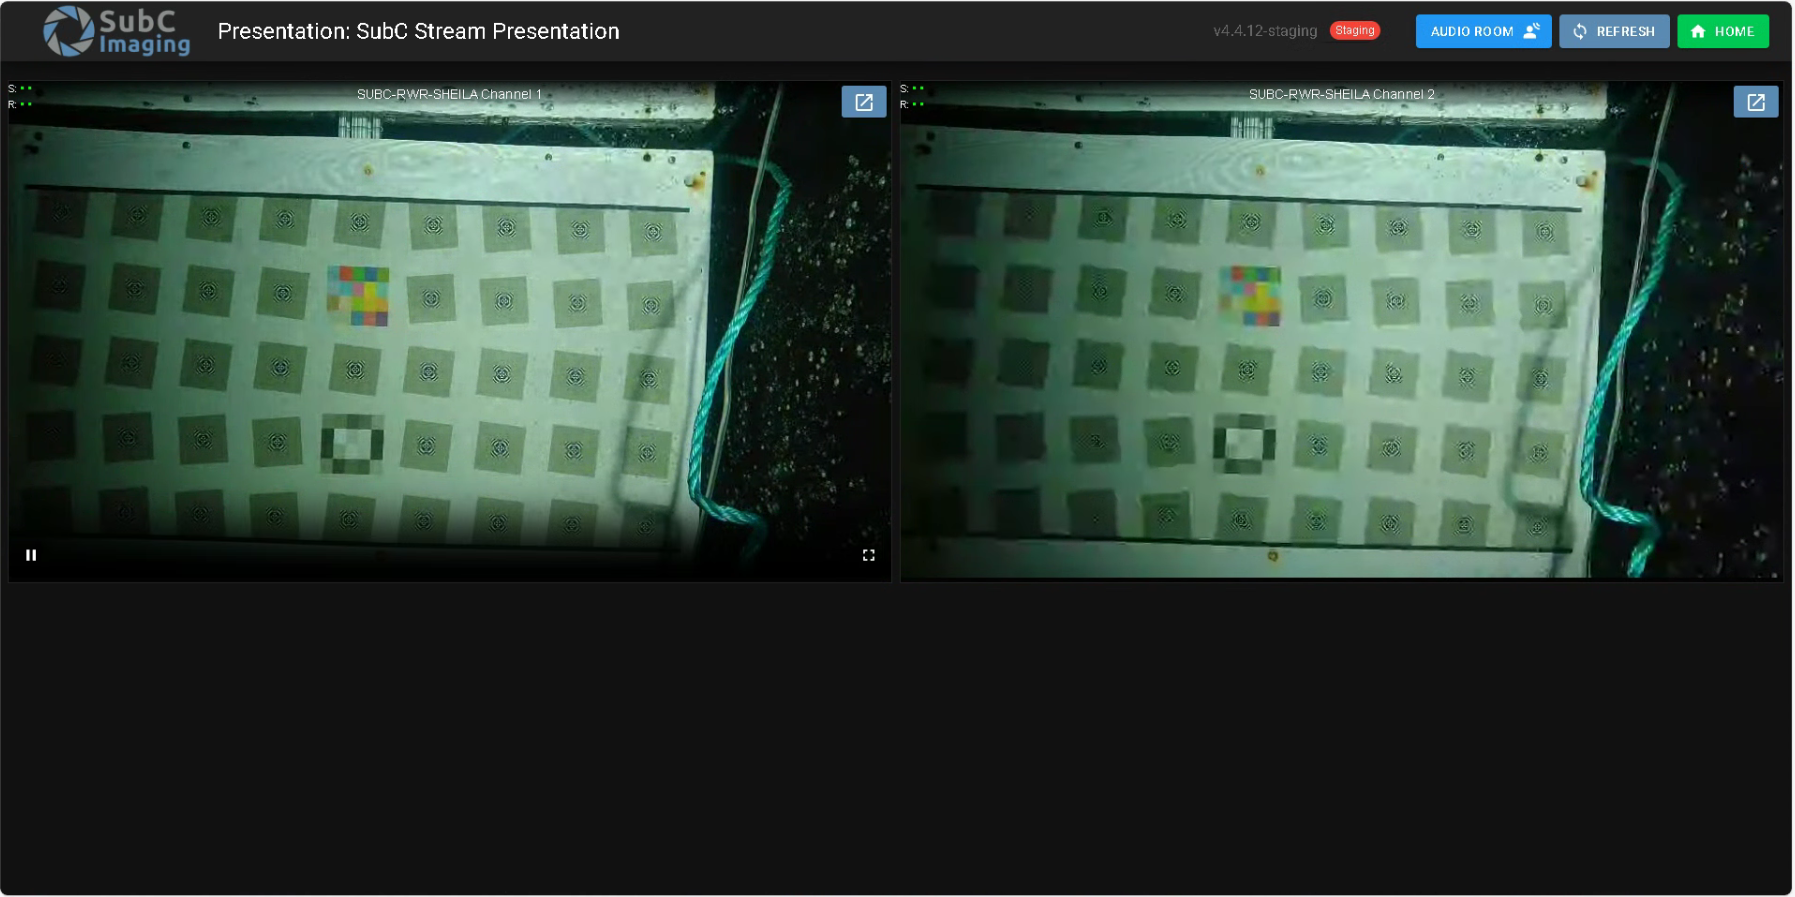
VIEW CHANNEL opens another browser tab from the Streaming Service web application UI displaying the Channel video in a larger format
APPLY button is inactive while the Channel is actively Streaming
STOP button will stop the current Channel Streaming and the APPLY button will become active again
When you have more than one Channel actively streaming, a convenient STOP ALL button appears in the top, right of the Configuration UI, allowing you to stop all Channels streaming with one click.
