Hardware Setup
We recommend using a UPS (Uninterrupted Power Supply) with your SubC DVR / SCI system to protect it from a power surge as well as to extend uptime in the event of a main source power outage.
Please refer to the SubC DVR+O / SCI Data Sheet for details including ports configuration information. (If you are using SubC DVR+O / SCI software with another vendor PC or DVR system refer to that vendors datasheet)
Connect Devices and Cables to the SubC DVR System
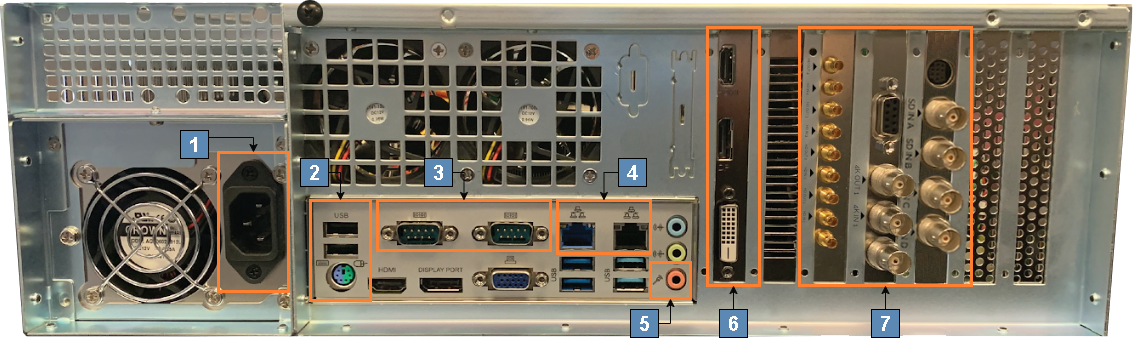
Insert the power cord (female) into the DVR power supply input port and plug the other end of the power cord (male) into a wall electrical outlet or UPS.
Plug in a keyboard and mouse to the DVR USB ports.
Connect the survey string feed cable to one of the serial ports on the DVR System. (This is required for Serial Overlay).
Network Connection: Plug an ethernet cable from your LAN into one of the ethernet ports located on the back of the DVR system. (This connection is required for LAN and SubC Cloud video Streaming).
If you have and wish to use an external microphone, the DVR also has an audio input port (pink color).
Plug the monitor video cable into the DVR video card port.
Connect the HD-SDI video cable to the HD-SDI BNC inputs on the DVR system.
The following optional features may be included as per your SubC DVR purchase:
If your DVR model includes optional 4K(6G-SDI) HD, connect a 4K(6G-SDI) video cable to the 6G SDI BNC input ports.
If your SubC DVR model includes the optional composite video features, connect the composite video cable to the SD BNC input ports.
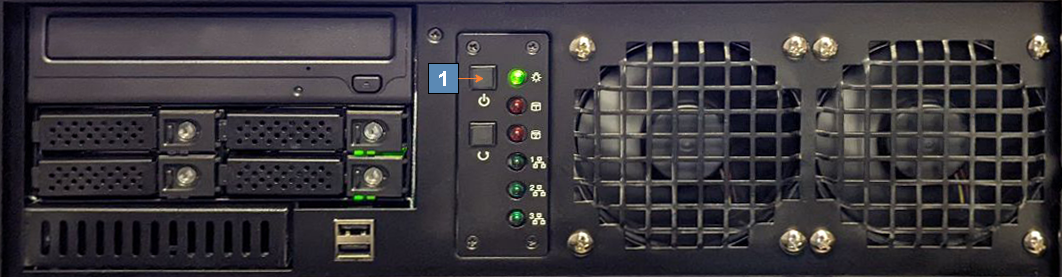
Power on the DVR by opening an access panel on the front of the DVR and push the power button. Allow a few minutes for the Windows operating system to boot up.
Open the SubC DVR+O or the DVR+O SCI application from the icons on the Windows Desktop. (Do not open both application at the same time, this may cause conflict &/or excessive demand on the system resources.)