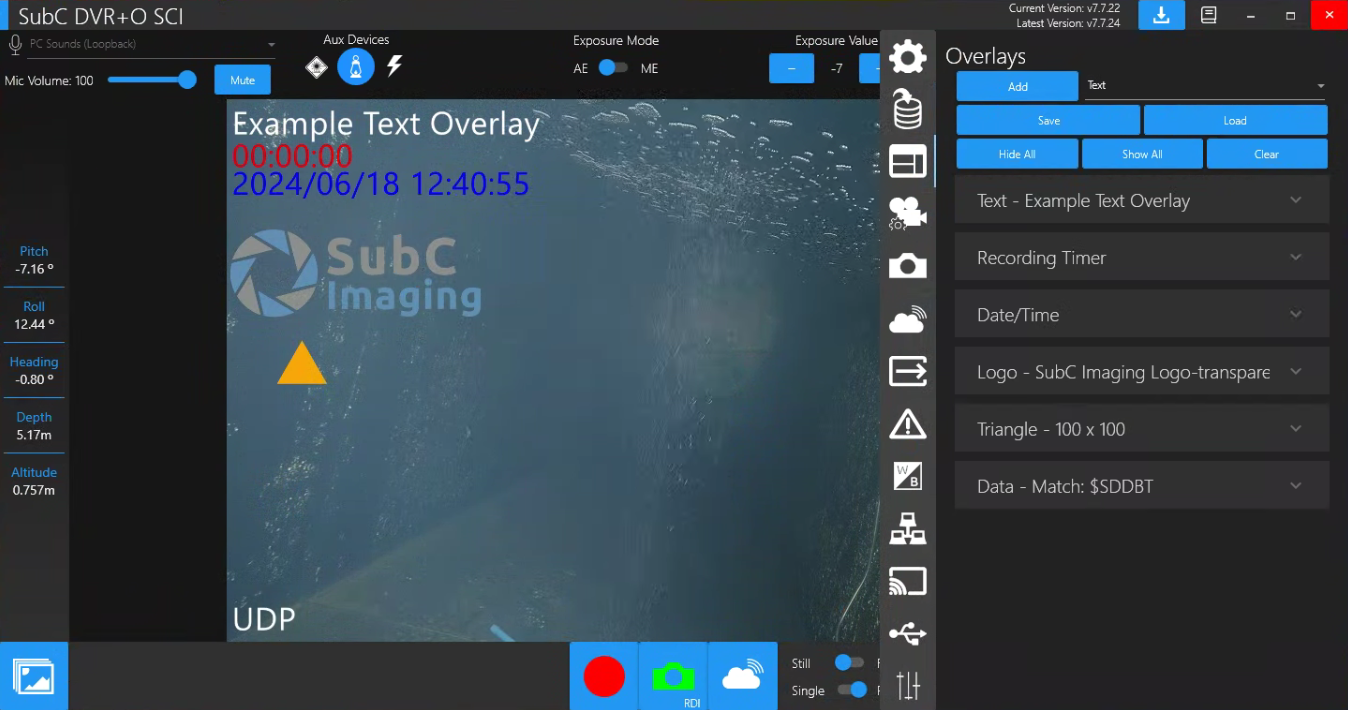
Overlays

Select Menu → Overlays
Overlays are text, graphics and data superimposed on the video image.
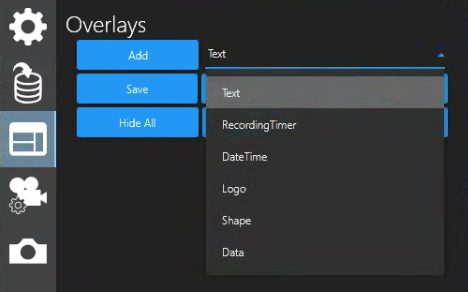
Overlay Types: Text, Recording Timer, Date/Time, Logo, Shape, Data (Environment Sensor Data, Data Input, such as water depth, temperature, etc.)
Configure Channel(s) and select Menu → Overlays
Overlay Types – select from a drop-down list of Overlay Types:
Text - add a meaningful string of text, such as a Project, Survey, Inspection Name
Recording Timer - put a Recording Timer (activates when you click the Record button)
Date/Time - put the current Date & Time
Logo - display yours, or your client’s company brand image.
Shape - add any of the follow options: Angle Banner, Round Banner, Left-Curve Banner, Right-Curve Banner, Point Banner, Plaque Banner, Ellipse, Triangle, Polygon, Star
Data - You must first activate Channel Settings Menu → Data Input. Then you can select the Data Input source and have it display as an Overlay.
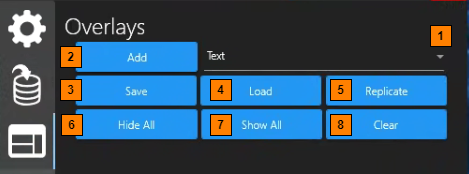
Add – applies the selected Overlay Type to the the main video view (center) and adds the Overlay configuration UI tile.
Save – opens File Explore where you can select a folder to saved your Overlays as .xml files that you can “Load”- reused and applied to DVR+O Channels.
Load – opens File Explore where you have saved your Overlays as .xml files so you can select and apply to the current DVR+O Channel.
Replicate – copies the current selected Channel’s Overlays to all other active Channels.
Hide All – removes all Overlays from view.
Show All – displays all Overlays (reverse Hide All).
Clear – removes all selected Overlay Types from the selected Channel.
Creating Overlays
Click the drop-down field select an Overlay type.
If you want to include more of the same overlay type, click the Add button
Overlay types are listed as collapsible, configuration tiles as shown below.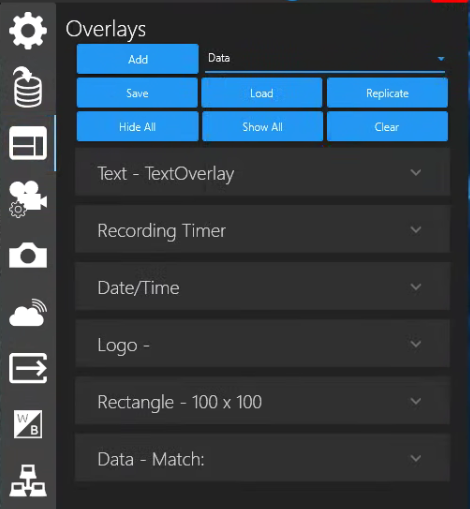
Save - Click the Save button to open a Windows File Explorer (default to the C:\SubC [Application] folder).
Create a folder where you wish to save your overlays and give the overlay a file name (example: C:\SubC DVR+O v7\My-Saved-Overlays).

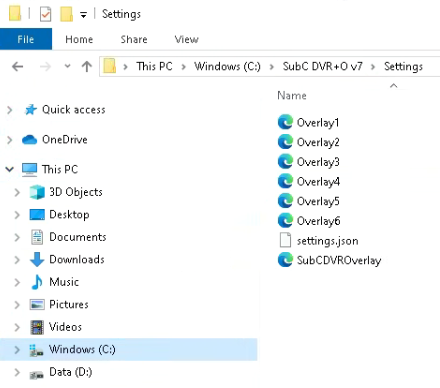
Overlays are also automatically saved as C:\SubC [Application]\Settings\Overlay# when you close the SubC application. This enables the SubC application, when you open it again, to automatically apply the previous session Overlays on the corresponding Channel (i.e., Overlay1=Channel 1).
This autosave is convenient, however, you are encouraged to also use the overlay Save feature to save your overlays so you can reload them for current & future projects.
Load - Click the “Load” button on the Overlay menu and a File Explorer window will open in the folder your previously accessed (or browse to the folder).
Select the desired saved Overlay configuration file (Example: Overlay-Saved-Example) and it will be applied to the Channel.
Hide All suppresses the Overlays from view on the current Channel without deleting them.
Example: You may wish to hide the Overlays to take a still or framegrab of the video feed without the Overlays visible, then click Show All to bring Overlays back in view again.Show All reapplies the Overlays that were suppressed with Hide All.
Clear deletes all Overlays for the current Channel.
Any unsaved Overlays will be lost when choosing this Clear option.
Configuring each Overlay Type is explained in detail in the following pages.