Inspector Project Example

The image above is an example of an Inspection Project showing one DVR+O Channel active with video Input.
Project Name - The name of the Inspector Project that is currently loaded will appear at the top-left of the window.
Microphone - If you selected a Microphone during the Inspector project configuration, the Microphone control bar will appear at the top of the Inspector UI. Use the volume control slider button to adjust.
Channel Video(s) - The DVR+O / SCI active Channels are presented in the center of the Inspector UI.
Pop out video window - For each video Channel, there is a full-screen button at the top-right of the video that you can click to pop the video into another window. This is useful if you need to see the video in a larger format on the SubC Inspector System and/or if you have multiple monitors to which you wish to display the video images for others to view.
Events that you create appear at the top-right of the Inspector UI. (Event buttons are only active during Recording.)
Create Events “+” button located at the bottom-right opens the “Create a new event” box.
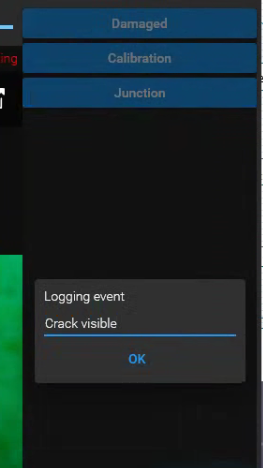
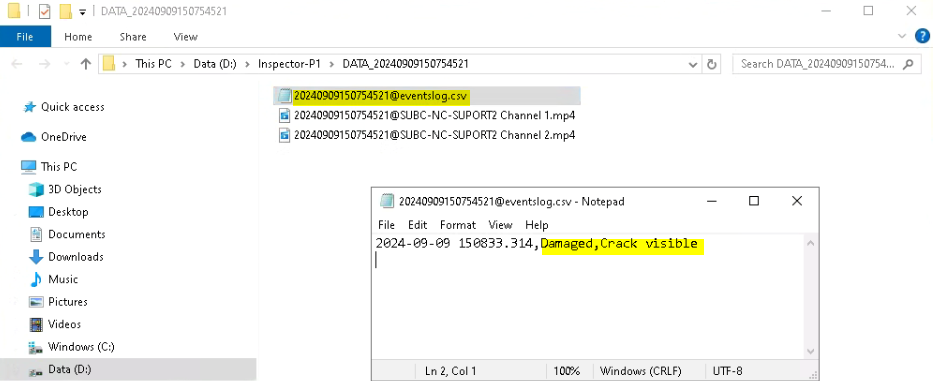
An Event is a name for something that you are watching out for. For example, if you create an event called “Damaged”, each time you see a something that appears to be damaged, click the “Damaged” Event and it will log the date/time for each time you click to acknowledge the event/sighting occurred in the @eventslog.csv file in the Inspector Project folder.
A Logging event note field will also appear, allowing you to optionally add more details pertaining to the Event. Click OK. An “Event taken: Event-Name” message will appear briefly at the top-center of the Inspector window. (i.e., Event taken: Damaged).
Start / Stop Recording Button appears as a red circle when recording is stopped and a red square when recording is active.
Clip button appears only when recording is active - this allows you to take a separate recording clip file of something that is of particular interest you wish to capture. Click the Clip button to start recording, click again to stop recording the clip.
Camera button is used to take still images. You can take a still image whether recording is active or inactive.