IP Camera
IP Camera Input
An IP camera is a type of digital video camera that uses Internet Protocol to connect to a network.
Connect to an IP camera through its IP address (or the camera’s DNS name) to access its video as input to the DVR+O system Channels.
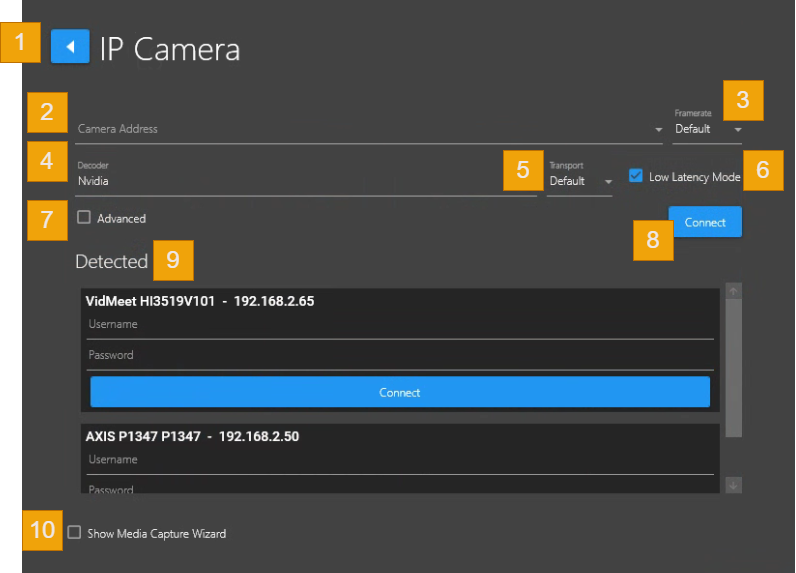
Back Arrow – Return to the Input selection screen.
Camera Address - Enter the RTSP address to the IP Camera or Path to a video file
RTSP Syntax Examples:
rtsp://[ipaddress]:[port]/path Example: rtsp://192.168.2.13:5540/ch0
rtsp://[cameraname]:[port]/path Example: rtsp://Camera1:5540/ch0
If your Camera requires login credentials
rtsp://[username]:[password]@[ipddress]:[port]/path
Example: rtsp://admin:openit@192.168.2.13:5540/ch0rtsp://[username]:[password]@[cameraname]:[port]/path
Example: rtsp://admin:openit@Camera1:5540/ch0
Path to a video file
C:\Users\Sheila Glass\Documents\Sample-Videos\videos\Dolphins.mp4
Select previously used address from the field list.
This field will retain up the latest 5 IP Camera addresses previously used.
Framerate - Select your framerate preference [Default will used the current framerate setting of the input device or select from range [ 60 | 59.94 | 50 | 30 | 29.97 | 25 ]
Decoder - Options: Quicksync, CPU or Nvidia*
Nvidia option will only appear if the system has Nvidia Video Card.
Transport - Select protocol options: Default | UDP | TCP
Low Latency Mode - Select this checkbox to reduce latency from the camera by preventing the computer from building up buffered video.
Advanced - When this checkbox is selected the Parameters field will appear.
Parameters field reveals the default values. If required, you can add to / adjust these parameters.

Connect - Click to connect to the selected Camera Address
Detected - Displays autodetection IP cameras connected on your network.
ONVIF Camera Discovery
If you have IP cameras on your network that use the ONVIF protocol, a list of each detected camera will appear.
Enter the camera username and password here and click the Connect button.

Show Media Capture Wizard
When checked, when you click the Start button the input video feed will start, and the Media Capture Wizard will appear, in which you can configure the Black Box and Media Storage settings. You can also skip by clicking Cancel Wizard button to view the video input display without configuring or click Next to skip Blackbox and proceed to Media Storage.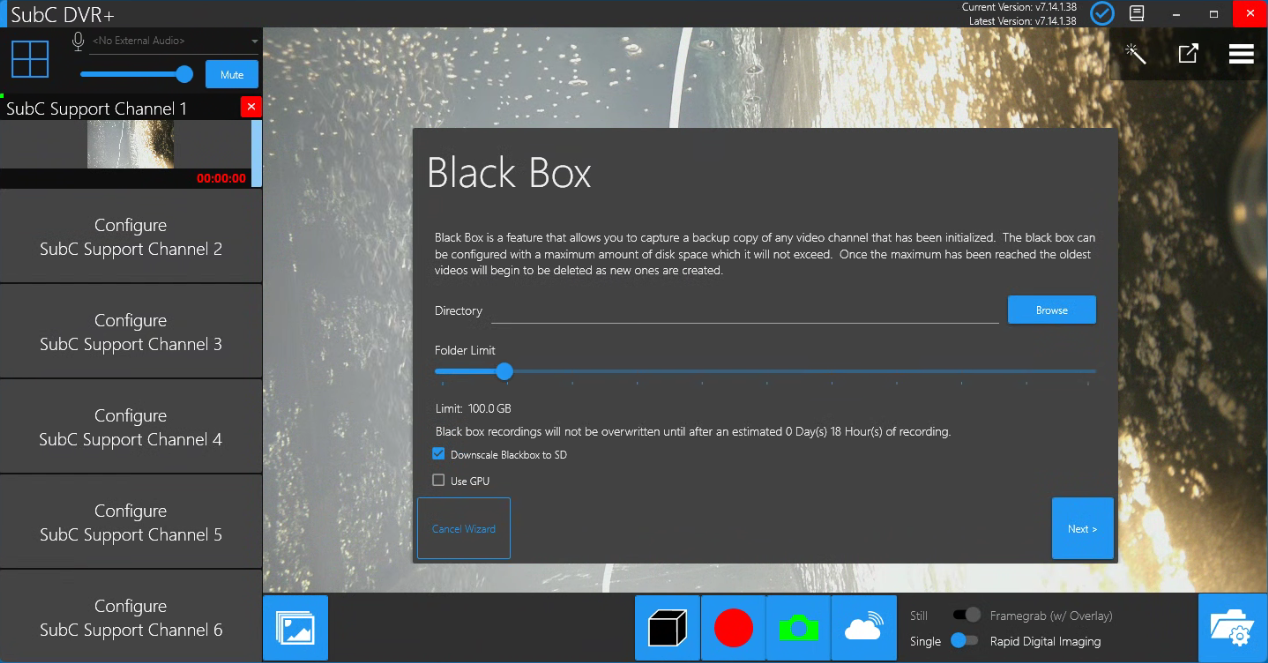
When unchecked, when the Start button is clicked, the input video feed will start without presenting the Media Capture Wizard.
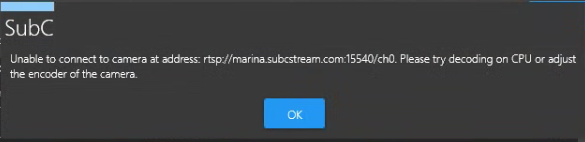
If you get this message, it maybe because your processor does not support H265 and you are trying to connect to a camera configured for H265.
As the message suggests, change the Decoder to CPU and try to connect to the IP camera again or adjust the encoder of the camera.