Record & Framegrab
This section describes how to Record videos, take Stills & Framegrabs in Single or RDI mode, and save to files.
Part of a Channel configuration includes selecting a Blackbox folder and Media folder to save your video Recordings and Stills.
If you opted not to configure Blackbox and/or Media Capture during Channel configuration, when you click on the Record Start or Camera buttons, you will be prompted with a File Explorer window from which you can select the folder to store your video files and still/framegrab files.
See Menu → Blackbox Settings and Media Capture Wizard and Folder / Filename Settings for more on Blackbox and Media Capture.
Before you click Record Start or Take Stills (camera icon) buttons, set your Folder / Filename Settings and select the folder to store your video files and still/framegrab files.

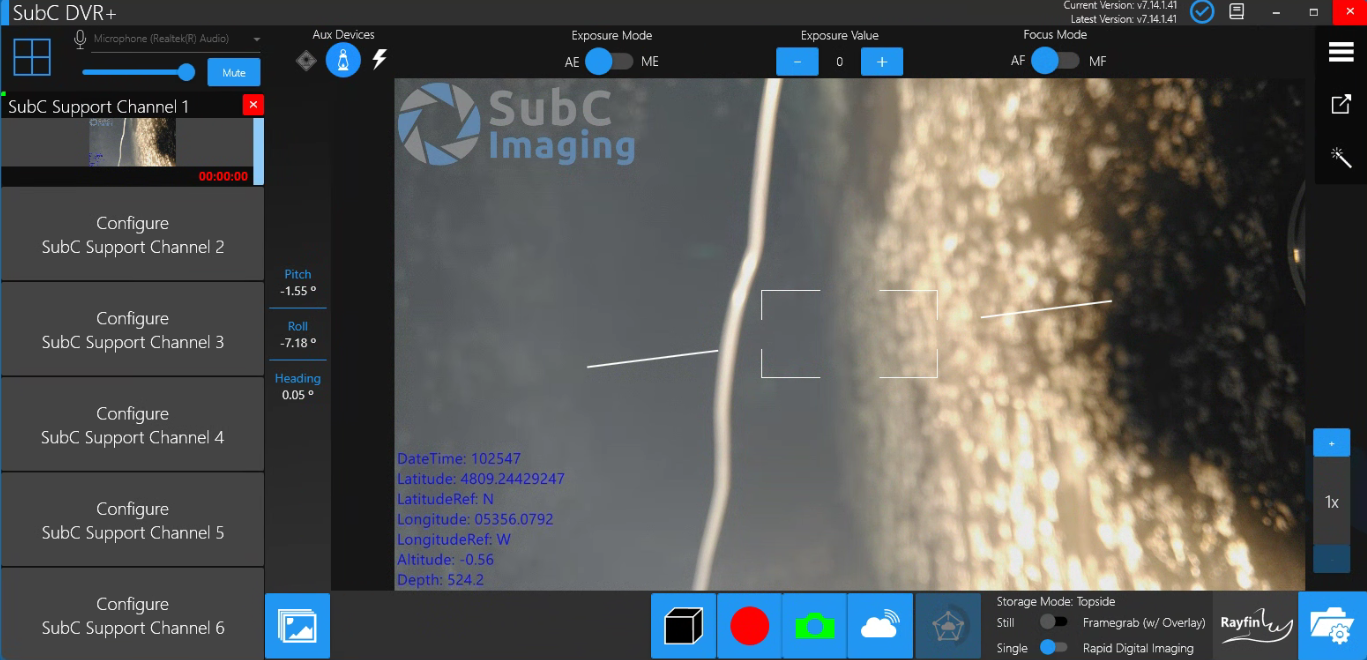
When Channel Input is Rayfin Camera, you will see Storage Mode: Topside (PC) and Internal (Rayfin)
 |  |
|---|---|
Click the Blackbox button to start / stop the Blackbox recording |  |
Click the Record button (red circle) to start/stop recording. Saves as .mp4 files.
Click the Stills button (camera) to take a Still (or Framegrab as the video is running). Saves as .jpg files.
Click the Stream button to start/stop Streaming the Channel.
Take Stills with or without including the Overlay
Overlay can only be included when recording Topside.
Take Single or continuous, multiple using Rapid Digital Imaging (RDI).
When in RDI mode, click the Camera icon once to start taking stills, and click again to stop.
Whether you are currently recording the video or not, you can take Stills & Framegrabs as long as the video is active on the channel.
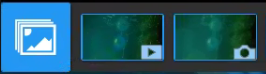
Click Review Media button to open File Explorer (or Browser, if Storage is Internal) to the folder where your Recordings, Stills, and Framegrabs are saved.
Your most recent captured Recording and Image appear as thumbnails to the right of the Review Media button for quick, convenient access.
See Review Media
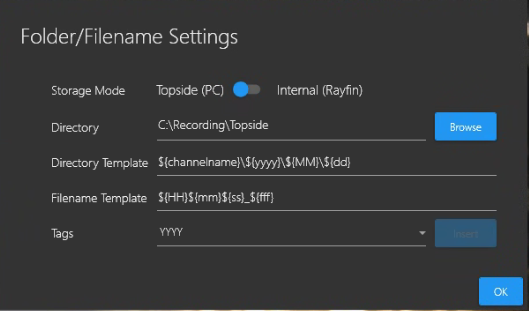
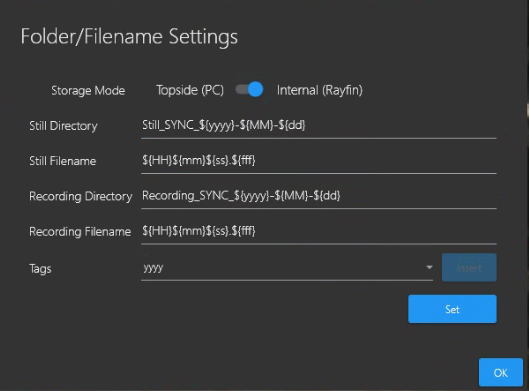
Folder/Filename Setting

When Channel Input is Rayfin Camera, you will also see Storage Mode Topside (PC) and Internal (Rayfin)
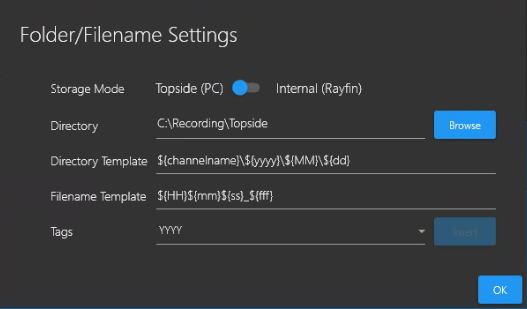
Click the Folder/Filename Setting button to open, view, and set your Recordings and Stills files storage preferences.
See Folder/Filename Settings.Topside (PC) - Storage is located on a local or NAS drive attached to the SubC desktop application host PC
Internal (Rayfin) - Storage is located on a drive inside the Rayfin camera.
When other Input Types (not Rayfin) are selected, storage is always Topside (PC).
