Starting An Input

Multiple Channels can be configured independently with the various Inputs and run concurrently.
Click on a Channel, choose an Input type and configure.
Below, is an overview of each of these Inputs.
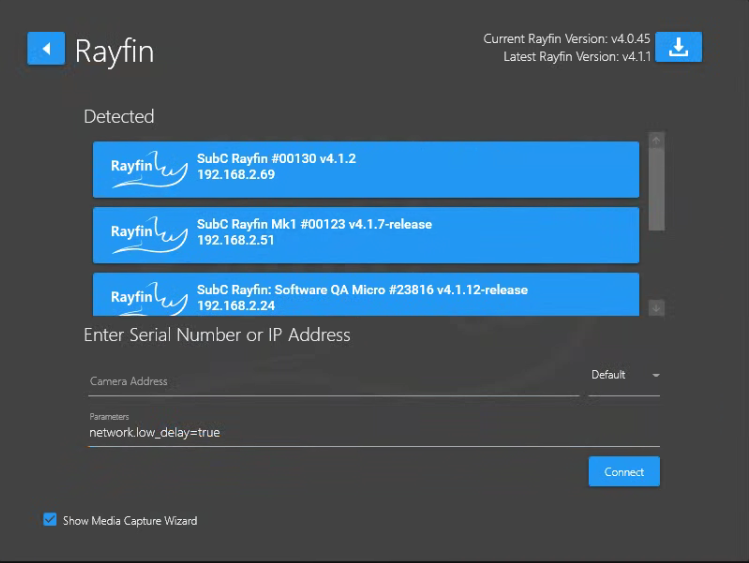
Rayfin

With SubC Rayfin Cameras connected on your Network, the DVR+O / SCI will automatically detect and list the Rayfin Cameras.
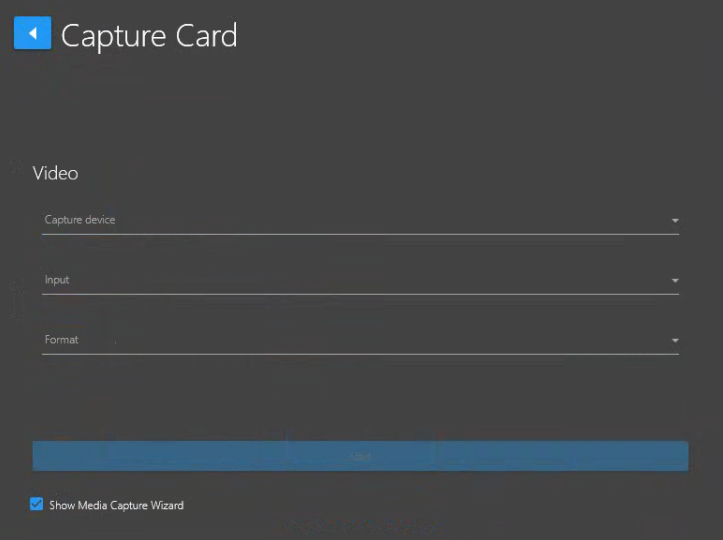
Capture Card

The Capture Card Input allows you to configure a Capture Card (a physical card internal or externally connected to your computer) that is used to capture video and output that video onto the computer.
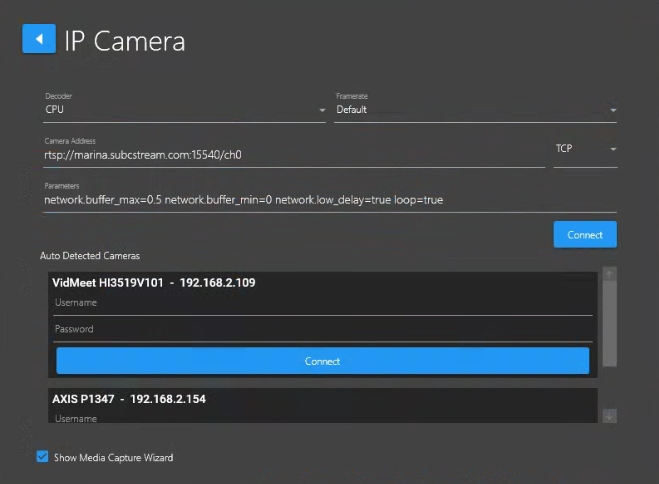
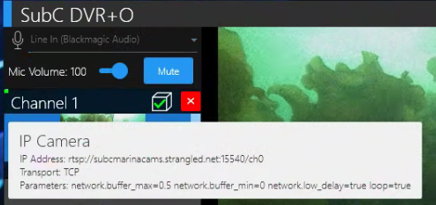
IP Camera

The IP Camera Input allows you to connect to other IP Cameras that you may have connected to your network.
Put the RTSP string of the IP camera in the Camera Address field. Example Syntax: rtsp://yourcamera.domain.com:port/ch0
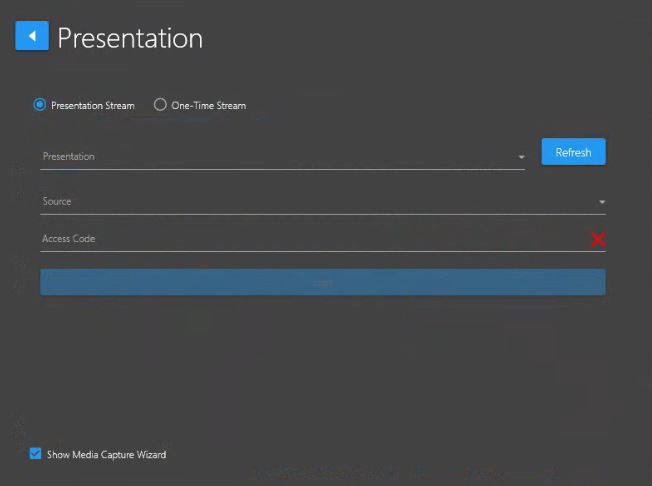
Presentation
A SubC Streaming Service subscription is required to enable the Presentation Stream and One-Time Stream features.
Presentations for Presentation Stream are created in the SubC Streaming Service web application and assigned to a Channel. These Presentations are then accessible in SubC Presentations viewer web application and can be used as Presentation Input.

The Presentation Input option allows you to assign an active SubC Presentation or One-Time Stream as Input on a Channel.
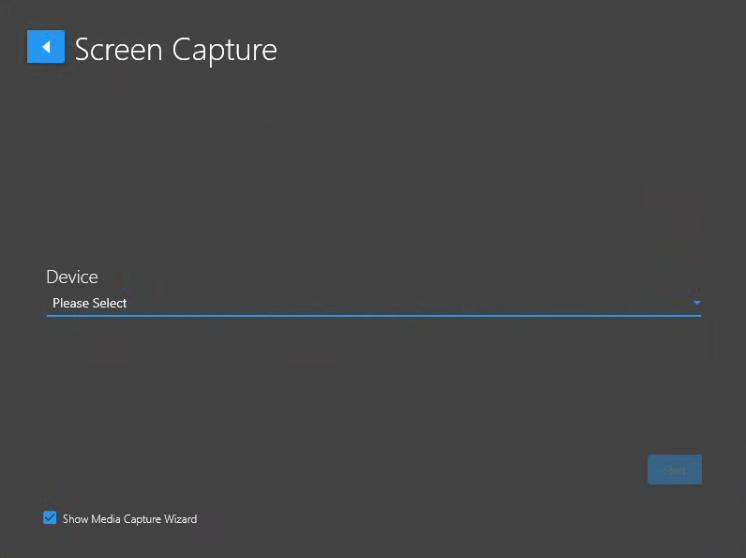
Screen Capture

The Screen Capture Input provides the option to select Screen Capture (the full computer monitor display) or a Window Capture (specific window opened on the computer - window must not be minimized) as input to a Channel.
Once a DVR+O Channel is configured with Input, the following features are available.
Microphone
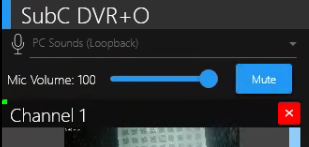
Image shows Mic in active state
Mic selection field detects any microphones you have installed/attached on the system and makes them available to select from this drop-down field.
Mic Volume slider button is active when the microphone is active (not mute)
Mic Volume slider button is inactive when the microphone is muted.
Preview window features

Channel Status Indicator – On the top-left, a small green light illuminates indicating that the video input is active.
Close Input – Click the red “x”, top-right, to close the active input and return to Input selection.
Current Selected Source Bar – When you click on an input Channel, a vertical blue bar will appear indicating it is the current source you have selected.
Recording Timer – On the bottom right is the recording timer. It will remain at 00:00:00 until you start recording.
Also, when you hold the cursor over the Channel Preview Window, a window will appear displaying the Channel configuration details.

Blackbox Indicator will appear as a cube with a green check mark when Blackbox is activated.
The Blackbox Indicator will change to a yellow ”!” if there is an error. Hold the mouse cursor over the Blackbox Indicator when its in the yellow “!” state to see a description of the error. Save this error information to share with support@subcimaging.com if you require assistance.
Recording Status Indicator - the Rec icon appears (bottom left) to show recording has started and the Recording Timer (bottom, right) begins to increment.
Recording Timer keeps count (hours/minutes/seconds) when recording is started until the Stop recording button is selected. When the Start recording button is clicked again, a new file to store the recording is created and the timer begins its counting from 00:00:00 again.
Dat - Data Indicator will appear when the Channel is connected to a Rayfin camera & you are Recording (Rayfin automatically feeds in data when connected to the DVR+O / SCI) &/or if the Channel is connected to any other Input type and you have explicitly configured Menu → Data Input and are Recording.
Real-time Image Enhancement

When a Channel is configured with an Input type, the Real-time Inage Enhancement “wand” toggle button will appear in the top, right of the DVR+O / SCI UI

The Real-time Image Enhancement is a feature that will help operators get the job done quickly and efficiently by allowing them to clearly see the videos and stills they're capturing in real time.
The Image Enhancement feature is ideal for water conditions with poor visibility as it helps bring out details in the enhanced video that are normally obscured.
Image Enhancement processes live frames so the framerate is processor dependent.