Data
Include incoming Data as an Overlay
Data Overlay works in conjunction with the SubC application Menu → Data I/O → Data Input.
When you connect a Channel to a Rayfin camera, its Data is automatically available in Data Input.
You can also add other Data Input sources. See Menu → Data I/O to configure your data sources as Data Input, then proceed to add Data Overlay.
See Examples below.
Using NMEA Sender Data generating application for Data Overlay
Using Rayfin with Altimeter connected for Data Overlay
Example 1: Using NMEA Sender Data generating application for Data Overlay.
NMEA Sender Data sample:

Menu → Data I/O → Data Inputs Configure & Connect 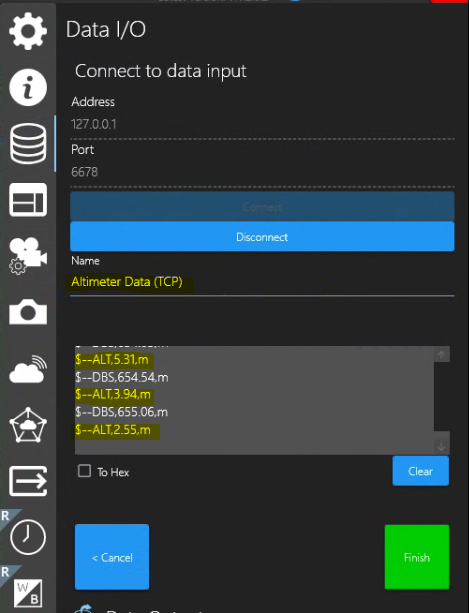 | Click Finish 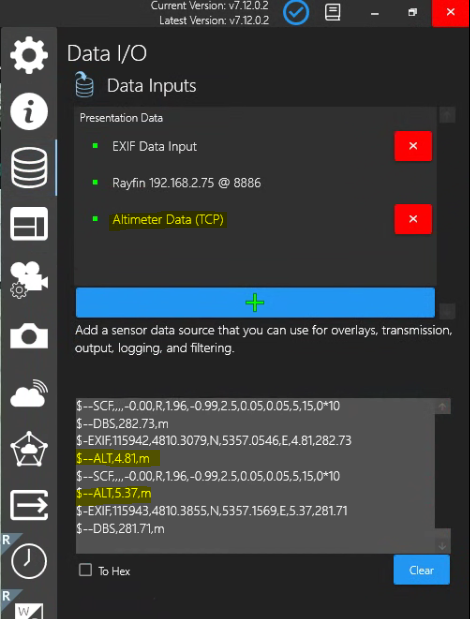 |
|---|
Menu → Overlays → Data - Match $--ALT
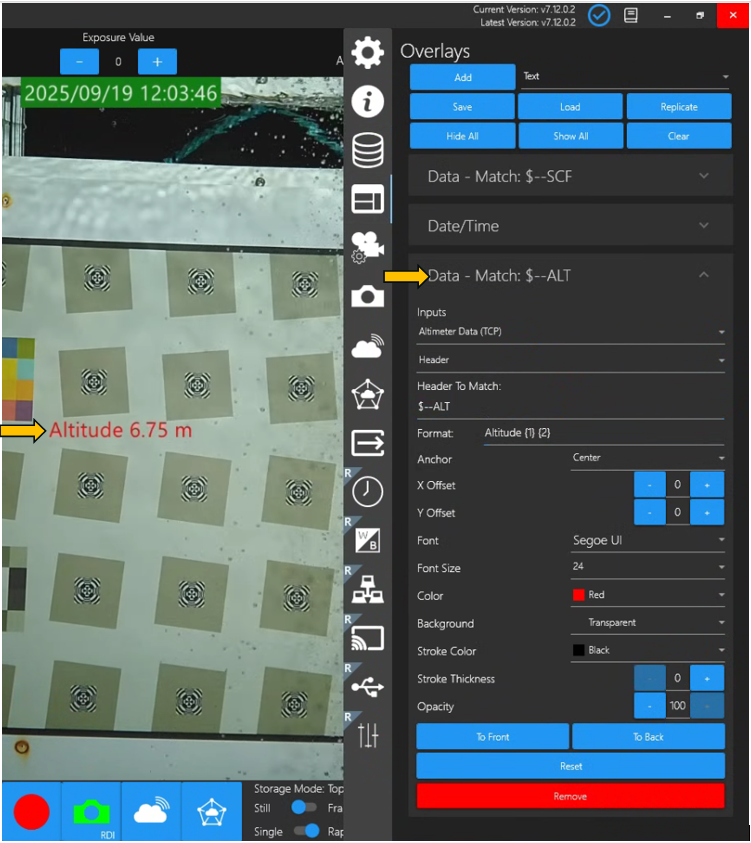
Example 2: Using Rayfin with Altimeter connected for Data Overlay
Header
Header To Match: $SDDBT
Format: Altitude {3} {4}
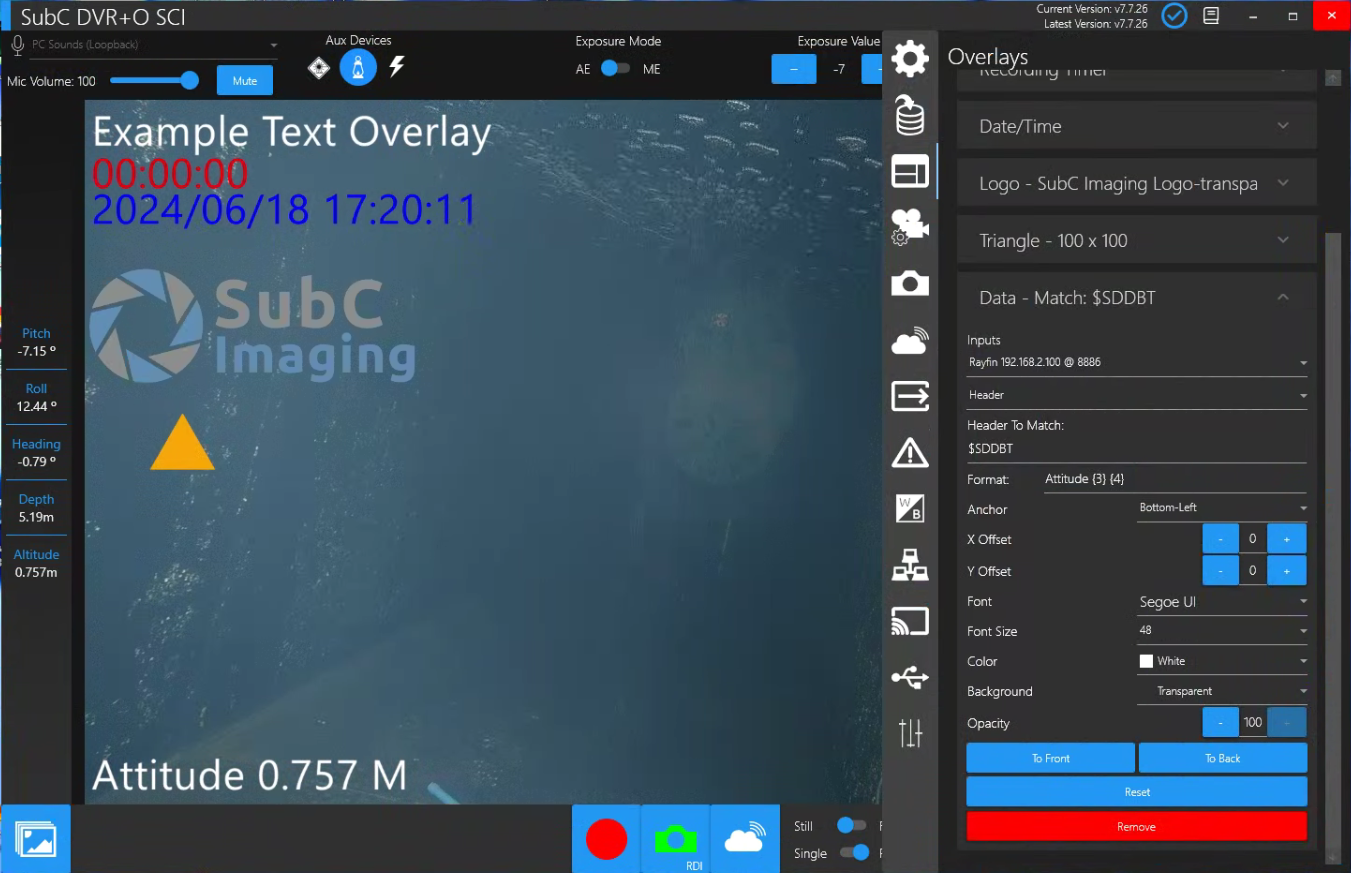
Altitude with its value (from {3} data input field) and “M” (to indicate Meters from {4} data input field) is displayed in the Bottom-Left (or where you choose to display it)
Example 2: Defined
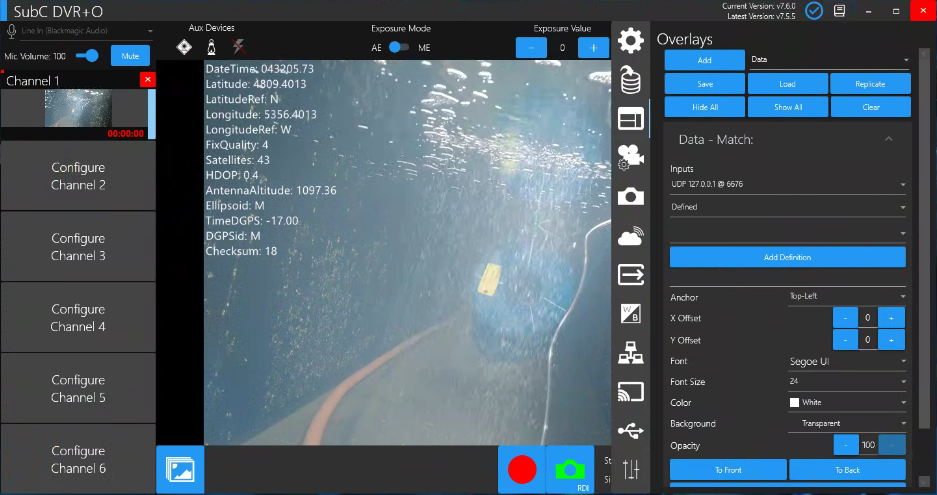
All Data Inputs will automatically display as Overlay…
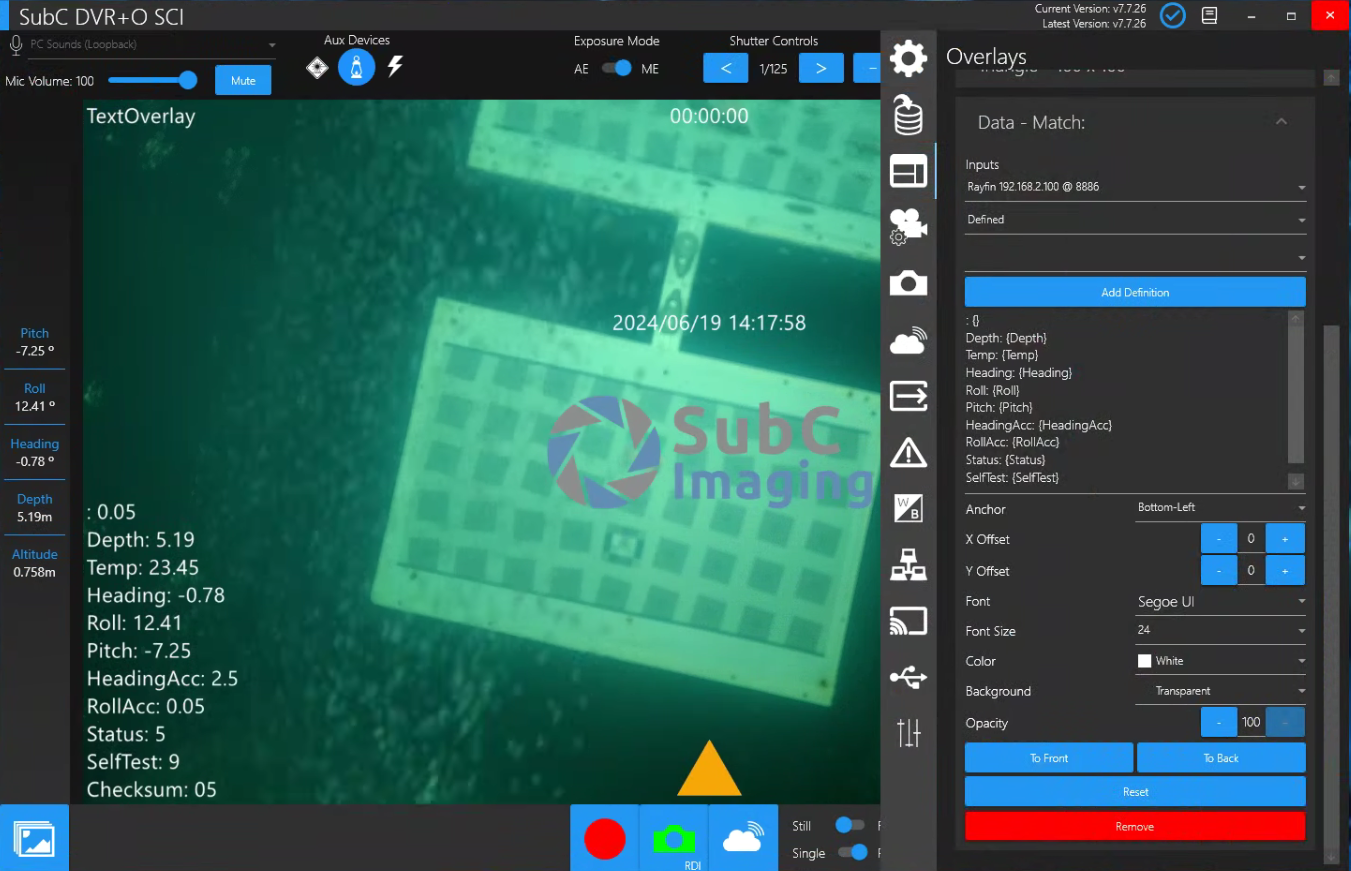
You can then refine the Data Inputs from this list by selecting only the fields you wish to include via the data filed dropdown list and click Add Definition as you select each one.
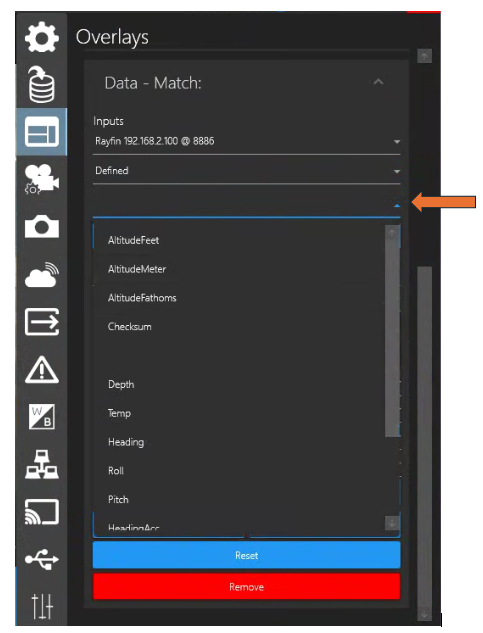
Your selected fields will populate in the Format field (below the Add Definition button)
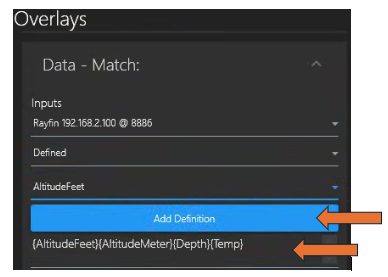
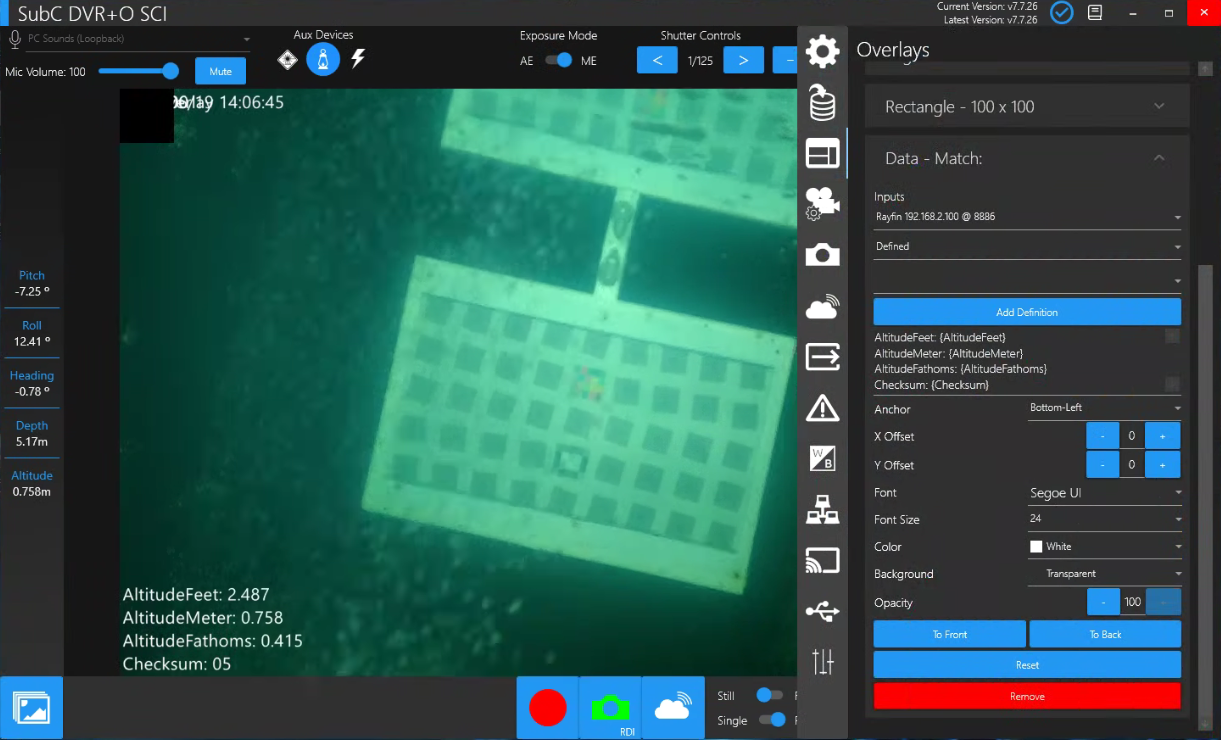
You can further refine the Format field content by adding Field Titles and /n new line characters for a better display data Overlay.
Example: Altitude Feet: {AltitudeFeet} /n Altitude Meters: {AltitudeMeter} \n Depth: {Depth} \n Temp: {Temp}
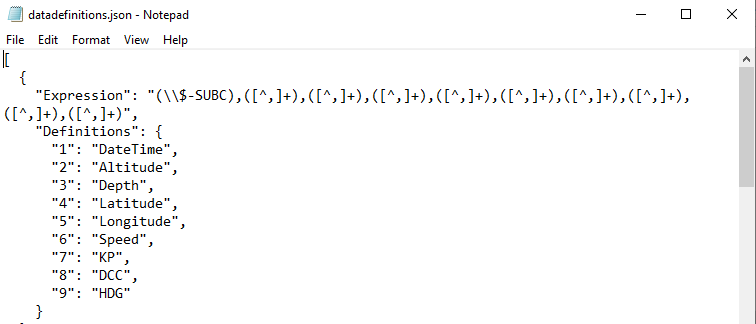
Note, data field definitions are identified in the C:\SubC [Desktop app]\datadefinitions.json file.
This is helpful to know so that you can include each field title when applying these data values as overlays in the Overlay → Data → Format: field.
Example - Format: Altitude {3} {4} outputs ![]() overlay.
overlay.

Reminder: Channel Settings Menu → Data Input
Before you can include Data Inputs in your Overlays, you must first set up Data Inputs. See previous Data Input section for setup details.
The Data Inputs you establish will then be available for inclusion in the Data Overlay menu.
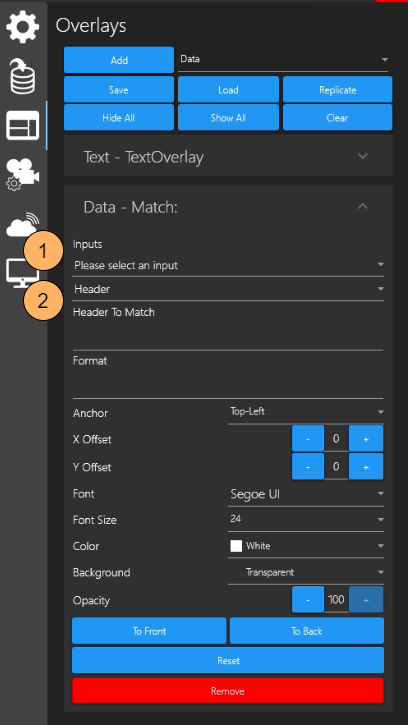
In the Overlays Data Match section
Inputs “Please select an input”
Options are:Presentation Data
Determined by your Data Input [Serial, UDP or TCP with IP and Port ]
Example: UDP 127.0.0.1 @6677
Header
Select to match the desired data values available in your Data Input.
Options:Header
Header is the first field value in the data string.Expression
An expression is a statement that generates a value on evaluation
Example - Header
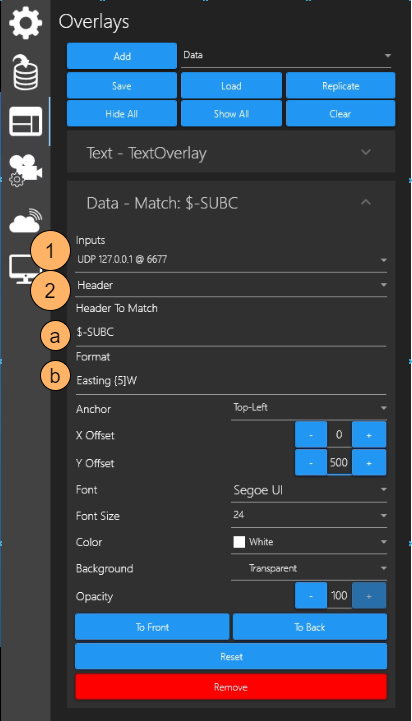
Inputs
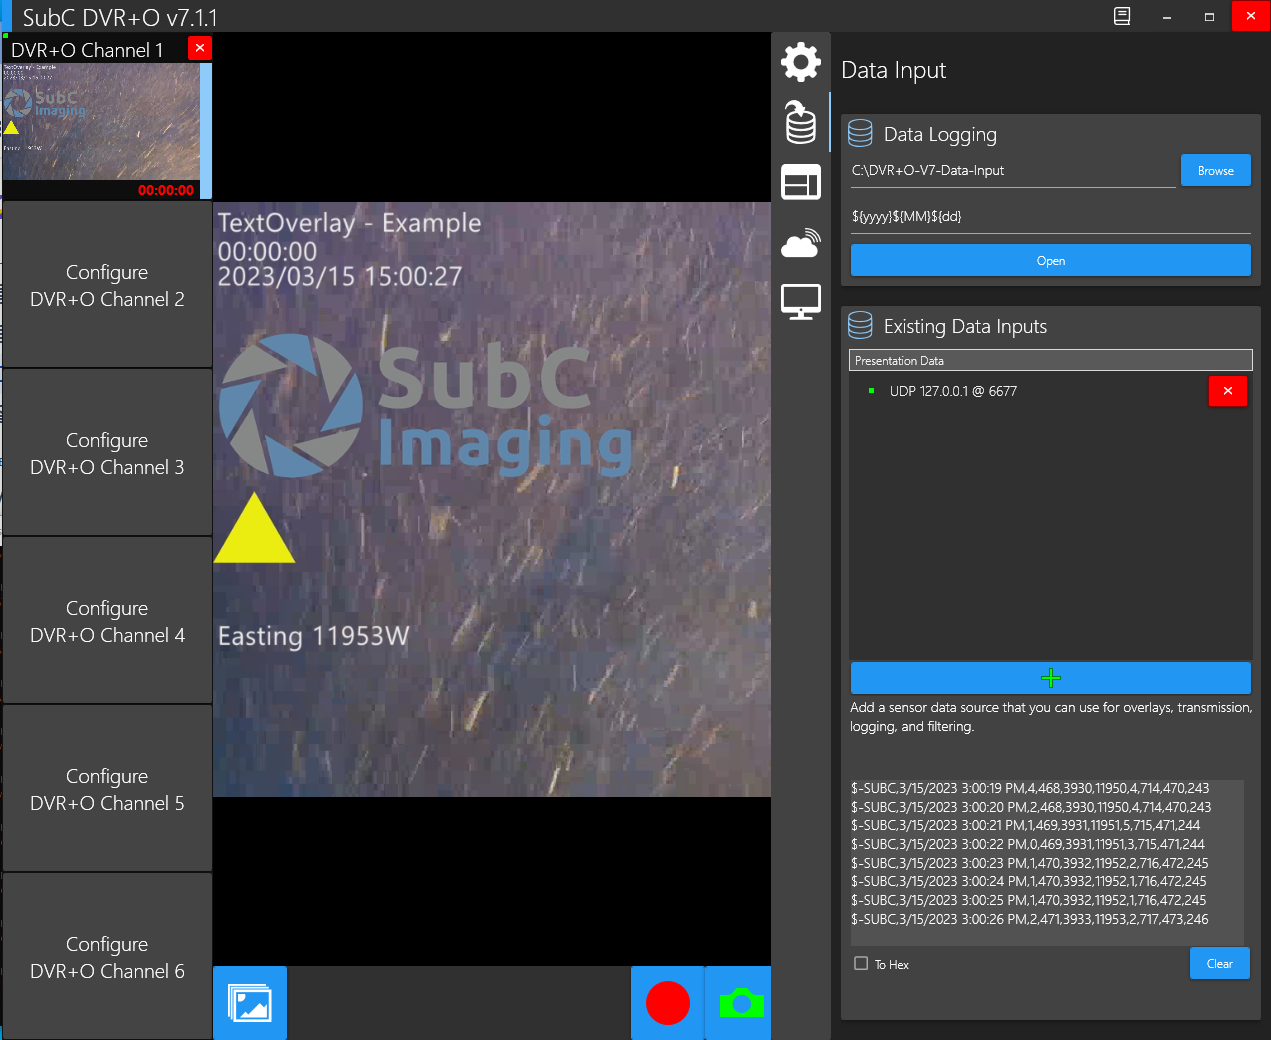
Data Input → UDP 127.0.0.1 @6677Header
Header to Match → $-SUBC
Format → Easting {5}W
{5} is the fifth field value in the input data string; Easting and W are just added text to identify what the field value represents.
Incoming data sample:
$-SUBC,3/15/2023 3:11:06 PM,0,796,3932,11952,3,778,798,86
You can filter the data from the Header, $-SUBC using indexes to select one or multiple field values to display in the Overlay.
{1} = 3/15/2023 3:11:06 PM
{2} = 0
{3} = 796
{4} = 3932
{5} = 11952
etc.
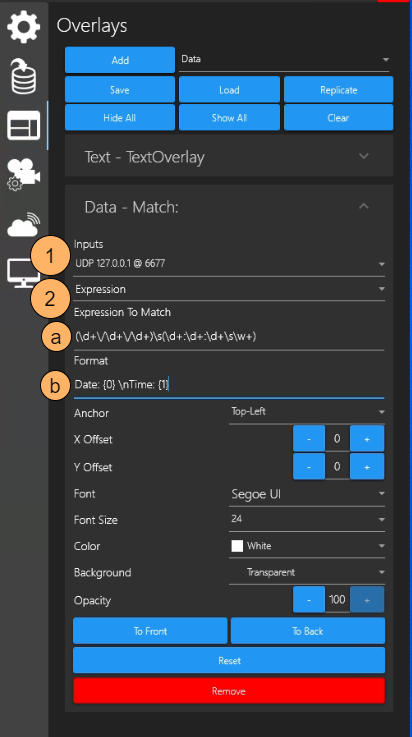
Example - Expression
Inputs
Data Input → UDP 127.0.0.1 @6677Expression
Expression to Match → (\d+\/\d+\/\d+)\s(\d+:\d+:\d+\s\w+)
Format (optional) → Date: {0} \nTime: {1}
As the Data Input flows, each time a line appears with the value that matches the Header or Expression you have identified, those lines of input will appear as the Data Overlay on the video.
Other Fields
Anchor – Position the text on the video image. Select from the field drop-down: Top-Left, Top-Right, Left, Center, Right, Bottom-Left, Bottom, Bottom-Right.
X Offset – Left/Right - Fine-tune the position of the text by clicking the “-” to move left and clicking the “+” to move right.
Y Offset – Up/Down - Fine-tune the position of the text by clicking the “-” to move up and clicking the “+” to move down.
Alternatively, you can adjust X or Y Offset by editing the number in the center (Range [1-100])
Font – Select text font style (Arial, Times New Roman, etc.)
Font Size – Select font size (ranging from 24 up to 80)
Color – Select font color
Background – Select a color to apply under the text to make it stand out or keep it as the default transparent (no background)
Outline Overlay Text
Stroke Color and Stroke Thickness
By adding a contrasting color outline to your Overlay Text, when the video background changes from light to dark / dark to light, your text will remain visible.
Select a base Color for your text and select Stroke Color and Stroke Thickness for your text outline.
Opacity – Adjust the transparency or translucency of the text (the default,100, is no transparency); Clicking “-” increases the text transparency and clicking the “+” reduces the text transparency.
Buttons
To Front/To Back – Changes the order in which the Overlay Type panels appear stacked (listed) in the Overlay configuration view. For example, if the Text Overlay panel is at the top of the stack, clicking “To Front” will send it to the bottom of the stack. Clicking “To Back” will send it back to the top of the stack.
Reset – Clears all settings pre-set in the current overlay.
Remove – Removes the Overlay. (Note, if you have not previously saved the Overlay configuration to a file, it is gone; But if it has been saved to a file, you can retrieve it and use it again.)