Data I/O

Select Channel 1 & Select Menu → Data I/O
Data Input / Data Output
SubC applications provide the option of getting Data Inputs from Rayfin Cameras and other applications or devices, such as those reporting EXIF (metadata about an image, including camera settings, date and time, depth, altitude and GPS location information) and other environment sensor data (water temperature, depth, etc.). This data can be saved to the Still image file &/or displayed as Data Overlay, which can also be save in the Recording video files (Topside storage only).
You can also output data that you are taking into the SubC application to other systems.
See Data Output section below.
Menu → Data I/O appears only when Channel 1 is configured with video input.
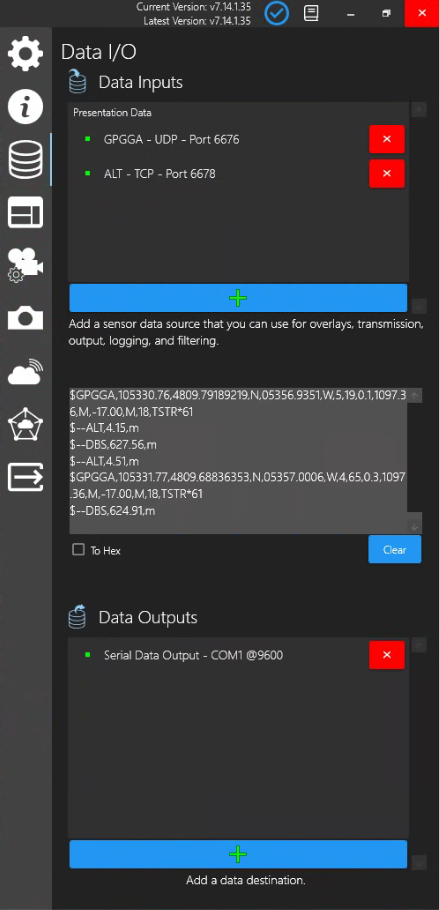
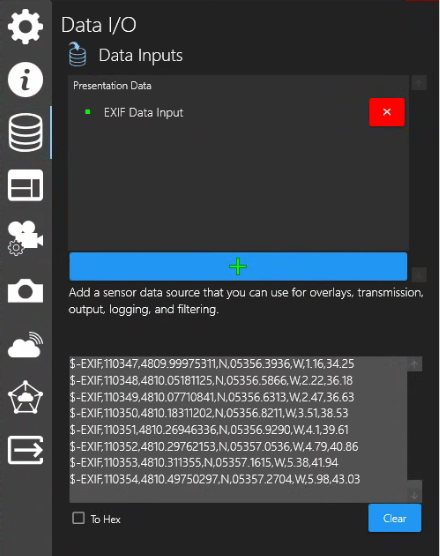
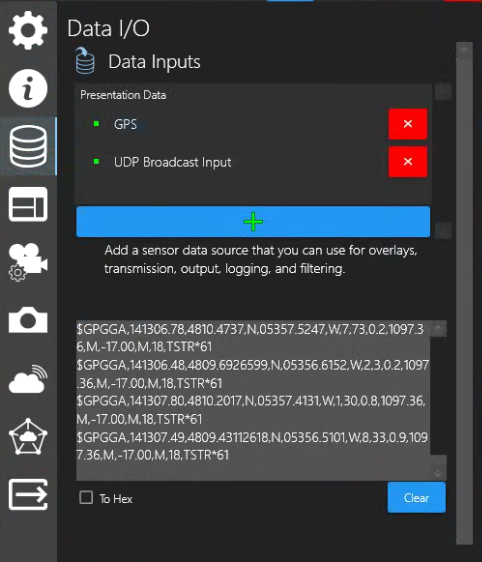
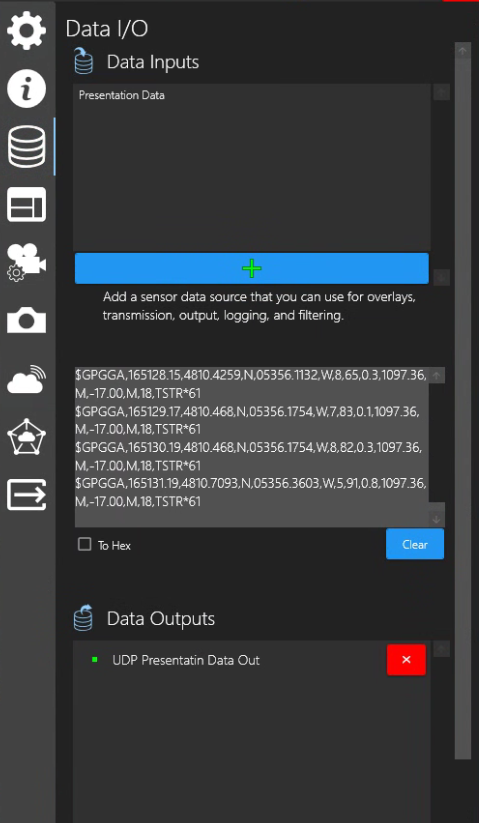
Presentation Data: If you have a Channel configured with Presentation as Input type, and if that Channel source to Presentation is also streaming data, that Presentation Data will automatically appear in Data I/O.
When you start recording, this data will be saved in a .csv file in the designated folder.
Data Input

Data Inputs
Rayfin Camera Data (Rayfin IP @ Port 8886). When you configure a Channel with Rayfin camera input, the Rayfin data automatically connects. (It is intentional that Rayfin data input does not have an “x” to disconnect).
UDP Data Input (IP @ Port)
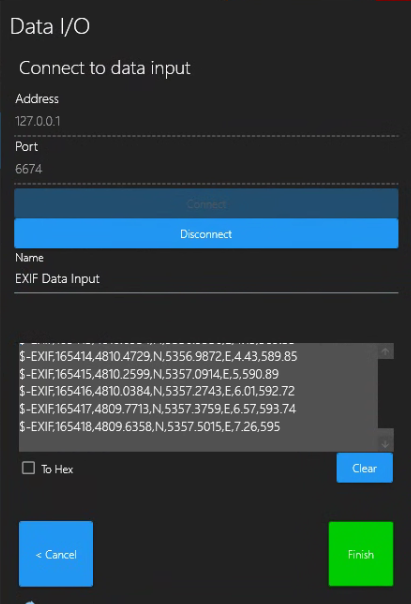
(Example using EXIF Data Input from NMEA as data source)
Click “x” button if you wish to disconnect from a connected data source.
Click the “+” bar to add another data source.
Options: UDP, TCP, Serial or UDP Broadcast
Incoming Data Preview window shows the data coming into the Channel from the Data Input source(s)
To Hex checkbox converts incoming data into Hexadecimal Notation format.
Clear button to remove/refresh the incoming data from the Incoming Data preview window.
Data Input and Data Output configuration examples are described below.
The next steps show how to add a Data Input.
Data Input Configuration
Start your Data Reporting application
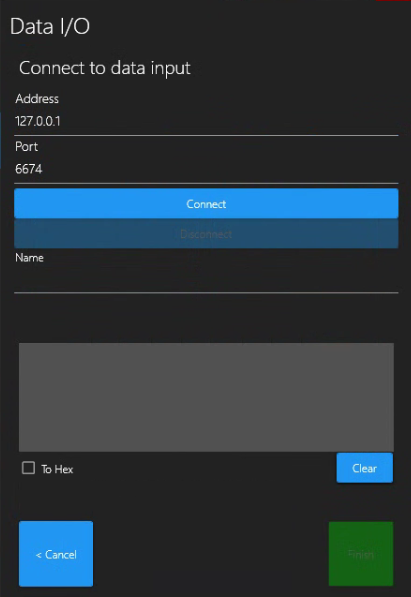
In the UDP example below we are using an NMEA data generator running on the same PC (IP 127.0.0.1) as our SubC application, but it can be running on another system within your network (enter the IP of the system that is generating the data)

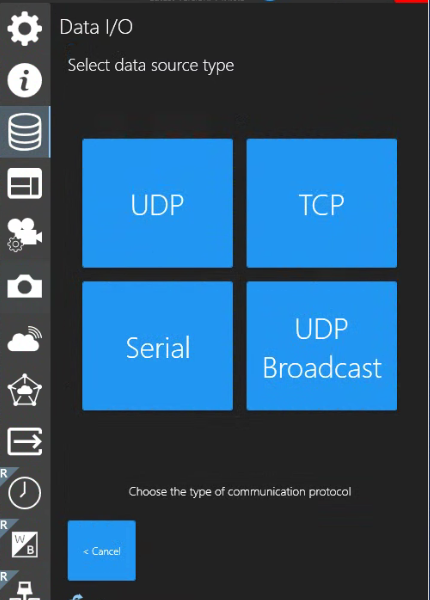
Click “+” Add button to add a data source
Select data source type: UDP, TCP, Serial, or UDP Broadcast for your data input.
These Data Inputs can then be used for Data Overlays, transmission, logging, and filtering.Click Cancel if you want to discontinue and return to the previous Data I/O UI.
Data Input Types: UDP or TCP
When you select UDP or TCP, the following configuration window will appear.
Address: Enter the IP Address of the Data source system.
Port: Enter the Data port number
Port number depends on your incoming data source
Name: Give your Data Import a meaningful name. (before connecting)
Click Connect
Data Preview window will populate with incoming data after you click Connect.
Disconnect will stop the data input (and re-enable the Connect button).
To Hex checkbox converts incoming data into Hexadecimal Notation format.
Clear removes the incoming data log and repopulates with fresh data.
Cancel if you want to disconnect the Data Input configuration window and return to the Data Input Type selection window.
Finish to conclude the Data Input configuration; The Data Inputs window is displayed again, and you’ll see your new UDP Data in the Data Inputs list.
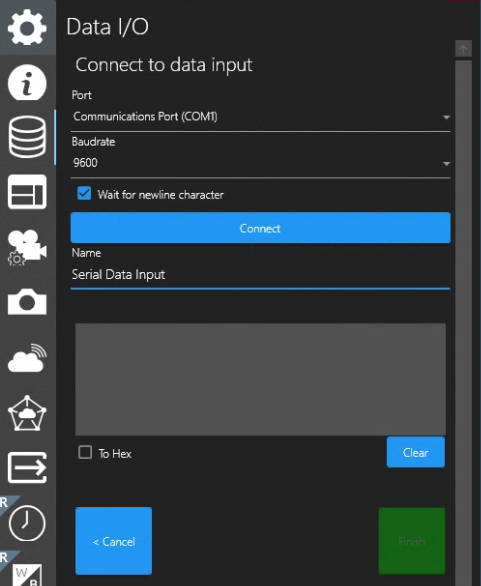
Data Input Type: Serial
Connect to data input
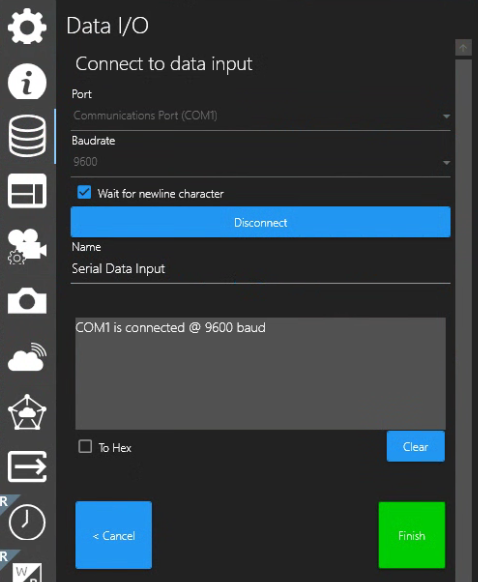
When you select Serial, the following Connect to data input window will appear.
Port - Select a serial port from the dropdown list
Baudrate - Select the rate at which information is transferred in a communication channel.
In the serial port example, the "9600” baud rate means the serial port is capable of transferring a maximum of 9600 bits per second.Wait for the newline character - Select this checkbox to ensure that the full data strings are transmitted before processing.
Name - Give your Data Import a meaningful name. (before connecting)
Click Connect.
Data Preview - Once connected, incoming data will appear in the Data Preview window.
To Hex checkbox converts incoming data into Hexadecimal Notation format.
Clear removes the incoming data log and repopulates with fresh data.
Cancel if you want to disconnect the Data Input configuration window and return to the Data Input Type selection window.
Finish to conclude the Data Input configuration; The Data Inputs window is displayed again, and you’ll see your new Serial Data in the Data Inputs list.
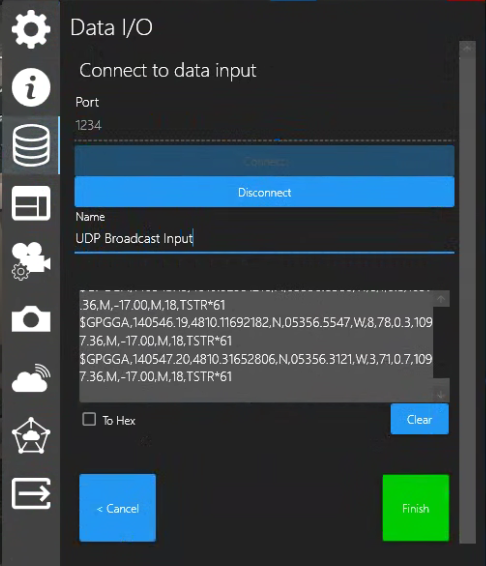
Data Input Type: UDP Broadcast
Select UDP Broadcast to connect to data being broadcast over your network by specifying Port only. (This is different from regular Data Input → UDP, where you must supply the Data Source system IP address and Port)
Port - Enter the specific UDP Broadcast port
Name - Give your Data Import a meaningful name. (before connecting)
Click Connect.
Data Preview - Once connected, incoming data will appear in the Data Preview window.
To Hex checkbox converts incoming data into Hexadecimal Notation format.
Clear removes the incoming data log and repopulates with fresh data.
Cancel if you want to disconnect the Data Input configuration window and return to the Data Input Type selection window.
Finish to conclude the Data Input configuration; The Data Inputs window is displayed again, and you’ll see your new Serial Data in the Data Inputs list.
Also, see Create an EXIF Data String
Your incoming Data can now also be displayed as an Overlay on the video (see Overlay → Data) and/or Output to another systems (see Data Output below).
Data Output
Menu → Data I/O
Below Data Input section you’ll see the Data Output section.
If you do not see Data Output, go to Menu → Settings – Options – User Interface and select Show Data Output checkbox.
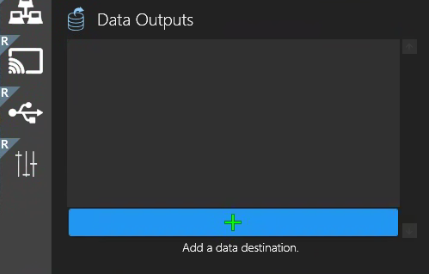
Click the “+” blue bar to Add a data destination.
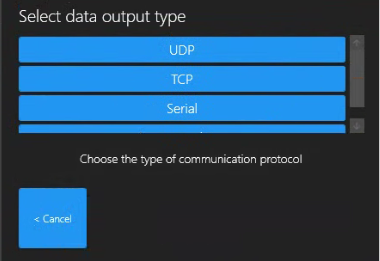
Select data output type communications protocol:
UDP
TCP
Serial
UDP Broadcast
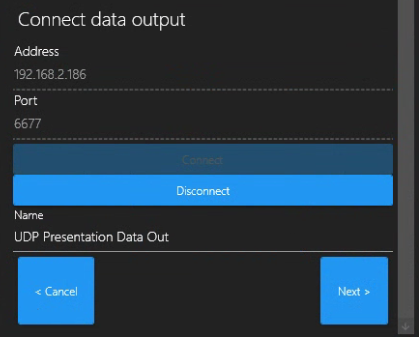
UDP Data Output Example:
On your SubC Software system, configure Channel 1 with Presentation Input with a Presentation that is streaming from another SubC Streaming enabled SubC Software system.
You will then see that data carried with the Presentation in your SubC Software system’s Data Input.
In the Data Output section, you can now send that Data out to another system.
Selected Data Output type UDP in this example.
Address: Enter destination system IP
Port: Enter the Port on which to send the data out
Name: Give your Data Output a meaningful name
Click Connect
Click Next
Click Finish
The system you have sent this data out to via its IP Address and specified port will be able to take that data in.