v3.5 Rayfin Software
Rayfin Control Software (RCS) runs topside and is designed for a fast and easy user experience.
To get up to speed quickly, there is a video tutorial for Rayfin software here:
https://www.youtube.com/watch?v=-8yuMiMAIyA&list=PLAWw3o4FUn2GOlihwZZPUPV9BscWgBicG
RSC Overview
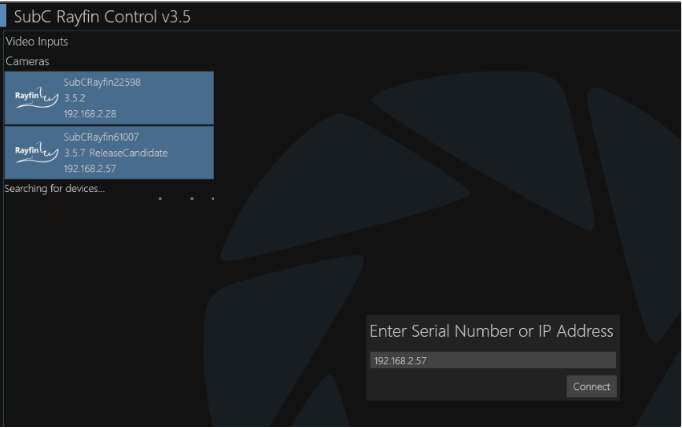
When Rayfin control software launches, you will see the available Rayfin camera(s) in the top left-hand corner of the UI. You can select a Rayfin from this list to connect or you also have the option of entering the Rayfin camera’s IP Address or Serial Number directly into the “Enter Serial Number or IP Address” filed and click Connect.
DHCP and Auto Detection
The Rayfin software polls the network every 10 seconds to find cameras using the Network Service Discovery (NSD) protocol
A DHCP server (often a router) will automatically assign an IP address to each device connected to the network.
Auto detection works when the camera is configured for DHCP.
Select a Rayfin Camera from the detected list on the left of the UI or enter the Serial Number or IP Address of a Camera and click Connect. See C17. Settings Menu → Communication section below.
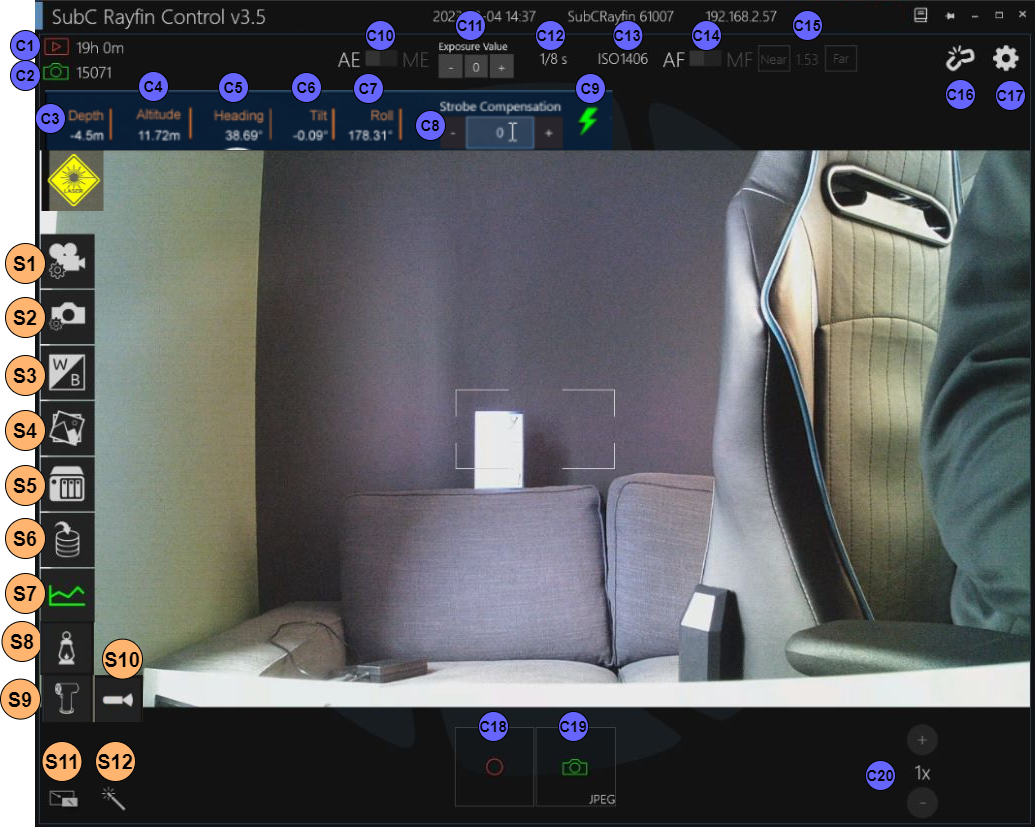
Once RCS has connected to a Camera, your will see the following RCS User Interface (UI). All of the features of the RCS UI are described below.
Camera Controls

C1. Recording Time remaining
C2. Estimate Number of Stills remaining
C3. Depth
C4. Altitude (Altitude requires an external NMEA compatible sensor to be attached to an Auxiliary port on the camera.)
C5. Heading
C6. Tilt
C7. Roll
C8. Strobe Compensation
C9. Strobe Toggle (Picture Flash)
C10. Auto/Manual Exposure toggle
C11. Auto Exposure value
C12. Shutter Speed
C13. ISO Value
C14. Auto/manual focus toggle
C15. Manual focus adjustment
C16. Disconnect
C17. Settings Menu (See below)
C18. Start / Stop Recording
C19. Take a Still. Hold to take continuous Stills.
C20. Zoom Controls.
Temperature - Shows only if camera is overheating.
Laser

When you select Settings → Aux Devices → TTL Laser or TTL Laser NMEA Sensor, the Laser icon will appear in the top, left of the RCS UI.
Also, the Laser Setting icon will appear. See S10. Laser Settings below.
Settings
Most of the Settings icons you see on the left of the UI appear when you connect to a Rayfin. Additional icons appear when you use the Settings menu and select these additional specific features. When you click on each of these icons, a corresponding menu will appear. Each of these Settings menus are shown below.
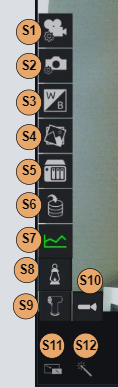
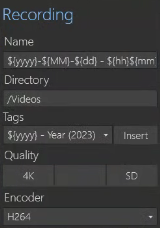
S1. Recording settings
 |
|
|---|
S2. Stills settings
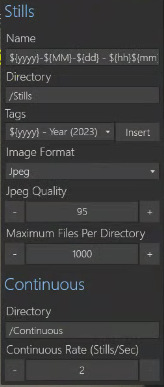 | Stills
Continuous
|
|---|
S3. White Balance / Color
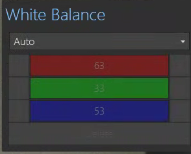 | White Balance - Select Auto or Manual from this drop down field. If Auto selected, the RCS will automatically adjust the white / color balance. If Manual selected, adjust the numbers in the RGB bars to your preference. |
|---|
S4. Gallery
Click to open File Manger where your video & stills are stored.
S5. Network Attached Storage (NAS)
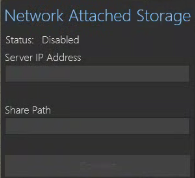 | If you wish to use Network Attached Storage, enter the NAS IP in the Server IP Address field and enter the Share path. Click Connect. |
|---|
S6. Data Input
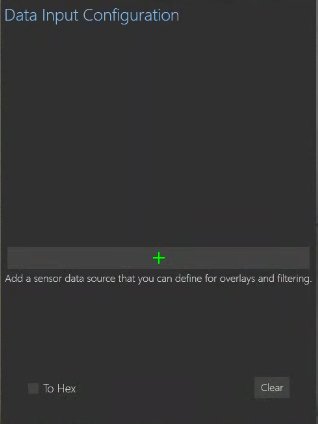 |
|
|---|
S7. Data Logging
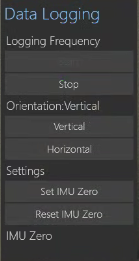 | Data Logging
|
|---|
S8. Lamp / LED Settings
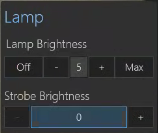 | Lamp
|
|---|
S9. Pan & Tilt
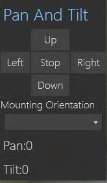 | Pan And Tilt
|
|---|
S10. Laser Settings
 | Laser Some brands of Lasers respond opposite to the On / Off commands sent when these buttons are clicked. Click Invert TTL so that the Laser responds correctly to On / Off. |
|---|
S11. Picture in Picture
Click Picture in Picture to display another, smaller image of the Camera view in the bottom, right of the UI. Click again to switch the small image with the larger main image. Click again to remove this smaller picture in picture image.
S12. Image Enhancement
Alternatively, click Image Enhancement to adjust the main image view to the equivalent of picture in picture.
C17. Settings Menu
The Settings Menu options are described in the pages that follow.


