IP Camera
An IP camera is a type of digital video camera that uses Internet Protocol to connect to a network.
The IP Camera Input type is used to connect to an IP Camera or an RTSP address.
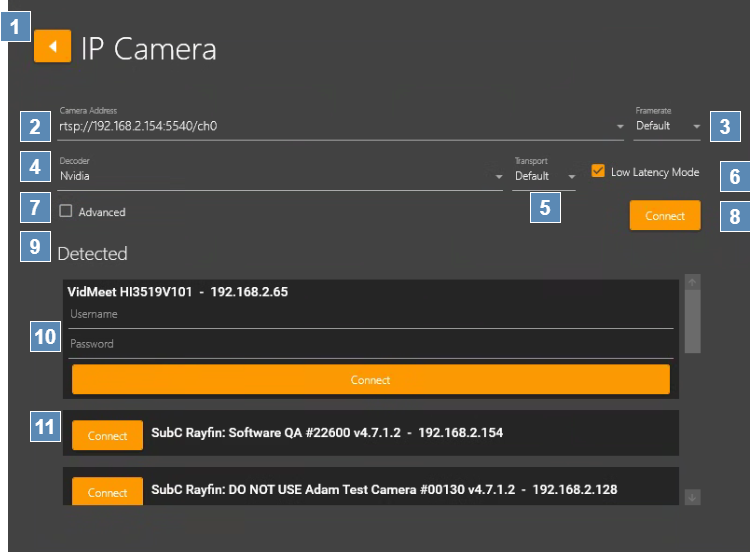
Back Arrow – Return to the Input selection screen.
Camera Address - Enter the IP Camera Input address.
Decoder - Options: QuickSync, CPU or Nvidia*
Nvidia option will only appear if the system has Nvidia Video Card installed.Framerate - Select your framerate preference.
Default = 30 or select from range list [ 60 | 59.94 | 50 | 30 | 29.97 | 25 ]Transport - Select from options: Default = UDP or select UDP or TCP from list.
Low Latency Mode - Select this checkbox to reduce latency from the camera by preventing the computer from building up buffered video.
Advanced - When the Advanced checkbox is selected the Parameters field will appear revealing the default values. If required, you can add to / adjust these parameters.

Connect to connect to the selected IP Camera.
Auto Detected Cameras - SubC Software utilizes ONVIF protocol to detect cameras.
Other IP Cameras - If you have other IP cameras on your network that use ONVIF protocol, a list of each detected camera will also appear. Enter the camera authentication username and password and click Connect.
SubC Rayfin Cameras - If you have Rayfin cameras connected on your network these also will be detected & displayed by the Stream Desktop application.
Camera Address Examples:
Syntax | Example |
|---|---|
rtsp://[ipaddress]:[port]/path | rtsp://192.168.2.13:5540/ch0 |
rtsp://[cameraname]:[port]/path | rtsp://Camera1:5540/ch0 |
rtsp://[username]:[password]@[ipddress]:[port]/path | rtsp://admin:openit@192.168.2.13:5540/ch0 |
rtsp://[username]:[password]@[cameraname]:[port]/path |
|
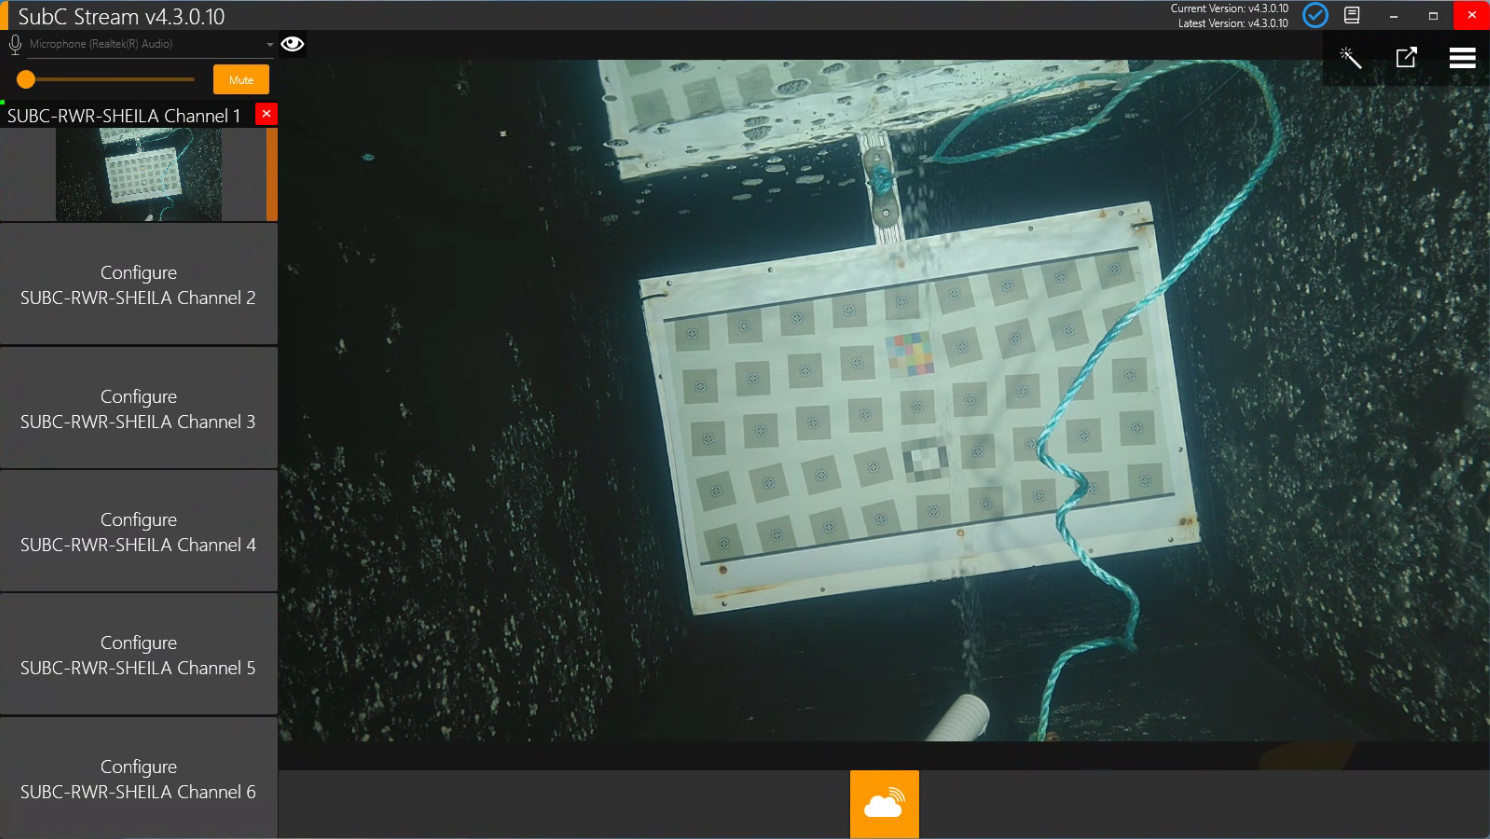
Once the IP Camera Input is connected to a Channel, its source video will appear on both the small Preview screen (left column) and Main screen (center).


Click the Start Streaming button.
When Streaming is started, the button changes to include a red box to indicate streaming is activated. Click this button to stop streaming.
You can also control the Stream Desktop Channels via the SubC Streaming Service Web application.
See Streaming section in this document for more information. Also, see SubC Streaming Service Web User Manual.