Streaming
SubC Streaming Service is a cloud-based software that is accessible from systems connected to the Internet.
The SubC Stream Desktop application works in concert with your SubC Streaming Service account and SubC Presentations, allowing you to live stream a variety of input video sources from offshore (i.e. ROVs and/or Vessels) to SubC Presentations where your invited viewers can watch through an Internet web browser from anywhere in the world.
With SubC Streaming Service, you can Stream the Channel videos to the Internet and securely control who can view by creating Presentations in SubC Streaming Services Web application.
Your Presentation invitations include a link and Access Code and are emailed to your viewers from within each Presentation.
SubC Stream Desktop Application
To use the Streaming feature in SubC Stream Desktop application you need to a SubC Streaming Service account, and you need to Activate your Stream Desktop host system with your Streaming Service Group.
When you select Menu → Streaming, if you get this activation prompt login to SubC Streaming Services Web application to generate an Activation Code and enter it in this Activate prompt on your SubC desktop application.
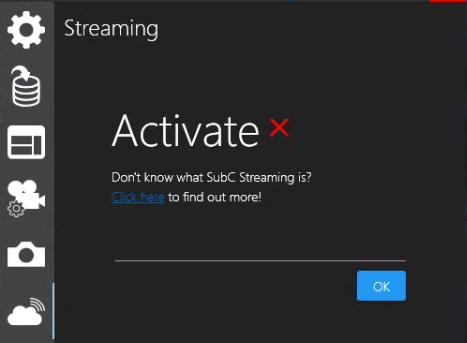
This “Activate” step registers your SubC desktop application host PC with your Group in the SubC Streaming Service. You’ll only have to do this activation once per PC when your first install the SubC desktop application. However, if you have more than one Streaming Service Group, you can deactivate the Stream Desktop application host PC from one Group and repeat the Activation steps to join another Group.

Menu → Streaming
With a Stream Channel configured with video Inputs, Select Menu → Streaming
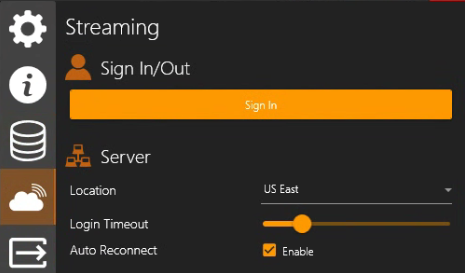
Sign In/Out
Sign In to your Streaming Service account using your employee email address.
Example: john.smith@yourcompany.com
SubC Stream servers are geographically distributed. Typically, you’ll select a Stream server that is in a region nearest to which your vessel or project is operating. However, you can select any Stream server you wish as they are all accessible globally.
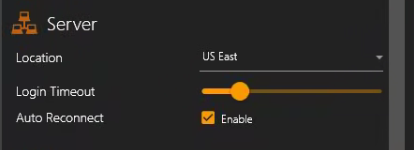
Server
Location: Click the dropdown field and select from the list of available SubC Stream Servers.
Login Timeout: Is set to default of 15 seconds. You can adjust this to a longer wait time if your network takes more than 15 seconds to respond to the transmissions between your system and the Stream server.
Auto Reconnect: Default Enable. If you lose your Internet connection, or connection to the Stream server is interrupted, as soon as the service is re-established any streams that were started before the interruption will resume.
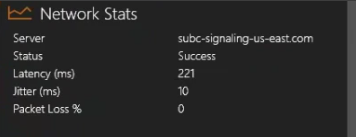
Ideally,
Latency should not exceed 150ms.
Jitter should be below 30ms.
Packet loss % should be no more than 1%
Network Stats
Server: This field will populate automatically with the domain name of the Stream Server based on your selection (below in the Server → Location field).
Status: Indicates the status of the connection with the selected Stream Server: Success or Failed (Failed if the server is unavailable or unreachable due to Internet accessibility issue).
Latency (ms): Latency refers to the delay in network traffic between your PC and the selected SubC Stream server.
Jitter (ms): Jitter is when packets arrive at the destination in a different order than they were sent. (Typically caused by network congestion, route changes, etc.) The longer it takes for packets to arrive, the more jitter can negatively impact the video and audio quality.
Packet Loss %: Packet Loss happens when packets travelling across the network fail to reach the destination (usually caused by network instability and/or congestion).
Recommended Streaming Settings
Transmission | Bit Rate |
|---|---|
4K | 4Mbps+ |
FHD | 512Kbps - 1Mbps |
HD | 256Kbps - 512Kbps |
SD | 64Kbps - 256Kbps |
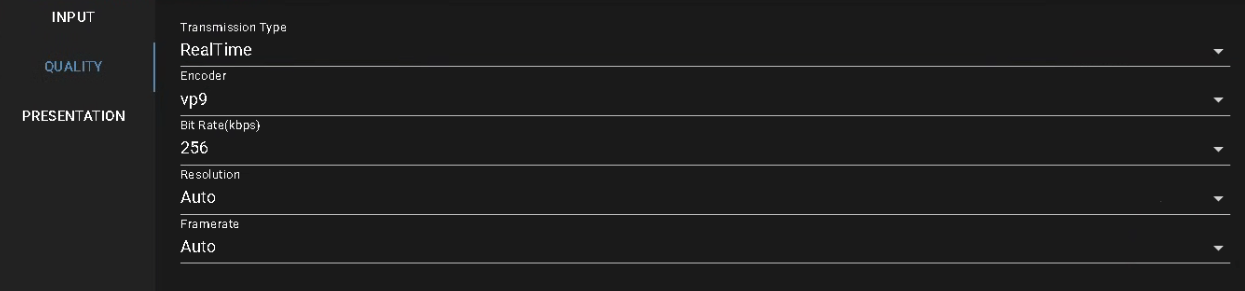
RealTime streaming is useful when you need very low latency video (such as for piloting a craft). Typically, this type of stream has sub-second latency but minimizing latency means no buffering. Frames are delivered and displayed as soon as they become available. The lack of buffering may result in the video being jumpy on slower networks.
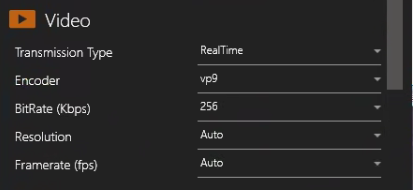
Video - RealTime
Transmission Type: RealTime
Encoder: vp9 | gpu_h264 | h264
vp9: Default=vp9; vp9 is a higher compression codecs, allowing for better quality images at a lower bitrate/bandwidth requirement; Stream at 1bit/sec; requires higher CPU resources
gpu_h264: Is a lower compression codecs; Streams at higher bitrate/bandwidth requirement; Stream at 4bit/sec; requires less CPU resources as the performance is video card based.
h264: Is similar to gpu_h264 in all aspects, except it utilizes the CPU resources; Select h264 if your system video card does not support gpu_h264 but you wish to use lower compression/stream at a high bitrate/bandwidth.
BitRate (Kbps): Default = 256
Selection Range: 16-5120.
Resolution: Default = Auto
Selection Range: 1920x1080, 1280x720, 720x480, 320x240.
Framerate (fps): Default = Auto
Selection Range: 5, 15, 20, 29.97, 30.
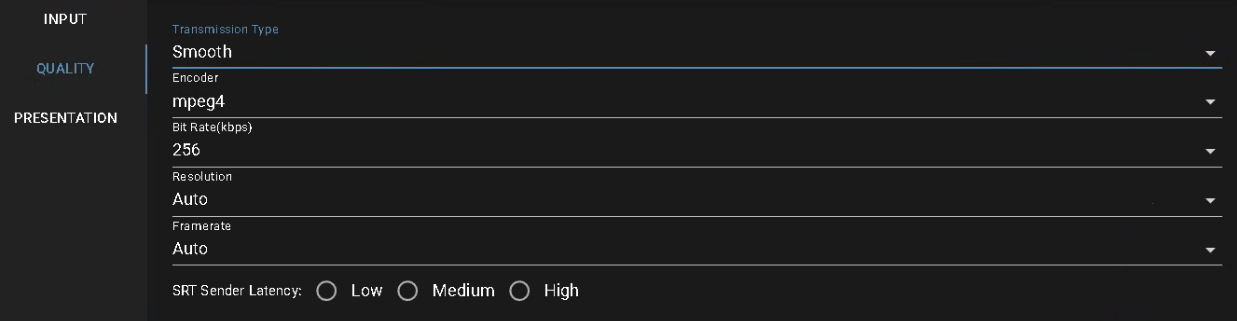
Smooth streaming is useful when you need a consistent stream, but latency and quality are not as much of a concern. Smooth streaming buffers several seconds of video frames to ensure smooth playback and also possesses a technology to cope with slower networks by delivering short fragments of video and verifying that each was played back at the expected quality level. If one fragment doesn't play with the expected quality, the next fragment is delivered at a lower quality level.
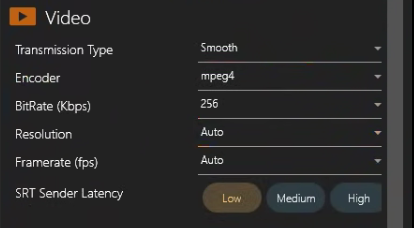
Video - Smooth
Transmission Type: Smooth
Encoder: mpeg4 | n265
BitRate (Kbps): Default = 256
Selection Range: 16-5120, 320x240
Resolution: Default = Auto
Selection Range: 1920x1080, 1280x720, 720x480, 320x240.
Framerate (fps): Default = Auto
Selection Range: 5, 15, 20, 29.97, 30.
SRT Sender Latency: Low | Medium | High
Low = 1s, Medium = 3s, High = 5s
These settings allow you to adapt to variations in your Network quality.
You can select Low = 1s, Medium = 3s, High = 5s - whichever best suits your current Network conditions.
For example, if you have optimal Network conditions, low dropouts, less buffering required, select Low for 1 seconds of buffering. If you need more buffering, select Medium for 3 seconds or High for 5 seconds.
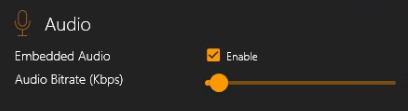
Audio
Embedded Audio: If you have a microphone connected to your system through which you would like to communicate/add narration during your video streaming transmission, select Enable checkbox.
Audio Bitrate (Kbps): Default is set to 64Kbps depending on your Network performance. You can adjust the audio bitrate to improve the audio quality.
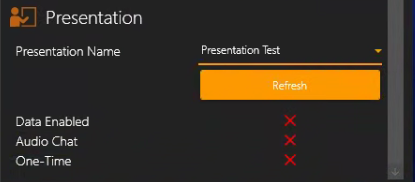
You need to be logged into the SubC Streaming Service (See Menu → Settings → Sign In/Out) to activate the Presentation Name field to become a drop-down / selection field.
Create your Presentations from within the SubC Streaming Service Web Application. Click Refresh to make new Presentations available in this selection field.
Presentation
Presentation Name: Displays the Name of the Presentation that this Channel will stream to.
Data Enabled: Displays as red “X” if not enabled / green checkmark if enabled on the Presentation
See Data Input section for more details.Audio Rooms: Displays as red “X” if not enabled / green checkmark if enabled on the Presentation
See Audio Rooms for more details.One-Time: One-Time Stream is optimized for quickly sharing a single channel of video, (without the need for an access code as is an option in regular Presentations). The link to a One-Time Stream will expire as soon as the Channel stops streaming, and a new link will be generated each time the Channel streaming is started again. See Presentations → One-Time Stream
Streaming Service Web Application
In Streaming Service web application → Groups, you can interact with your Stream desktop application’s Channels.
Similar to the Stream desktop application UI, you can also configure the Channels from within the Streaming Service web UI and start / stop Streaming.
See SubC Streaming Service Web User Manual → Home Groups for details on Configuring Channels Input, Quality and Presentation within the Streaming Service web UI

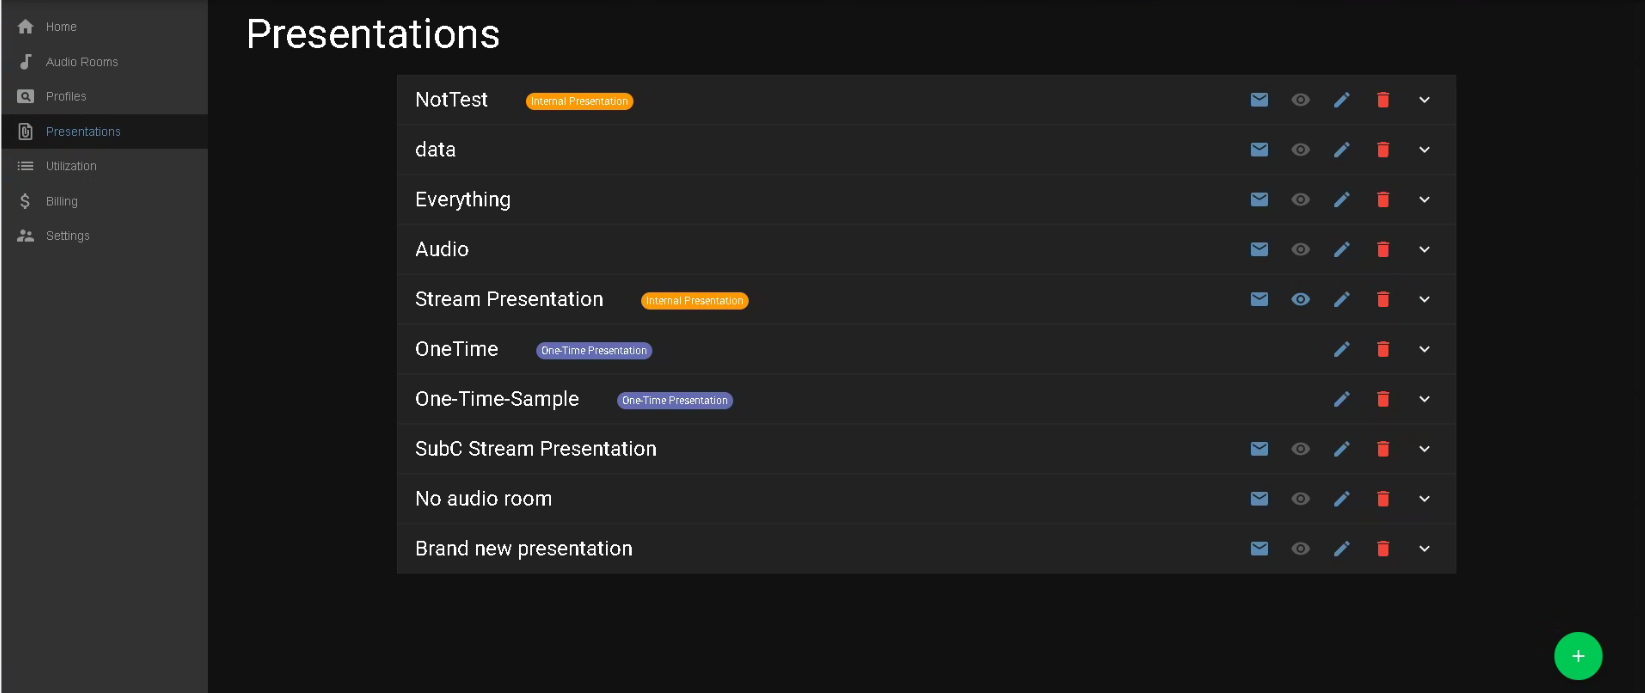
Presentations
In SubC Streaming Service Web application
Select Menu → Presentations to Create and View/Edit your Presentations.
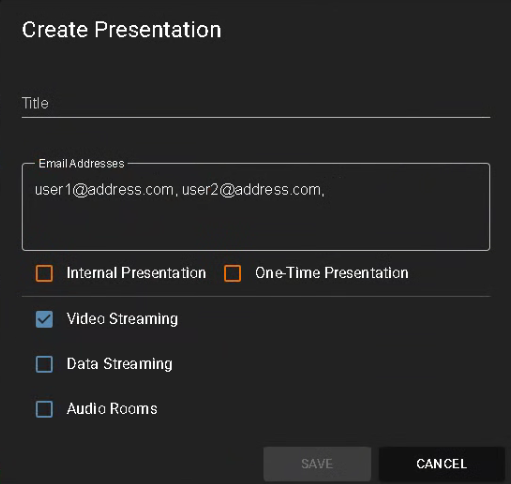
Create a Presentation

Title: Give your Presentation a unique & meaningful name (such as a Project Name)
Email Addresses: Enter email addresses of those you wish to invite to view your Presentation (separate emails addresses with a comma)
Internal Presentation: Internal Presentations are meant for testing / setting up before a Live Project. Internal Presentations have a SubC Logo watermark overlay on the video and have a lower use cost that Live Project Presentations.
One-Time Presentation: A One-Time Stream is a convenient way to quickly stream & share a video.
You can share a One-Time Stream URL and open it in a web browser.
You can also take a One-Time Stream URL in as Presentation Input on a SubC Channel
You must select at least Video or Data. Note, you can now stream Data without Video
Video Streaming: To enable the Video streaming feature on the Presentation
Data Streaming: To enable the Data streaming feature on the Presentation
Audio Rooms: To enable the Audio Rooms feature on the Presentation

 | Click Email button to send invitations to those whom you’ve added to your Invitees list. 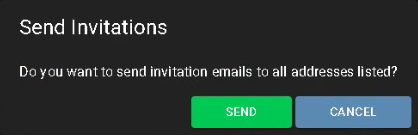 |
|---|---|
 | Click View button to open the Presentation Viewer page 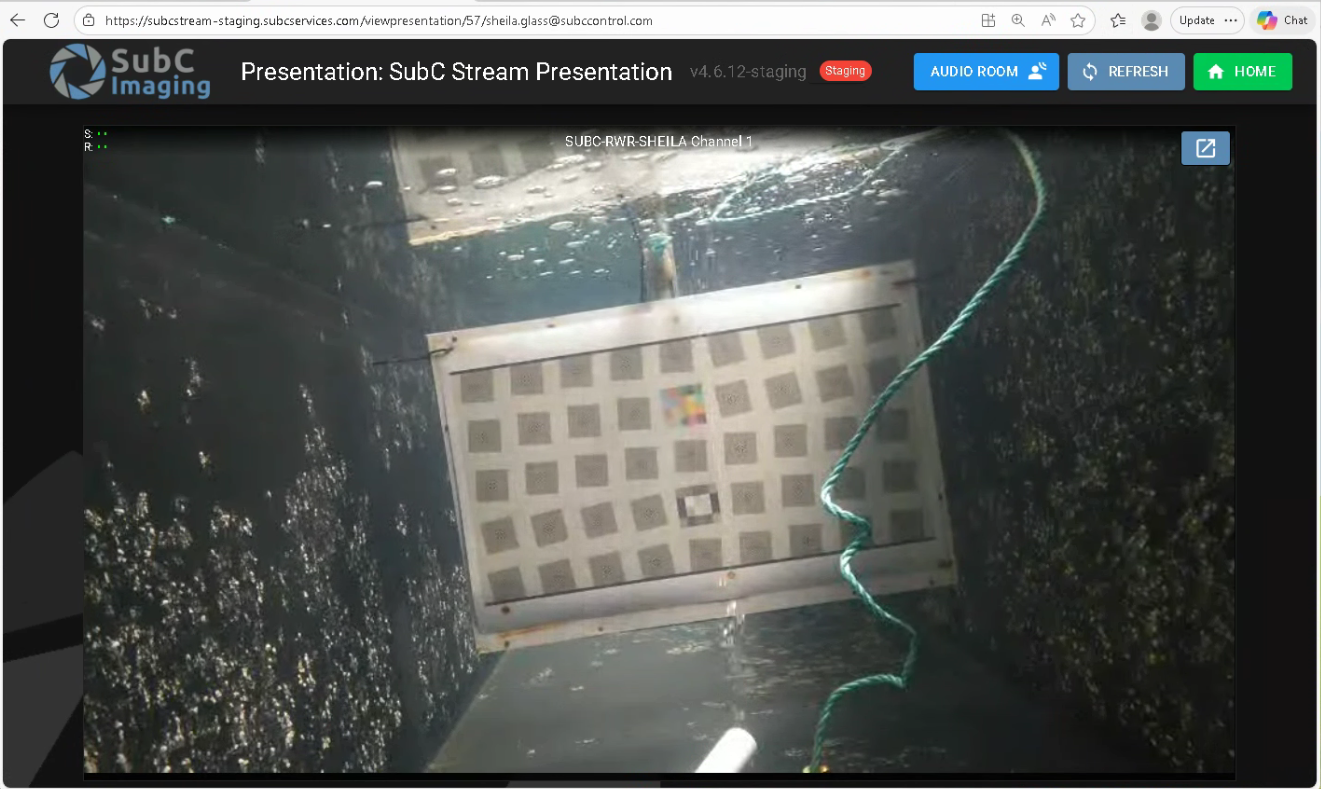 |
 | Hold the cursor over the Presentation Name to Edit the Presentation Name  |
 | Click Trash Can button to Delete a Presentation 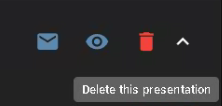 The Presentation is actually sent to Archive; If you change your mind and want to restore the Presentation, go to Menu → Settings → Presentations → Show Archive and click the Recycle button to put the Presentation back in your Presentations list. You’ll see this message you try to delete a Presentation that has a Stream Source (a Channel that has this Presentation selected in its configuration) still attached to this Presentation; Go to Menu → Groups → System → Channel and select a different Presentation for that Channel. 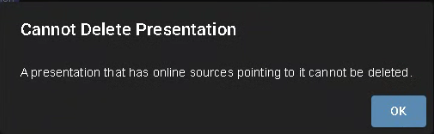 |
 | Expand to show the Presentation details 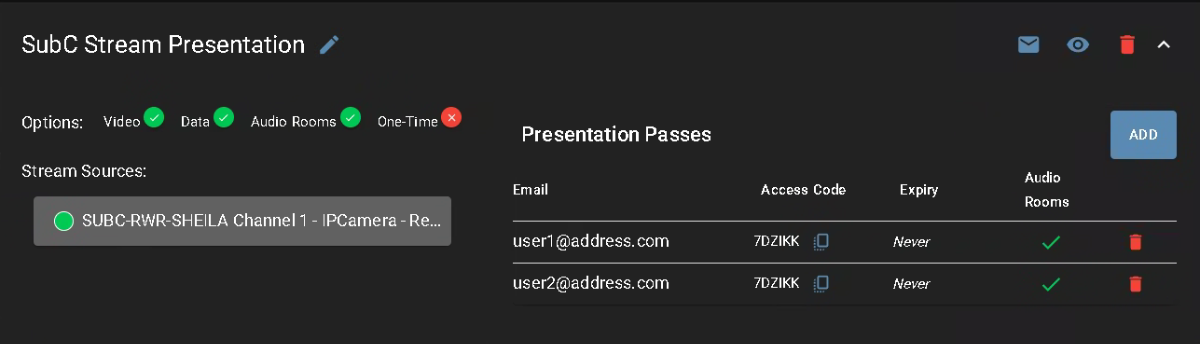 |
Remotely Configuring & Streaming Channels
You can also configure the Stream Desktop Application Channels remotely through the Streaming Service Web application.
Once the Stream Desktop application is opened on the host PC (Internet access on the PC is required), it will appear in the Streaming Service Web application in the Streaming Service Group (your Group) in which it has been Activated.
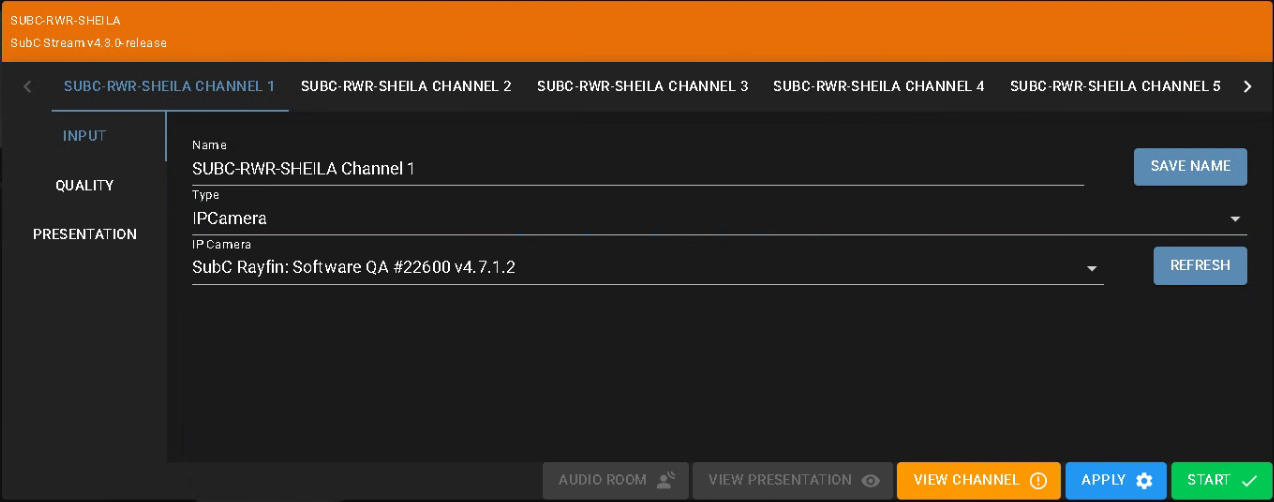
The Stream Desktop hostname and Stream Desktop application name and version appear on the top, left.
The Channels of the Stream Desktop appear in a row.
For each Channel there is a Menu to configure the Channel Input type, Quality and Presentation
Along the bottom, depending on the Presentation associated with the Channel and the Features it has been assigned, the following buttons appear.

The Channel Menu items, Input, Quality and Presentation are described in the section below.
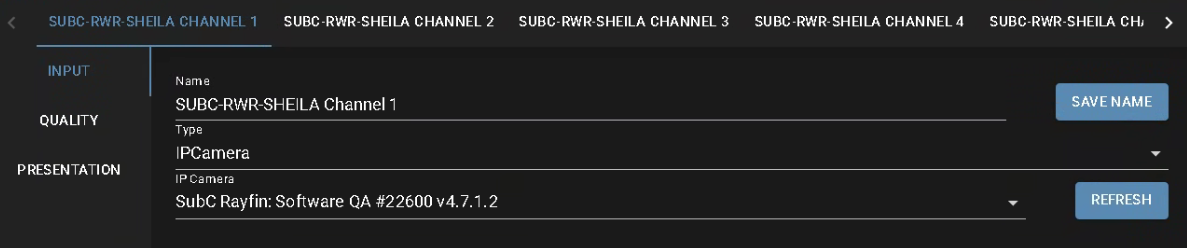
Input
Name - By default, the Stream Desktop application PC’s hostname, and the Channel number appear in the Name field.
You can rename the Name of the Stream Desktop application Channels.
By directly editing the Name field in this Streaming Service Web application UI and click Save Name
Or, by directly editing the Name field in the Stream Desktop application Menu → Channel Info → Channel Name
Type - Select a Channel Input Type from the dropdown filed list.
Capture Card, IP Camera, RTSP Address, Screen Capture, Window Capture, Presentation Input or OneTimeStream
Next Field(s) - Depending on the Input Type selected, other field(s) will appear below with selectable option(s) based on the Type.
RealTime
Smooth
Quality
Transmission Type - RealTime or Smooth
Next Field(s) - Depending on the Transmission Type selected, other field(s) will appear below with selectable option(s) based on the Type.

Presentation
Presentation - Select a Presentation from this dropdown list to which this Channel will send its video &/or data when actively streaming.
Next Field(s) - Depending on the Presentation selected, other field(s) will appear below with selectable option(s) based on the Features included when the Presentation was created.
See SubC Streaming Service Web User Manual for more detailed information.