License Options & Software Installation
SubC License Options
We have two licensing methods available for SubC Applications, Dongle and Virtual.
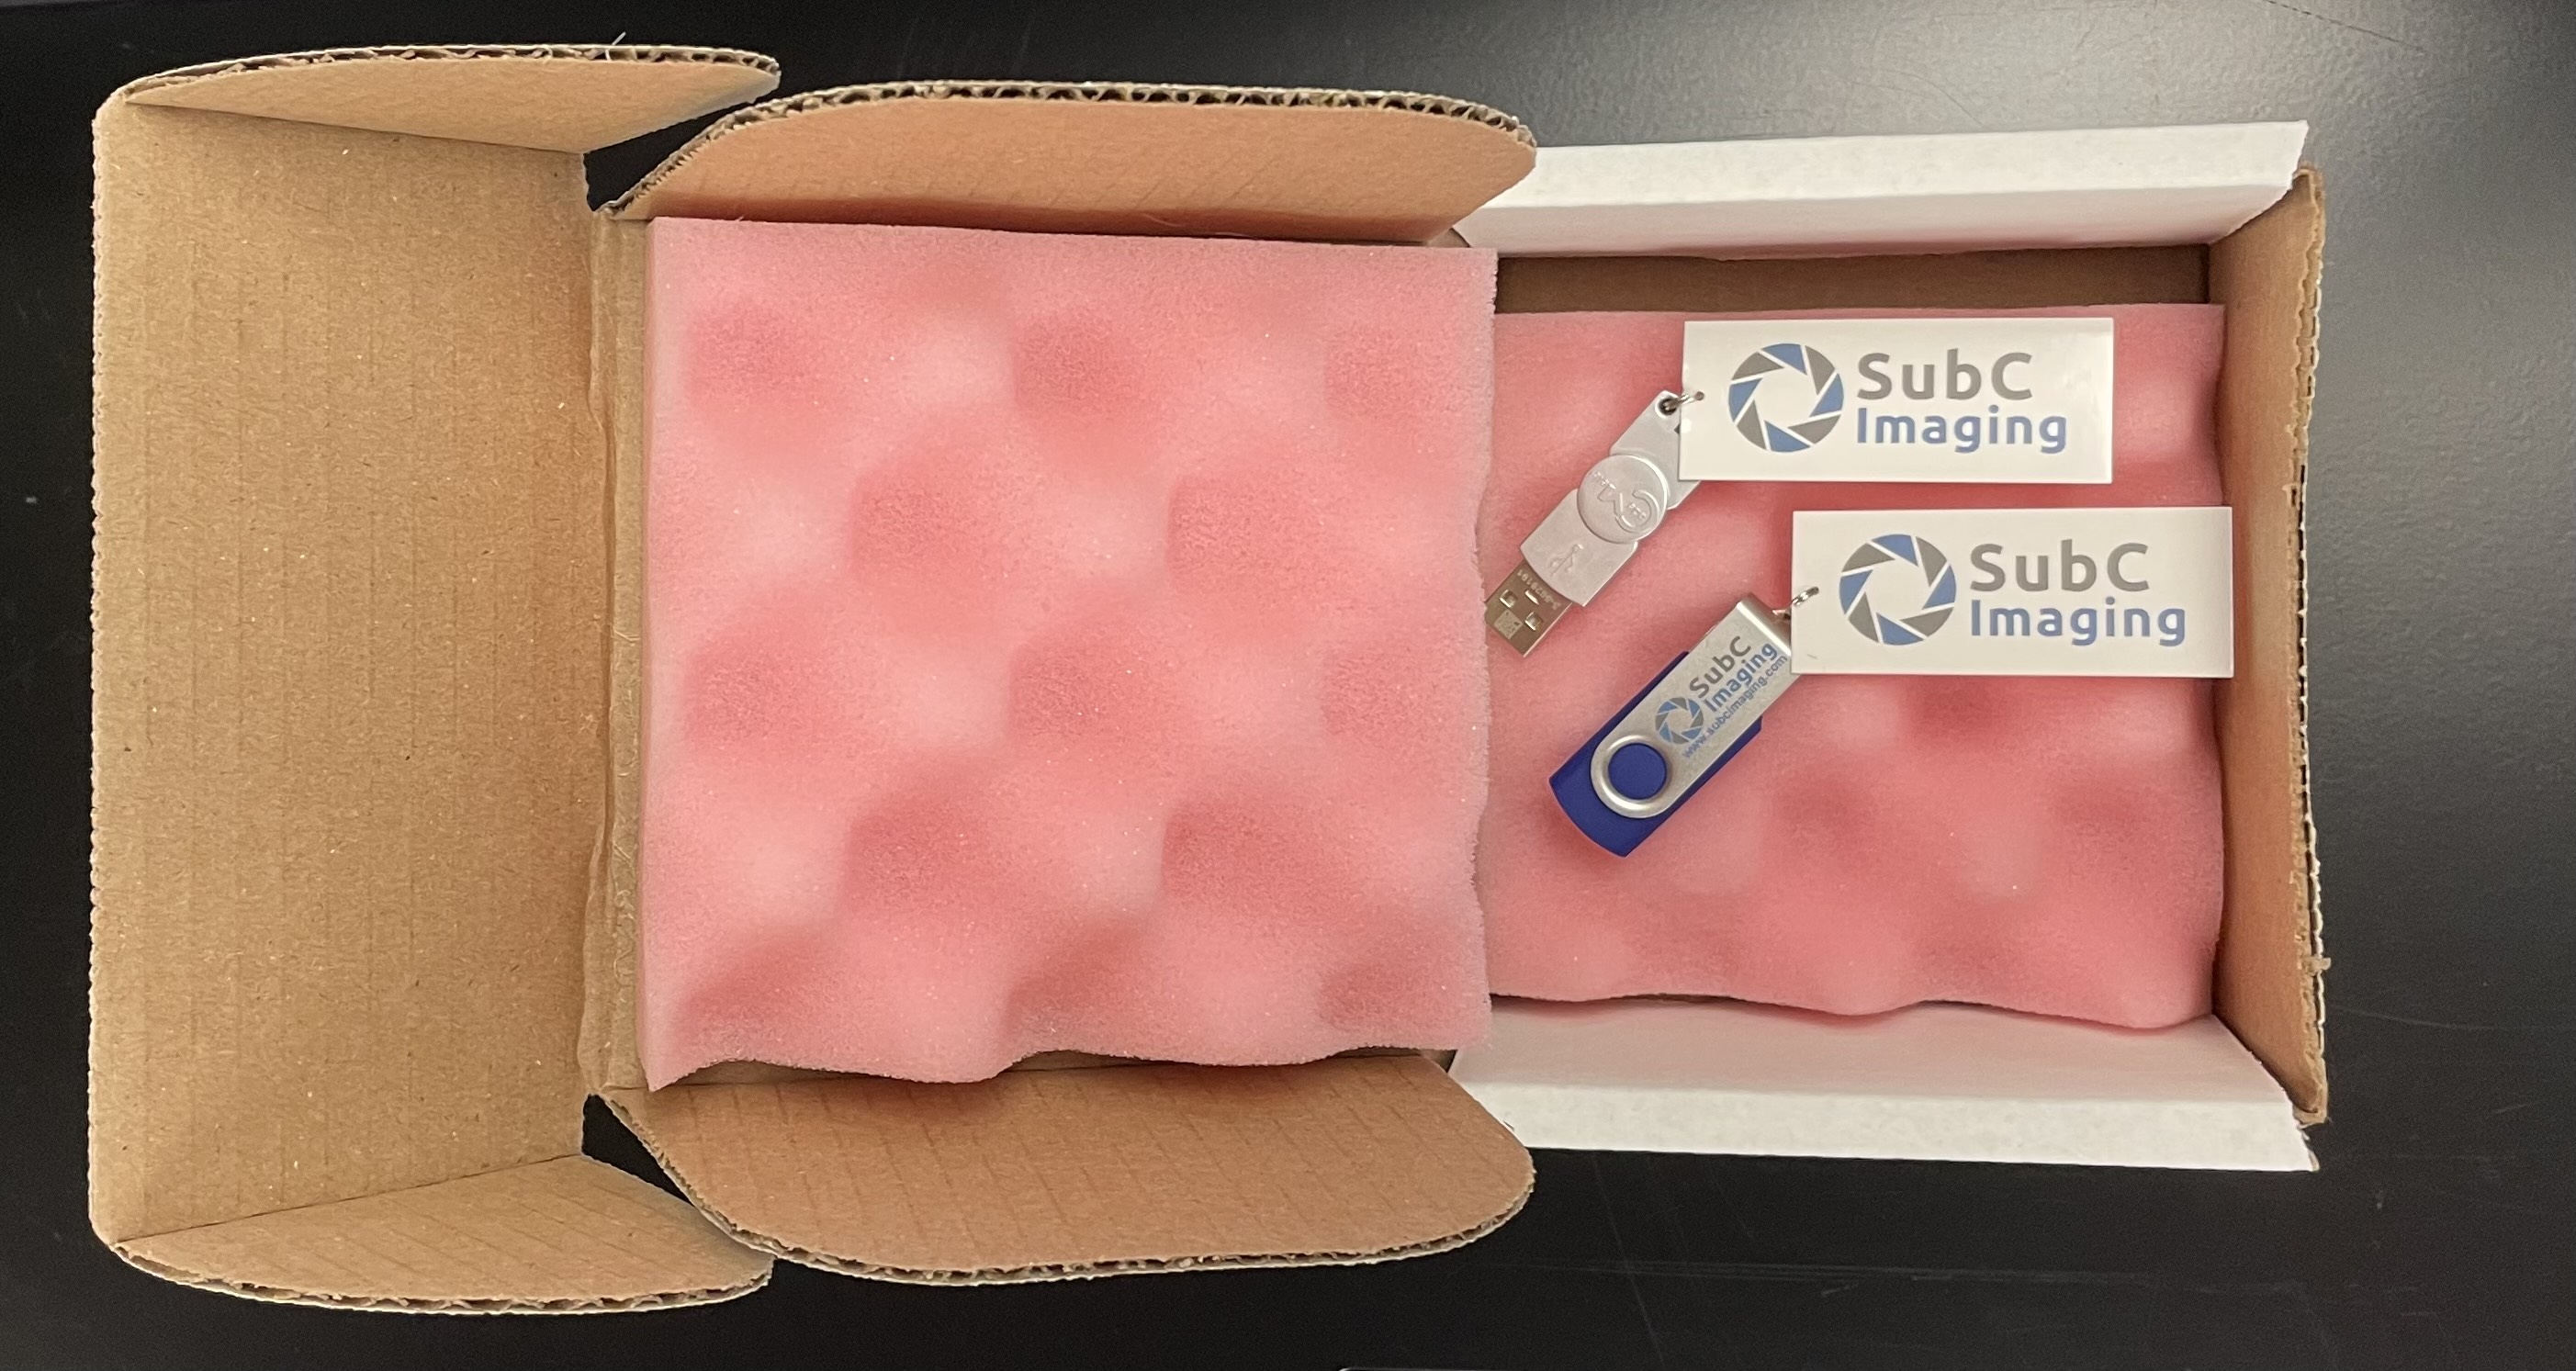
Option 1 - License on USB Dongle - Portable
If you wish to have the portability to run the SubC Software applications on various systems, we can provide you with the Software installation file on a USB thumb drive and the Software CodeMeter License on a USB dongle.
Plug the flash drive that contains the SubC Software installation file into a USB port on the system you wish to install.
Open a Windows File Explorer and navigate to the flash drive.
You can copy the SubC Software Installation file to a folder on your system and run the installation from that location if you so choose.Run the SubC Software installer and follow the prompts through the installation process.
Plug the CodeMeter License Dongle into a USB port on the system before launching the SubC Software application.
The SubC Software applications will not run unless the CodeMeter License dongle is plugged into the system. If you wish to run SubC Software application on multiple systems simultaneously, you will require a CodeMeter License Dongle for each system.
Option 2 - Virtual License - Dedicated
If you wish to use SubC Software application on a dedicated system, we can provide you with a link to download the SubC Software installation bundle and we provide you with a Virtual CodeMeter License Update file to import onto the SubC application host system.
Your SubC Account Manager will contact SubC Support Team support@subimaging.com to make a request to generate your SubC Software Virtual License Request file & License Update file.
This process is described here: SubC License Request & Update.
SubC Software Download
Download the latest version of SubC DVR+ / SCI: https://getdvr7.subcservices.com/
Notice the Software Version Status indicator at the top, right of the SubC application UI. When the system is connected to the Internet, this indicator will let you know when there is a newer software version of the SubC application available.
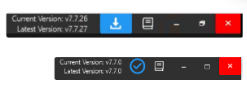
The blue download button indicates there is a newer version of SubC software application available. Click this button to download the latest version and install at your earliest convenience.
The blue checkmark indicates that the most current version of the SubC software application is installed.
SubC Software Installation
If you are using a SubC Software Dongle License (portable to multiple systems), plug the License Dongle into the computer USB port. The License Dongle must be plugged into the SubC software host system for the SubC Software application to launch.
If you are using a SubC Software Virtual License (not portable, dedicated to the system), the virtual license can be imported onto the system after the initial SubC Software installation.
See SubC License Request & Update
SubC DVR+ v7.14 & ReviewStudio Software Installation
Open the system Downloads folder and click “SubCDVR+ [version].exe” to run the SubC Software installer.
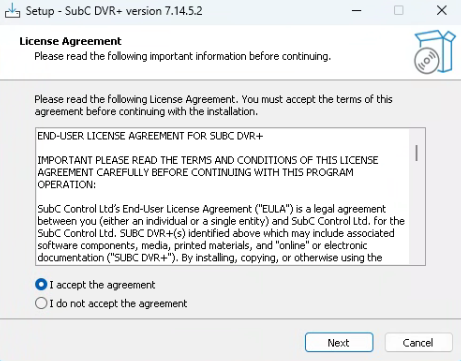 | License Agreement - Select I accept the agreement and click Next. |
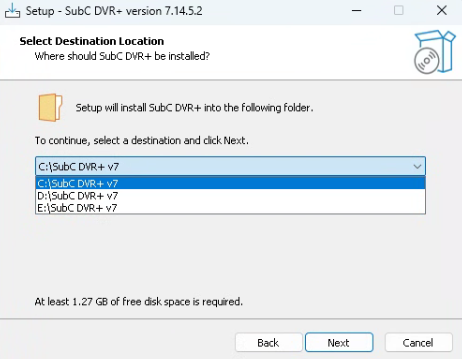 | Select a Destination Location If you have multiple drives on the system, you can select which drive you want to install the SubC DVR+ software. |
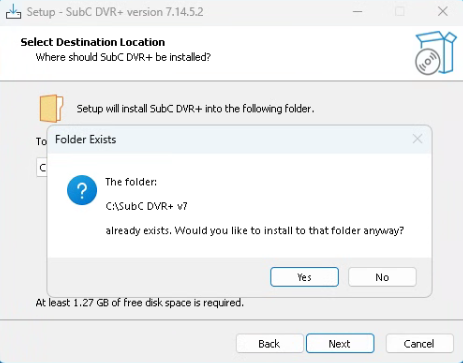 | Folder Exists If you have installed DVR+ on the selected disk before, you will be prompted to confirm to proceed. |
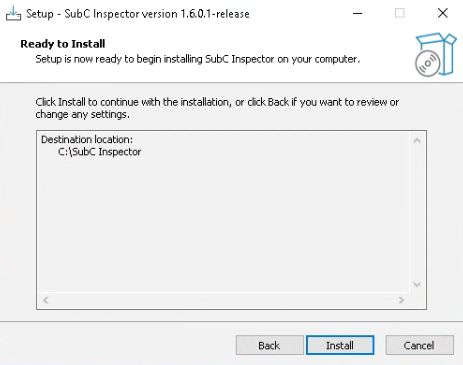
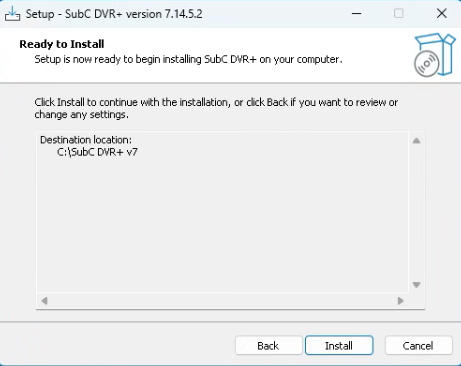 | Ready To Install Click Install to proceed. |
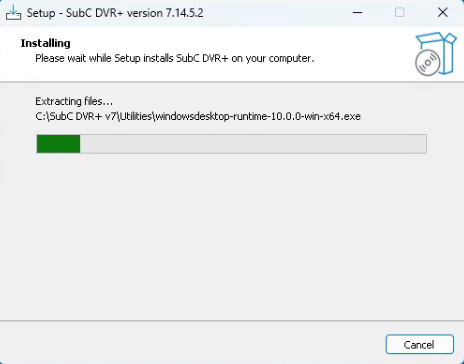 | Installing Please wait while the Setup installs SubC DVR+ on your system. CodeMeter Runtime Kit: The first time and occasionally on subsequent SubC application updates, you may be prompted to run the WIBI CodeMeter Runtime Kit Setup. This pertains to the SubC application License. Click Next and complete this installation as well. 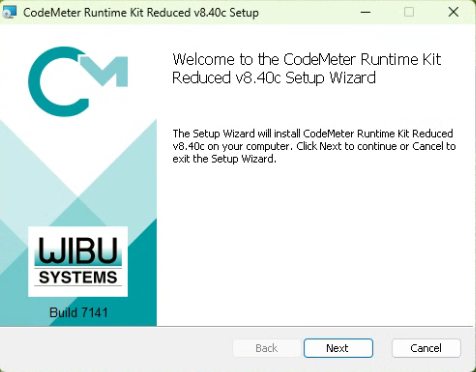 |
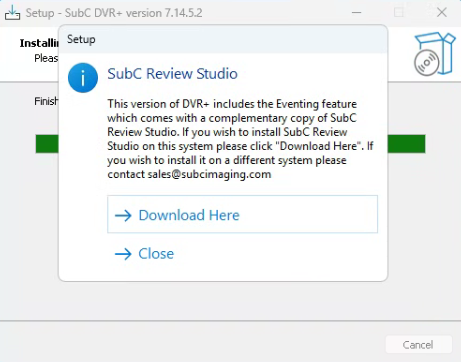 If you wish to install SubC ReviewStudio on another standalone system, you will need a SubC ReviewStudio license for that system. | SubC Review Studio Download You will be prompted to download the SubC Review Studio installer on this system. Click Download Here to proceed. The SubCReviewStudio [v1.0.2.2].exe installer will be downloaded to the system Downloads folder. You can install ReviewStudio on the same host system as the DVR+. ReviewStudio will run off of the DVR+ License, but you can only have either the DVR+ or ReviewStudio application open at a time, not both at the same time, else you’ll see a “WIBU License Error”. You can copy the ReviewStudio installer to another standalone system dedicated for Inspection Review (this is the typical use case) or download the ReviewStudio installer from this link. |
 | Completing DVR+ Installation If you already have your DVR+ / SCI License, select Launch SubC DVR+ Click Finish If this is the first time installing SubC DVR+ on your system a License will need to be in place before the application can open. If you have a physical Dongle License, plug it into the computer before launch / opening the SubC application. If you chose to use a Virtual License, unselect Launch and click Finish. Then see SubC License Request & Update and contact SubC Support to Request a Virtual License. Once the Virtual License is imported, you can then launch SubC application from the shortcut icon on the Windows Desktop. |
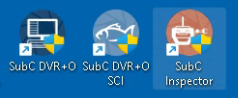
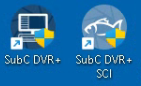  | SubC DVR+ and SubC DVR + SCI application launch icons will appear on the system desktop. Run the SubC ReviewStudio installer if you selected to download to the DVR+ / SCI host system or on a standalone SubC Review Studio host system. |
SubC Inspector
SubC Inspector has been replaced in DVR+ v7.14 with our new Eventing feature and the new SubC ReviewStudio.
However, SubC Inspector can still be used with DVR+ / SCI v7.14 and will be supported until Q2 2027.
If you are installing DVR+O / SCI v7.13, you will be prompted to install the SubC Inspector application.
SubC Inspector installation prompt.  |
If you are upgrading DVR+O / SCI to a newer v7.13 version, it's a good idea to also reinstall SubC Inspector the be sure you have the latest version compatible with the version of DVR+O If you want to install SubC Inspector on the same system as DVR+O, click Yes If you want to install SubC Inspector on another system (other than the system on which DVR+O / SCI is installed). See SubC Inspector User Manual → Software Setup |
|---|---|
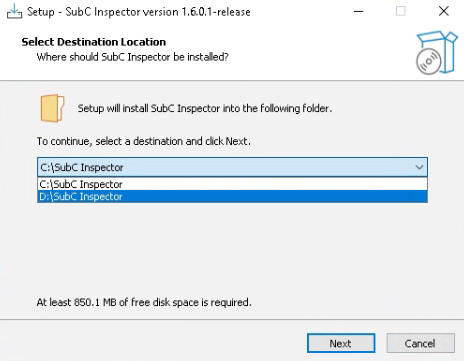 | Select Destination Location: Where should SubC Inspector be installed? Default location is: C:\Subc Inspector but you can select a drive other than the default C: drive. The application folder name “Subc Inspector” remains the same. |
 | Ready to Install: Click Install. Folder Exists: If SubC Inspector has been installed previously on this Drive, you will see this message: “The folder: C:\SubC Inspector already exists. Would you like to install to that folder anyway?” Click Yes 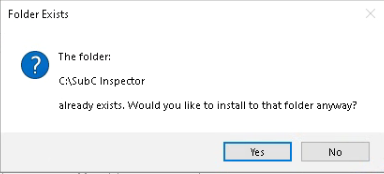 |
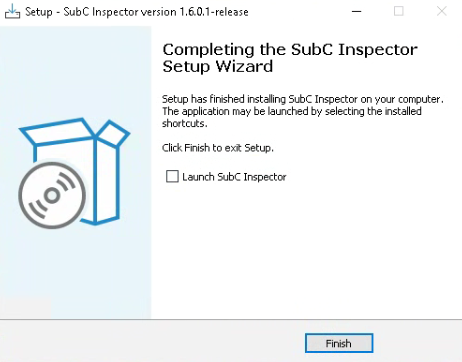 | You can unselect to skip Launch SubC Inspector for now. Click Finish. |
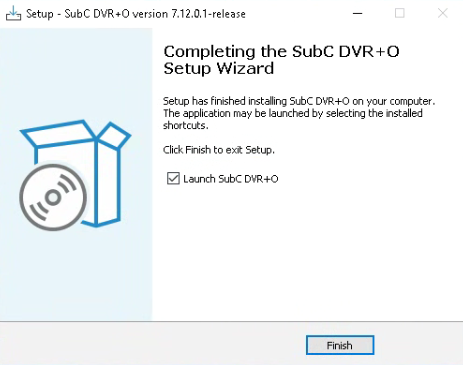  DVR+O / SCI v7.13 / Inspector | Select Launch to open SubC DVR+O / DVR+ and Click Finish The first time installing SubC DVR+O / SCI on your system a License will need to be in place before the application can open. If you have a physical USB Dongle License, plug it into the computer before launch / opening the SubC application. If you chose to use a Virtual License, unselect Launch and click Finish. Next, see SubC License Request & Update and contact SubC Support to Request & Import the Virtual License. Once the Virtual License is imported, you can then launch SubC application from the shortcut icon on the Windows Desktop. Desktop Icons: The SubC application shortcut icons will appear on the Windows Desktop.
|