What's New in Stream v4.2
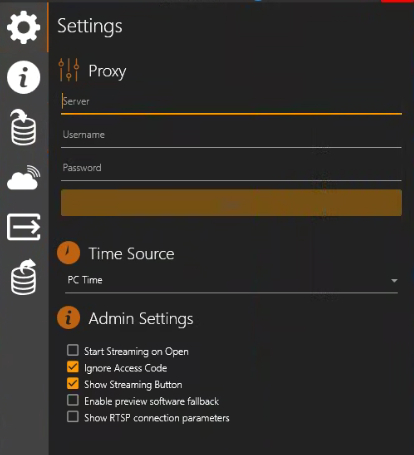
Menu → Settings
Proxy - If you have a proxy server on your network enter the connection credentials.
Time Source - The date and time that appears in all files produced by the Stream can now be sourced either from the PC time or from an incoming Data Input.
Admin Settings - Turn settings on/off as you prefer:
Start Streaming on Open
Ignore Access Code [Presentation Access Code]
Show Streaming Button
Enable preview software fallback [If the Stream Channel Preview & Main view video is not visible when accessing the Stream host PC via remote desktop, you can turn the Enable preview software fallback toggle on and then be able to see the Preview & Main video.].
Show RTSP connection parameters
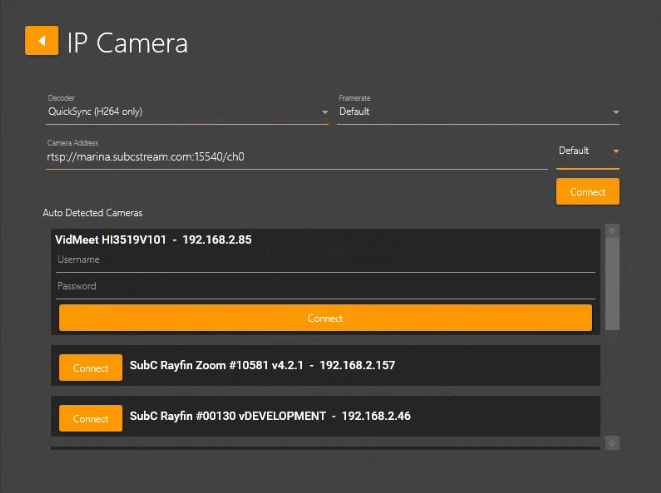
Inputs → IP Camera
Decoder - A new Decoder drop-down selection field has been added to the IP Camera Input Type
Framerate - Select your framerate preference from range [ 60 | 59.94 | 50 | 30 | 29.97 | 25 ]
Auto Detected Cameras - If you have IP cameras connected on your network (using ONVIF protocol) Stream will detect and display them for easy selection.
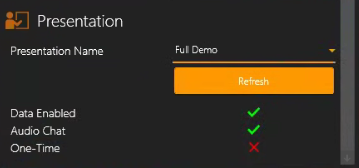
Menu → Streaming → Presentation
We’ve added the ability to select a Presentation Name to apply to a Channel from a dropdown list.
Subscription to SubC Streaming Services is required and you must login to your account.
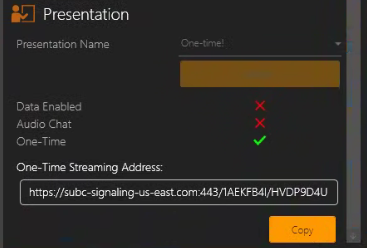

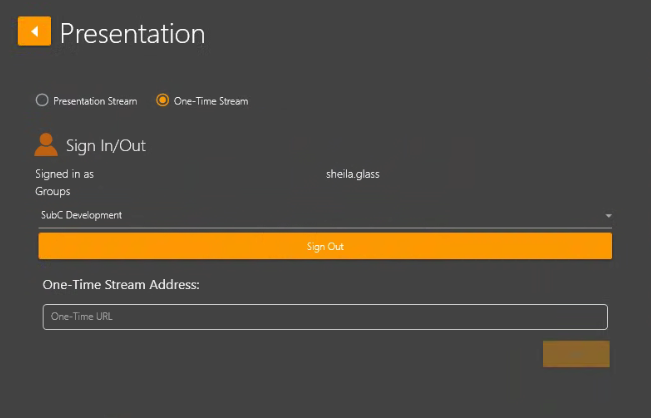
Inputs → Presentations → One-Time Stream
A One-Time Stream is a new convenient way to quickly stream & share a video.
Presentation → Presentation Name: Select a Channel and then your One-Time Presentation (Example name One-time!) from the Presentation Name drop-down field.
Start Streaming the Channel(s)
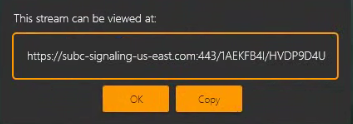
A link to connect to this One-time Stream will appear. Copy this URL and share it with those you want to view the One-time Stream, then click OK.
You can also take a One-Time Stream as Channel Input by selecting Input Presentation & One-Time Stream and paste the One-Time stream URL in the One-Time Stream Address field.
To create a new “One-Time Stream” Presentation, open SubC Streaming Service Web application Menu → Presentations and click the green “+” circle
See → Operation
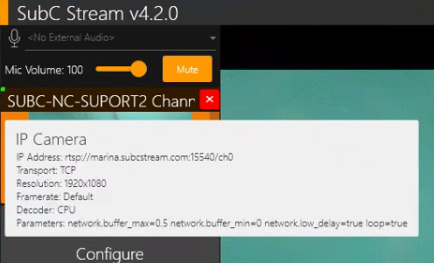
Channel tooltip (info tab)
Hold the mouse cursor over the Channel Preview window to shows the Channel configuration details, including the incoming video source Resolution.
See → Operation
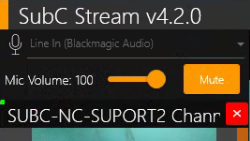
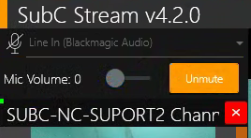
We’ve made the Microphone active/ inactive status more obvious.
When the Mic is active, the Mic Volume slider is active, and the Mute button is available.
When the Mic is muted, the Mic Volume slider is inactive, and the microphone Unmute button is available.
Data Input → UDP Broadcast
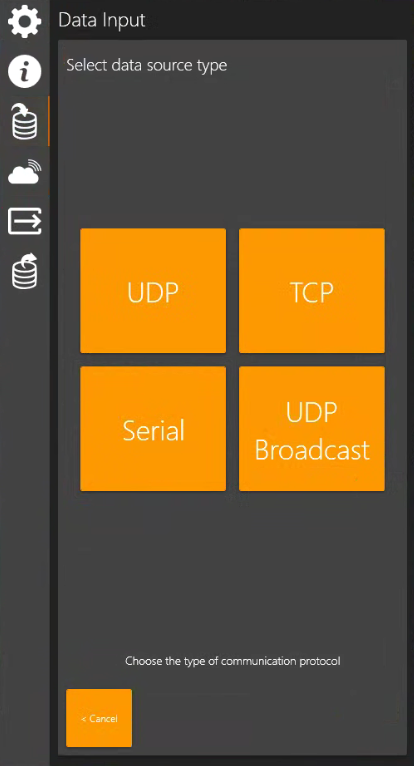
Menu → Data Input
Select UDP Broadcast to connect to data being broadcast over your network by specifying Port only. (This is different from regular Data Input → UDP, where you must supply both the Data Source system IP address and Port)