
1. Mounting Rayfin Stereo System on ROV:
Torque Requirements:
|
Stainless Steel Fasteners Torque |
|
|---|---|
|
Fastener |
Max Torque |
|
1/4”-20 Stainless Steel Fasteners |
8 N.m / 5 lbf.ft |
|
#10 Stainless Steel Fasteners |
4 N.m / 3 lbf.ft |
A. Rayfin Stereo System Mounting on ROV:
Fastener & Hardware List
|
|
|
Item |
Description |
|
1 |
ROV Base Plate |
|
2 |
1/4”-20, 1” Long Stainless Steel screw |
|
3 |
316 Stainless Steel Washer |
|
4 |
PVC Washer |
|
5 |
1/4”-20 Hex Lock Nut |
|
6 |
Rayfin Stereo System Assembly |
Instructions:
a. Using the ROV Stereo System mounting-hole layout, drill 4x 1/4” clearance holes in the ROV base plate. A 17/64” (6.8mm) drill bit provides the best fit. b. Place Rayfin Stereo System assembly (6) on the drilled ROV base plate (1). c. On the Rayfin Stereo base plate, add PVC washer (4) and stainless washer (3) as shown in Image B. d. Insert 1/4”-20 x 1” stainless screw (2) through the washers; then place PVC washer (4) and stainless washer (3) beneath the base plate per Image B. e. Fit 1/4”-20 hex lock nut (5) and tighten securely. Repeat for all screws until the Stereo System is fully fastened. f. Final assembly should match Image C. Ensure the hex nuts protruding at the bottom of the Rayfin Stereo System Assembly do not touch any component or floor to ensure proper vibration isolation. |
B. LED Mounting on ROV:
Fastener & Hardware List
|
|
|
Item |
Description |
|
1 |
1/4”-20, 1-3/4” Long Stainless Steel Screw |
|
2 |
Stainless Steel Washer |
|
3 |
PVC Washer |
|
4 |
1/4”-20 Hex Lock Nut |
|
5 |
1/4”-20, 1-5/8” Long Stainless Steel Screw |
|
6 |
Stainless Steel Lock Washer |
|
7 |
1/4”-20 Hex Nut |
|
8 |
Stainless Steel Hose Clamp |
|
9 |
Delrin Aquorea Base Mount |
|
10 |
Delrin ROV Aquorea LED Mount |
Instructions:
A. Installing ROV Aquorea LED Mount:
a. Using the Aquorea LED Mounting Template, confirm your ROV material can be drilled and make holes with a 1/4” bit. A 17/64” (6.8mm) drill bit provides the best fit. b. Position the ROV Aquorea LED Mount (10) as shown in Image A. Ensure the large radial slot is oriented correctly. Reversing it flips the LED pivot angle. c. Place the stainless steel washer (3) at all six locations in Image A. d. Place Stainless Steel Washer (2) and insert 1/4”-20 x 1-3/4” Stainless Steel screw (1). e. Opposite side: fit PVC Washer (3), Stainless Steel Washer (2), then 1/4”-20 Hex Lock Nut (4). f. Tighten all screws securely and repeat for both LED mounts. g. Assembly should match Image B. a. Place Aquorea Base Mount (9) under ROV Aquorea LED Mount (10) as in Image B. B. Installing Aquorea Base Mount:
b. Place Stainless Steel Lock Washer (6) and insert 1/4”-20 x 1-5/8” Stainless Steel screw (5). c. Opposite side: add Stainless Steel Lock Washer (6) and 1/4”-20 Hex Nut (7). d. Tighten securely and repeat for both base mounts. C. Installing Aquorea LED:
a. Thread Stainless Steel Hose Clamp (8) through Base Mount (9) slot and tighten until the Aquorea LED is secure. b. Repeat on the other side. |
LED Angle Adjustment:
|
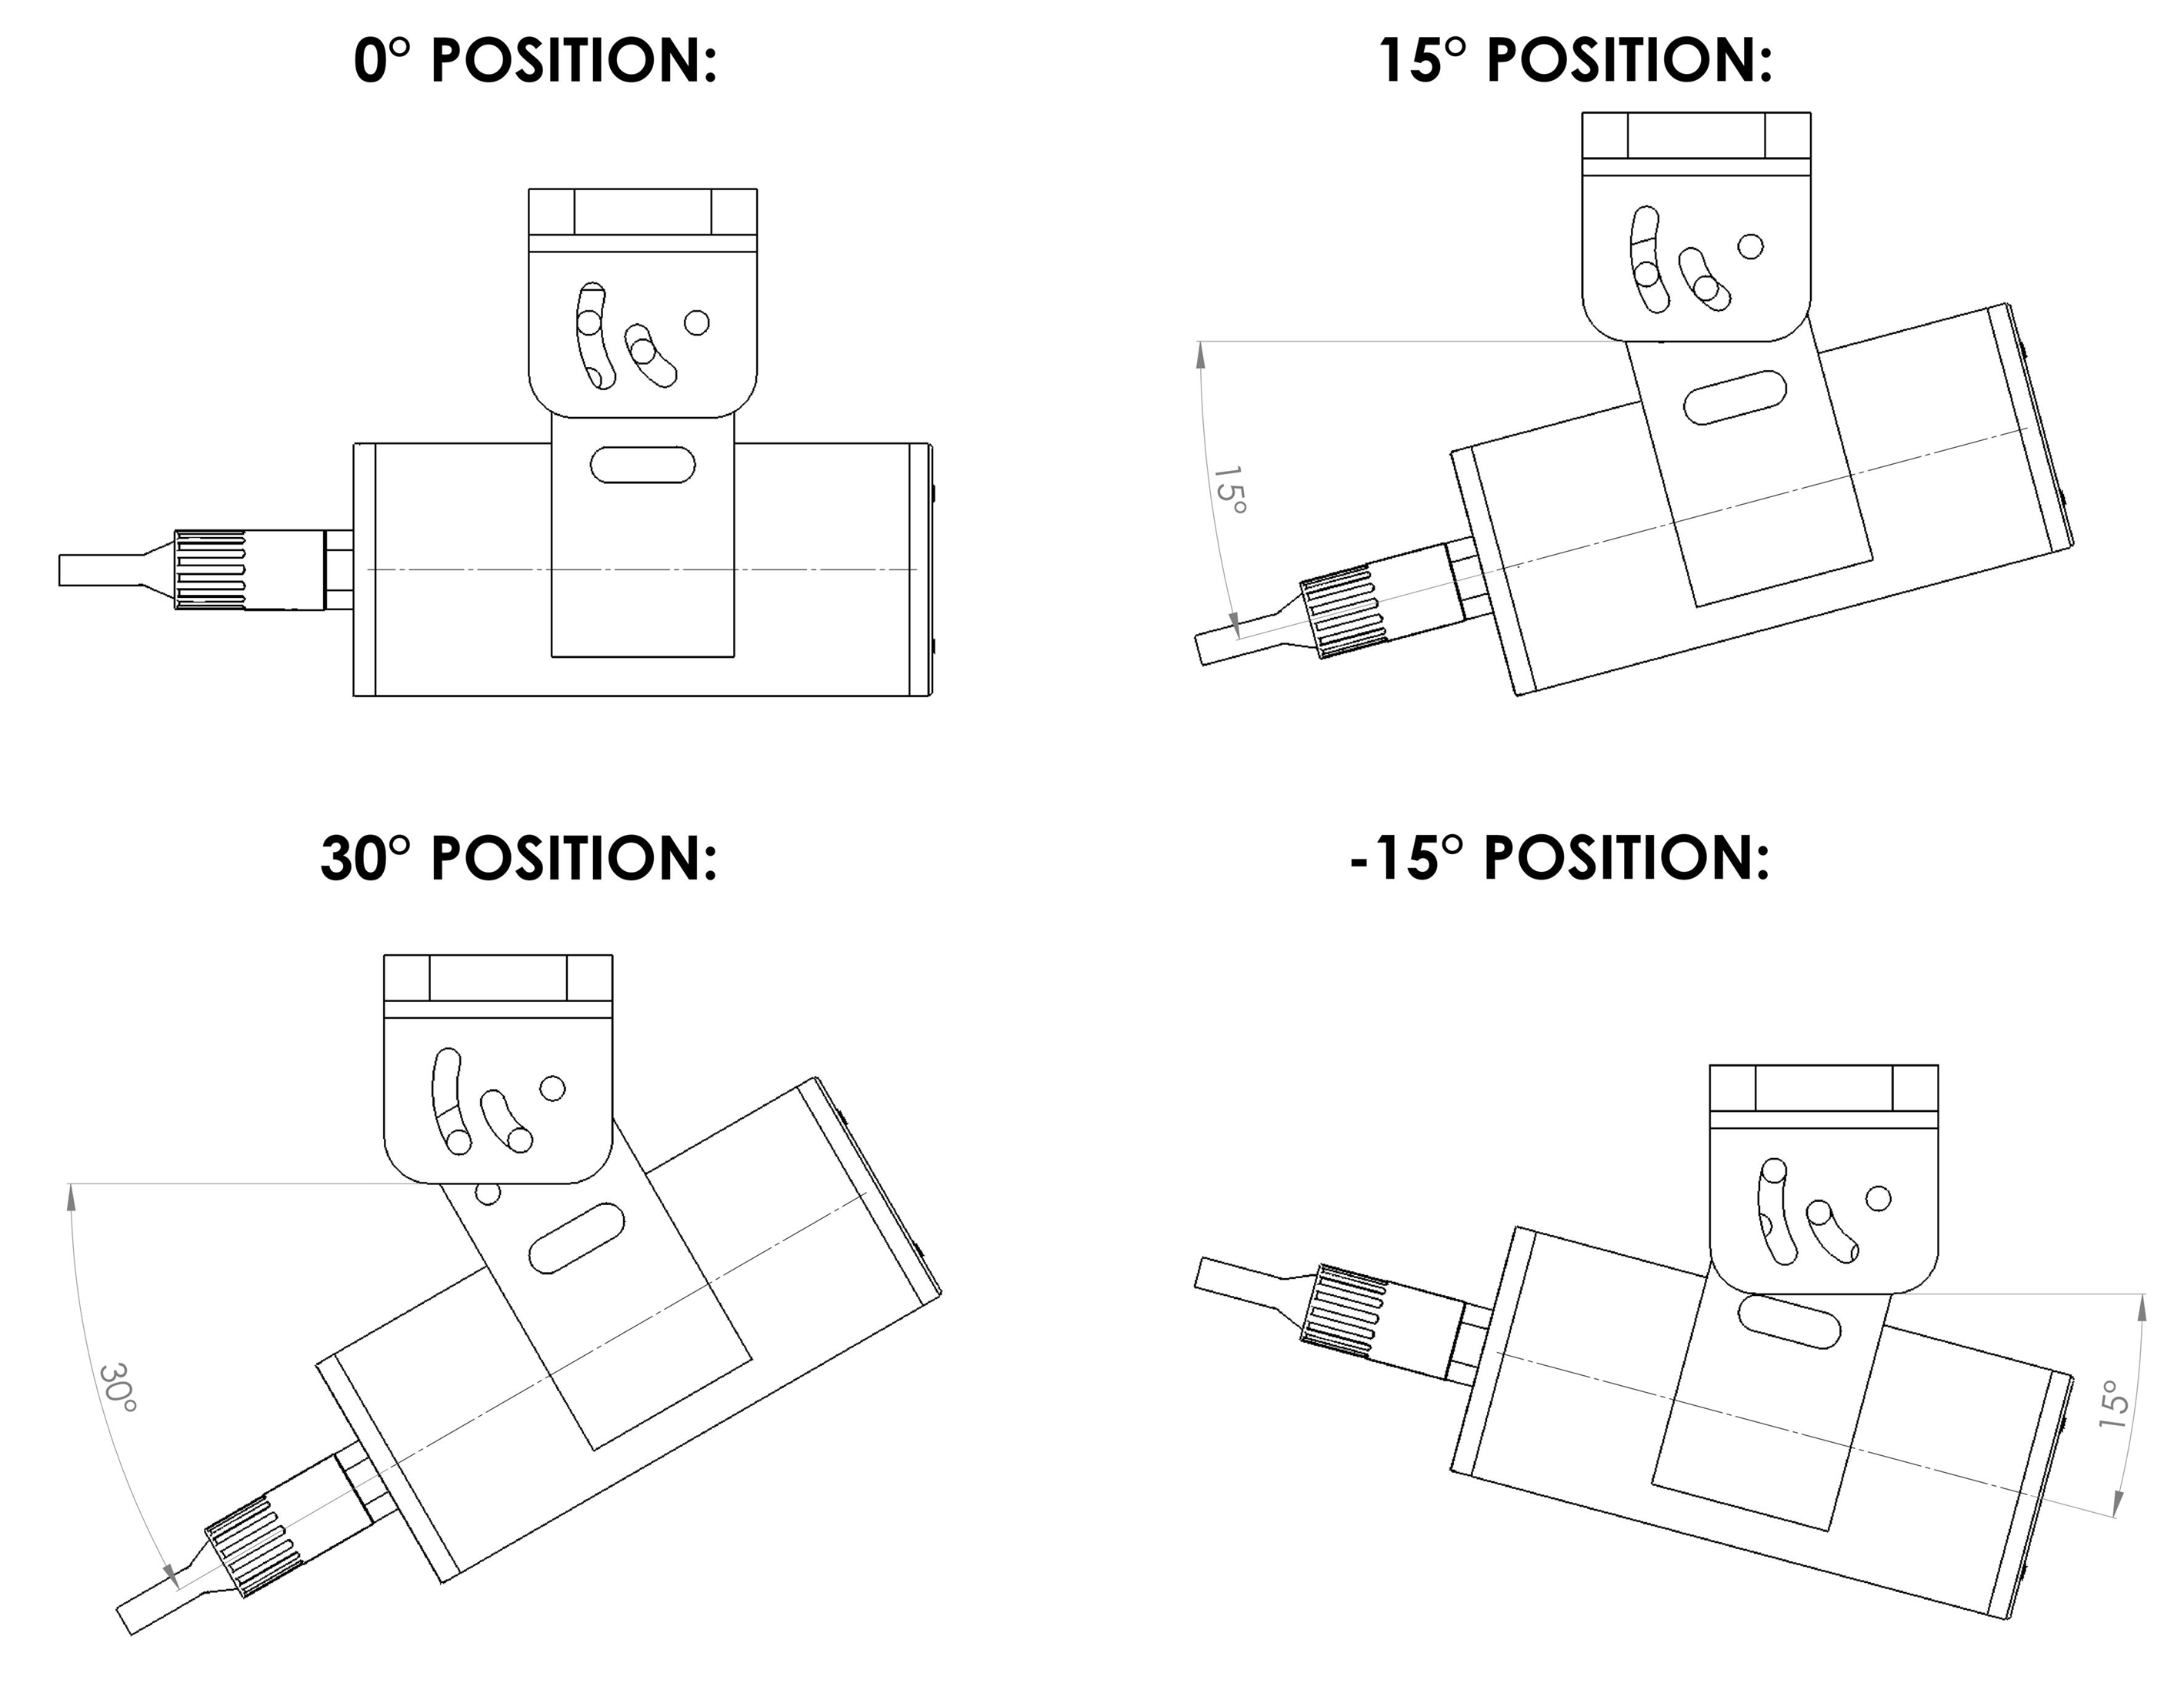
|
Instructions:
a. See Image B in 1.B. LED Mounting on ROV. Loosen the fasteners so the Aquorea Base Mount (9) can move freely. b. Set the LED angle as shown in the image. c. When positioned, fully tighten the screws on the Aquorea Base Mount (9) in the correct order. |